The Only DIY Skeleton Mirror Guide You’ll Need
Halloween fans, DIY lovers, and skeleton decor enthusiasts, you’ve officially found the right place. This is the DIY Skeleton Mirror guide that started it all. I’ve been perfecting this project since 2019 with not one, not two, but three hauntingly stunning versions, each one bigger, bolder, and better than the last. One of them was a highly requested tutorial. This is where the inspiration began, and this is where it continues to live in its most creative form. If your beautiful eyes refuse to settle for anything basic, and you’re ready to craft a show-stopping piece that is everything but ordinary, then you’re in the right place. Let’s make magic, bones, and mirrors collide!
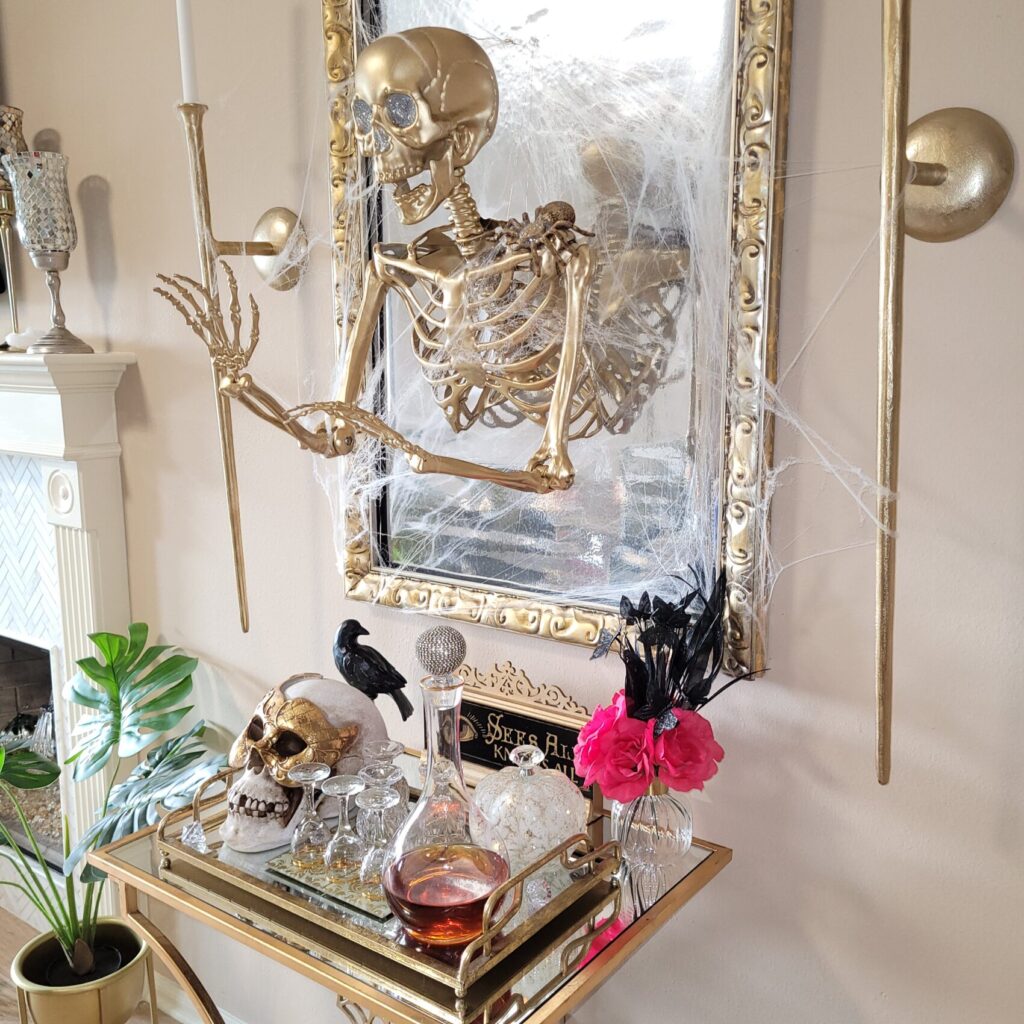
This DIY Skeleton Mirror – Haunted 3D Skeleton Coming Out Of The Mirror is one of the most easiest and fun Halloween DIY projects! I’m so excited to share with yall, my DIY Haunted Gold Skeleton Wall Mirror for Halloween using my existing Any-Theme Frame (aka, an old intricate frame that can be used for all seasons and holiday decor). You can go with a haunted glam appeal or just straight up gory. This project is versatile and more importantly INEXPENSIVE. Scroll down for my step by step tutorial on How to DIY Your Own Haunted Gold Skeleton Wall Mirror as well as get inspiration for several other DIY Skeleton Mirror and similar ideas just in time for Halloween!
This site contains affiliate links at no additional cost to you, view the Privacy Policy for more information.
I was inspired by Crystal’s Skeleton Frame at Surviving on a Teacher’s Salary Also, by Grandin Road’s Sorceress Skull Framed Mirror. Both versions below are both Glam and Spooky, which is what I am also aiming for. Grandin’s is sold out anyway, and also rather pricey for the size and purpose. While Grandin’s Sorceress Skull Mirror runs $499, my Haunted Gold Skeleton Wall Mirror is less than $48 because I have most of these items on hand already. Still, I listed what these items would cost today below.
Why Do Your Own DIY Haunted Skeleton Wall Art
Hey yall! Glad you stopped by.
Doing your own DIY Haunted Skeleton Wall Mirror can save you HUNDREDS of Dollars! The Grand Road and Christian Siriano above both cost over $200, so that’s enough reason for me! Also, imagine the thrill of transforming a simple wall into a spine-chilling centerpiece with a DIY 3D Haunted Skeleton Wall Art or Mirror! This project is not just about adding a spooky touch to your Halloween decor—it’s about creating an experience. As you piece together the eerie elements, you’ll find yourself immersed in the fun of crafting something unique and memorable. Plus, it’s a fantastic way to get into the Halloween spirit with friends or family. You’ll end up with a hauntingly beautiful creation that not only looks amazing but also tells the story of your creativity and Halloween excitement!
Shopping For A Posable Skeleton For Halloween
Here are some tips for finding the perfect posable, full size skeleton that fits both your creative vision and budget:
- Look for Flexibility: Make sure the skeleton is truly posable! This will give you the freedom to craft all sorts of fun and eerie poses, making your Halloween decor even more dynamic and eye-catching.
- Consider Durability: While staying on budget is key, opt for a skeleton that’s sturdy enough to last through the season (and maybe even for years to come!). Durable materials ensure your creation can be enjoyed for many Halloweens.
- Check Out Thrift Stores: You’d be surprised at the spooky treasures you can find in discount stores! Keep an eye out for sales or clearance items—you might score a great deal on a life-sized skeleton that’s perfect for your project. I’ve already seen quite a few for sale on Mercari, Poshmark, Facebook Marketplace and it’s barely September.
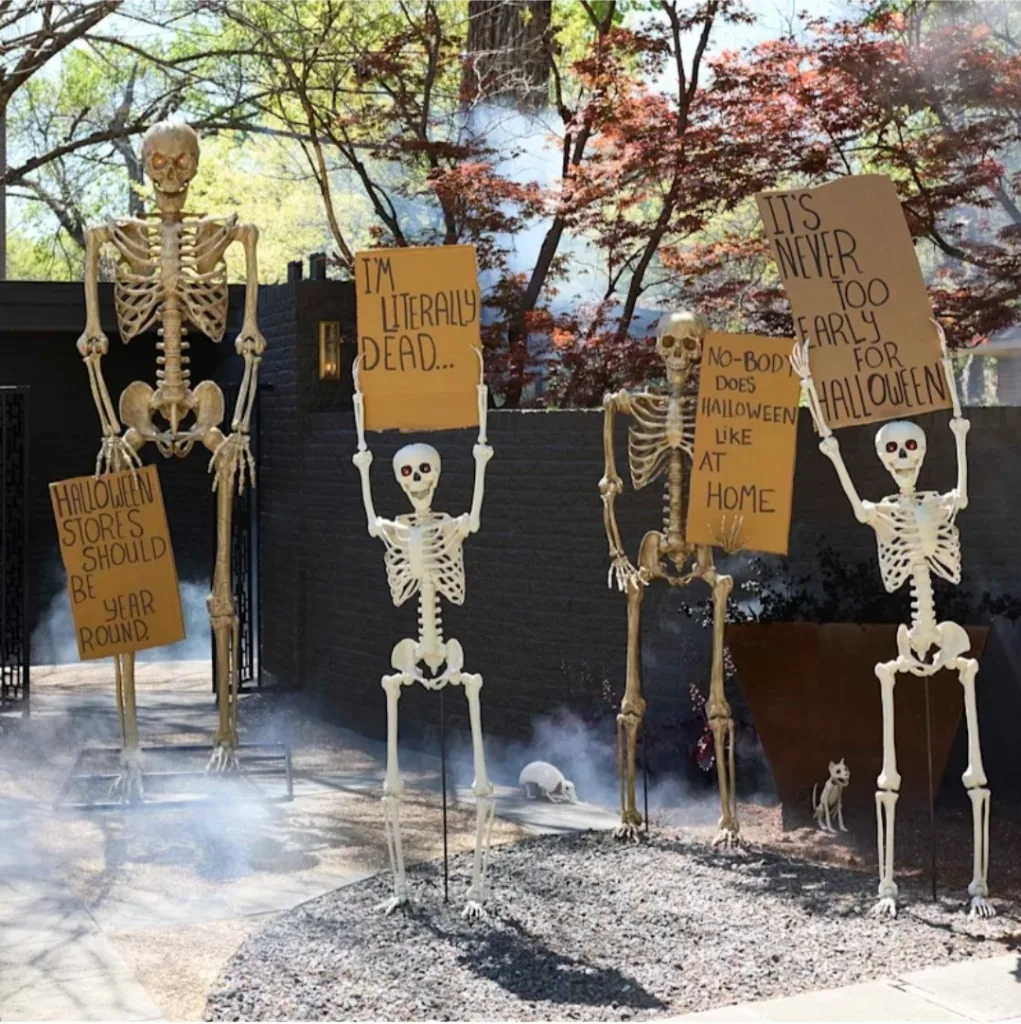
Just FYI, because posable life size Skeleton’s sell out quick. I suggest checking these places as early in the season as possible: Amazon, Walmart, Halloween stores, Party City Stores (All Party City Stores closed now), Michaels, At Home, Home Depot and FaceBook Marketplace. My skeleton is 5 Ft tall from Walmart for $28 and I plan to paint the entire body gold. Many of the stores are now selling skeletons in various colors including, gold, pink and black. Amazon has a large inventory or posable skeletons starting in August so shop early online!
The best time to shop for posable Halloween skeletons for the best price at your local stores, is actually after Halloween season. You’ll find them on clearance for up to 80% off. So I purchased 1 for $28 at Walmart pre-Halloween, and two more on clearance at Target and the At Home store for less than $20, however after Halloween season.
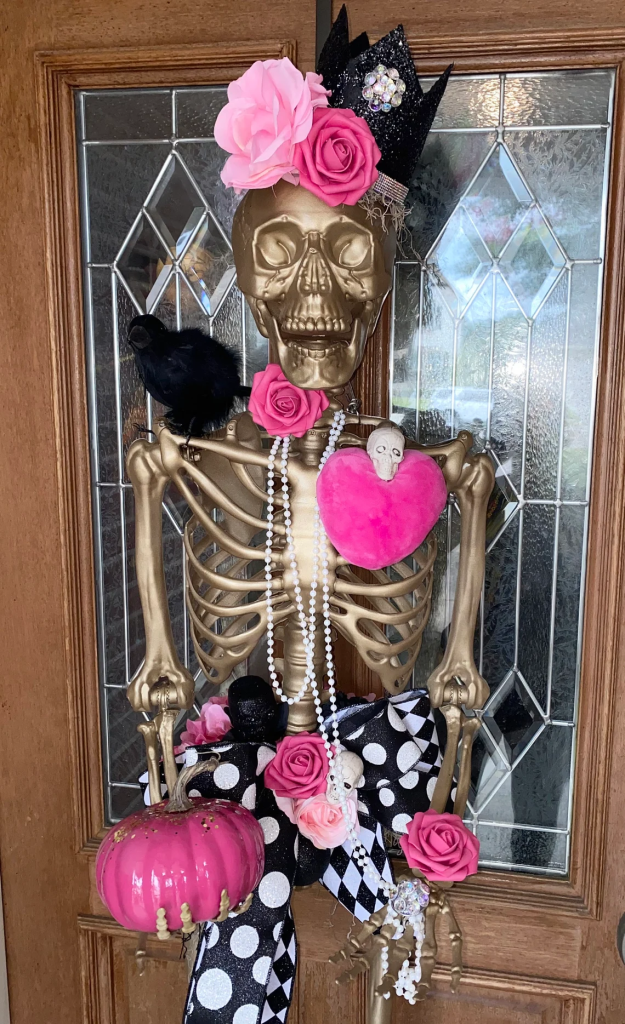
This bougie 3D gold skeleton by LB is super cute and one of a kind. She sells them made to order on Etsy, but you can also create the same look or in your own style with your new skeleton while using the same tips on this post.
What is a “Any-Theme Frame” Exactly?
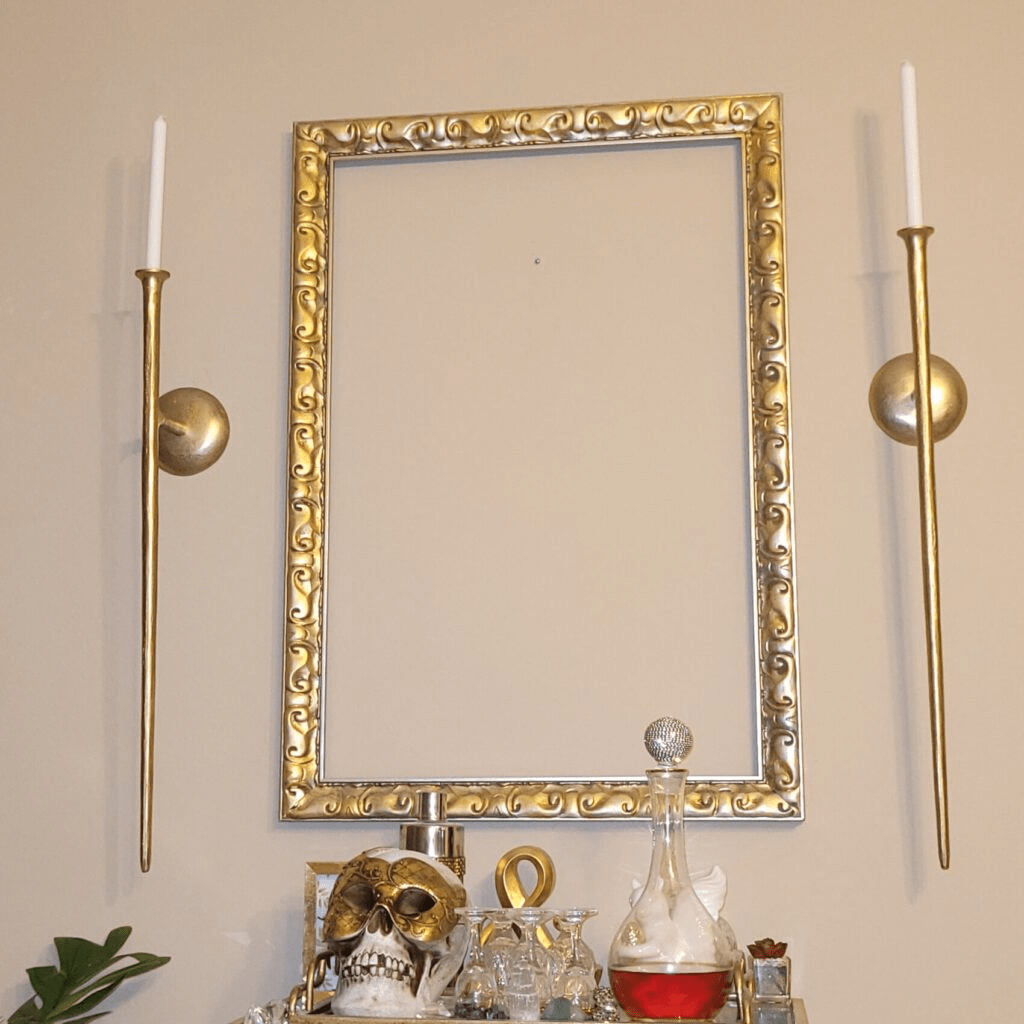
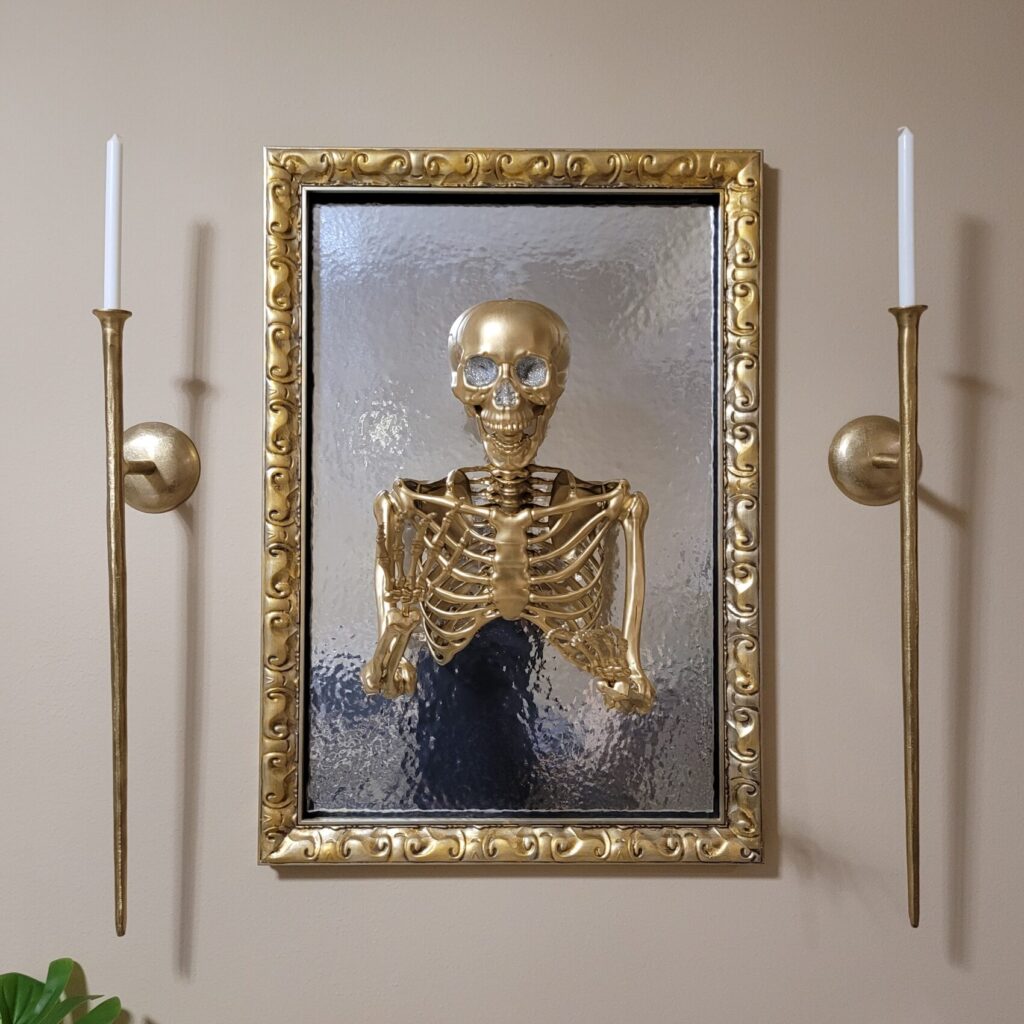
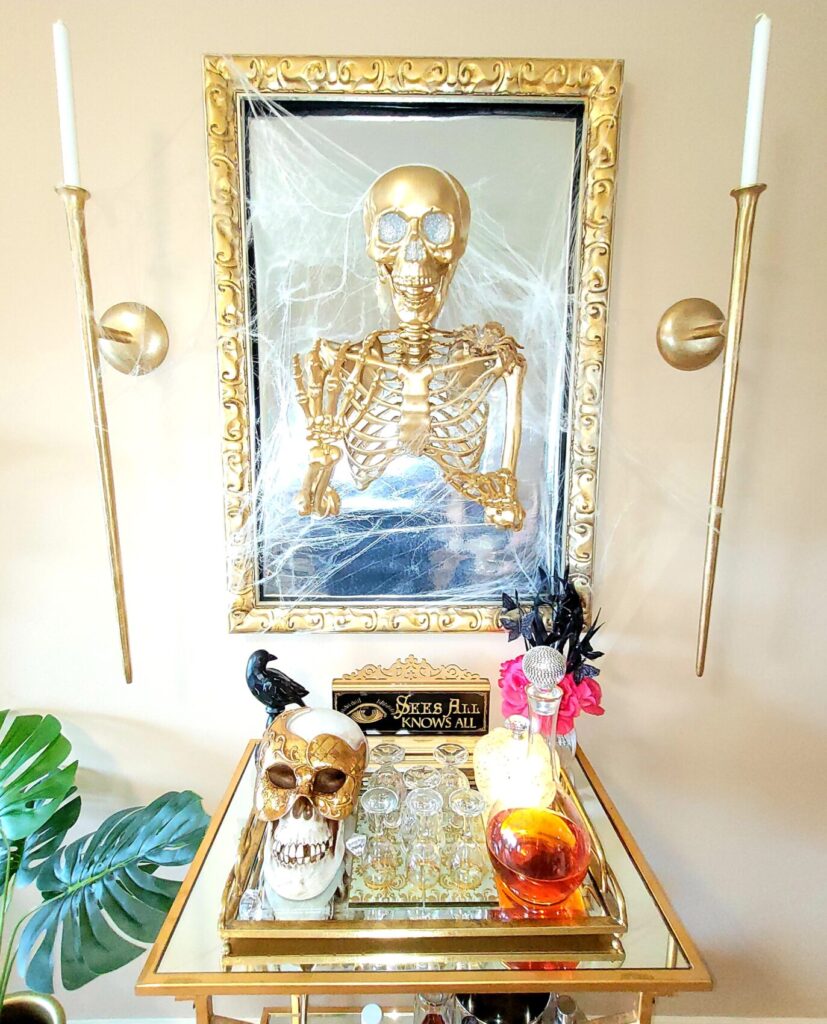
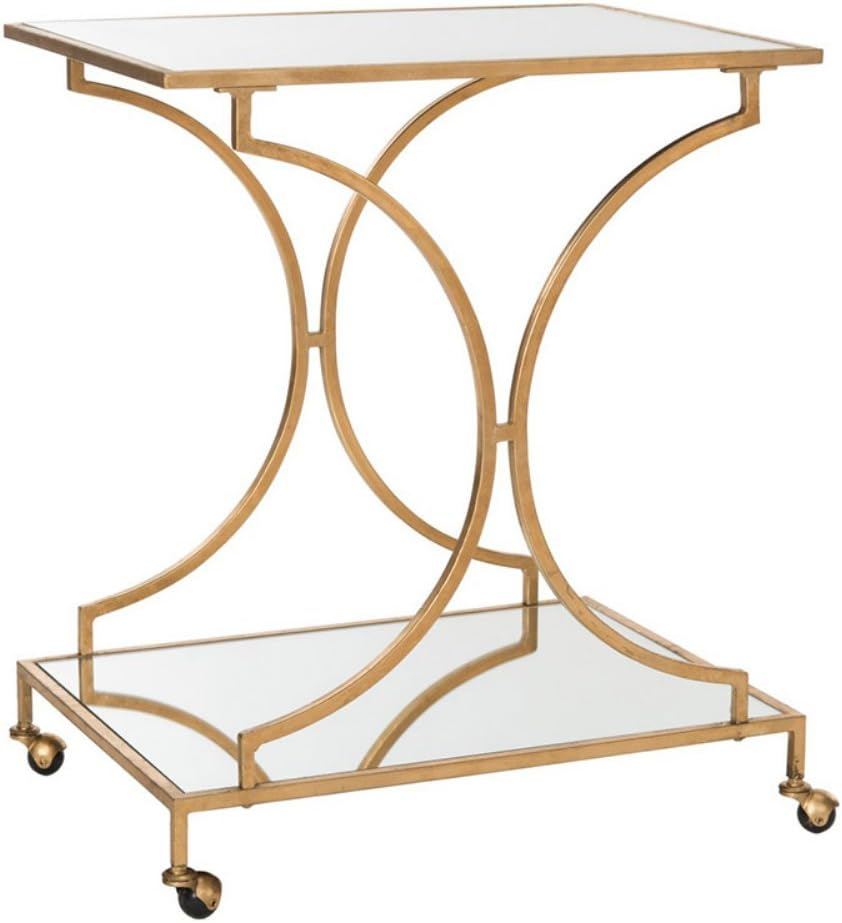
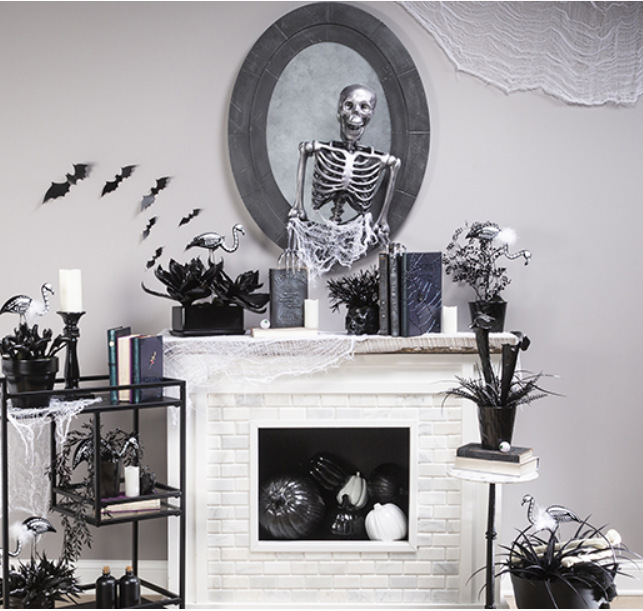
So, if you’ve been following my DIY and Home Decor journey. You may know that I have what I’ve coined as my “Any-Theme Frame” (or ATF) in 2018 placed right above my living room Gold Bar Cart. I will decorate the center of it based on my home decor, theme, holiday, season or just my mood. It’s a large ornate frame. I purchased this frame on clearance for under $25 at Hobby Lobby. They have large frames on clearance all year around. Prior to my painting it, it was white, but I painted it champagne and added gold leaf. It’s 24 x 36 in measurements and lays bare on the wall above my gold bar cart.
Here is what my Any-Theme Frame looks like the majority of the year. This is what it looked like for Christmas. Now, hopefully you get the gist of how transitional my Any-Theme frame can be!
Get Started With Your Haunted Skeleton Halloween Frame
To get the look of this project, you’ll need:
- A empty frame with hardware to hang on the wall OR a mirrored frame (Paid $25) You could also DIY a custom frame using plywood for around $7
- Mirrored or Chrome Vinyl Decal (I paid $19 because this option is resusable, but there are much cheaper options)
- Your Ghost, Skeleton or Ghoul which will fit inside the frame. I went with a posable skeleton. (Paid $28) You can also check Party City.
- Wire or Plastic Thread ($6)
- Screws or Nails to hang frame and Skeleton ($2)
- Faux Spider Webbing (Paid $7)
- Optional Fine Glitter and Modge Podge for sparkly Skeleton eyes ($9 for both)
- Optional Rust-O-Leum Bright Coat Gold Spray Paint ($5 at Lowes)

Vision for My Haunted Halloween Skeleton Mirror
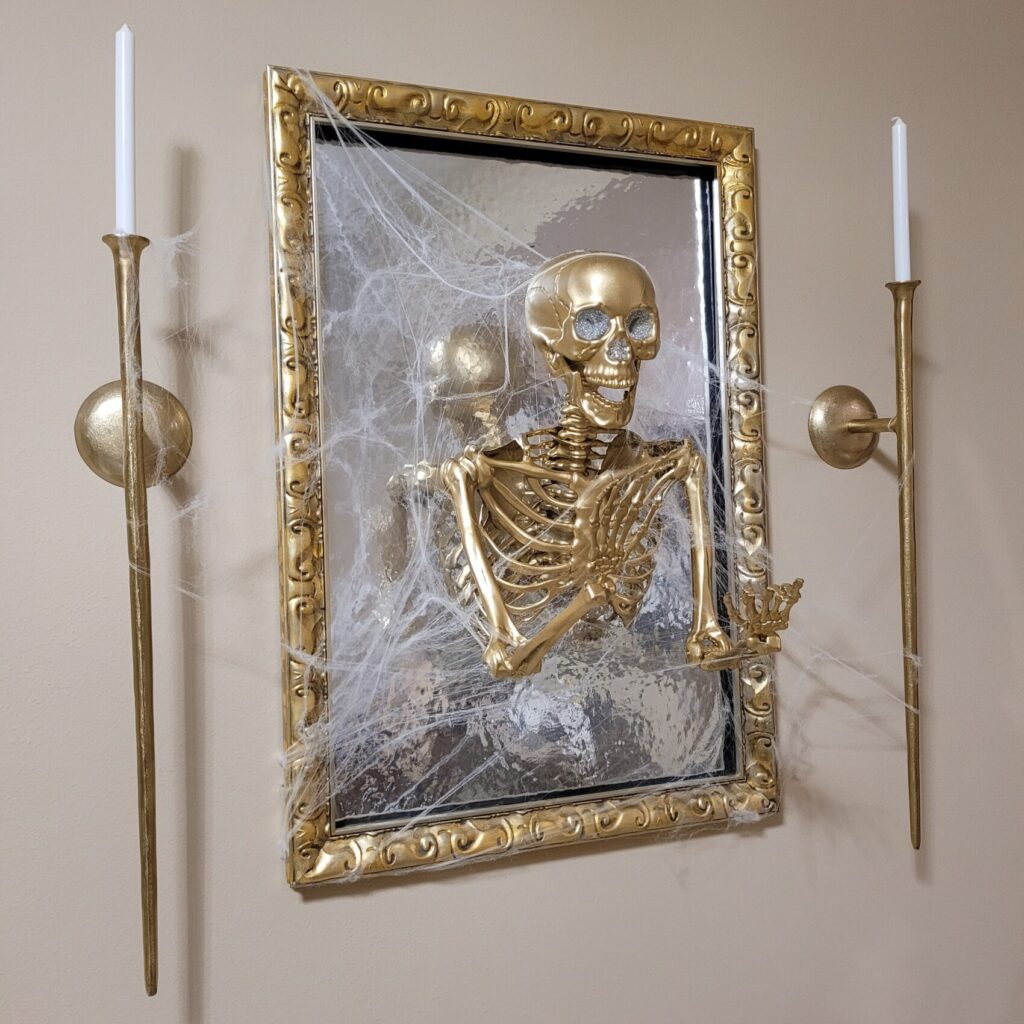
My vision this Halloween is to create the illusion of my skeleton to be emerging from the mirror ready to grab an innocent bystander. I could’ve had it appear as if it was coming from a photo or just the wall, however a mirror look will be the most glam choice of all to me. You could also leave out the mirror and frame and have it coming from just the wall.
DIY Skeleton Mirror Tutorial And Video
My skeleton actually has a screw at the top of his spine, so I’m able to easily easily remove just one screw to separate the skeleton into two parts. This is what it looked like once removing just 1 screw at spine and prior to painting. The screw location varies skeleton to skelton. I’ve even seen some that don’t have screws at all so it would have to be sawed in half.
Painting My Skeleton Gold
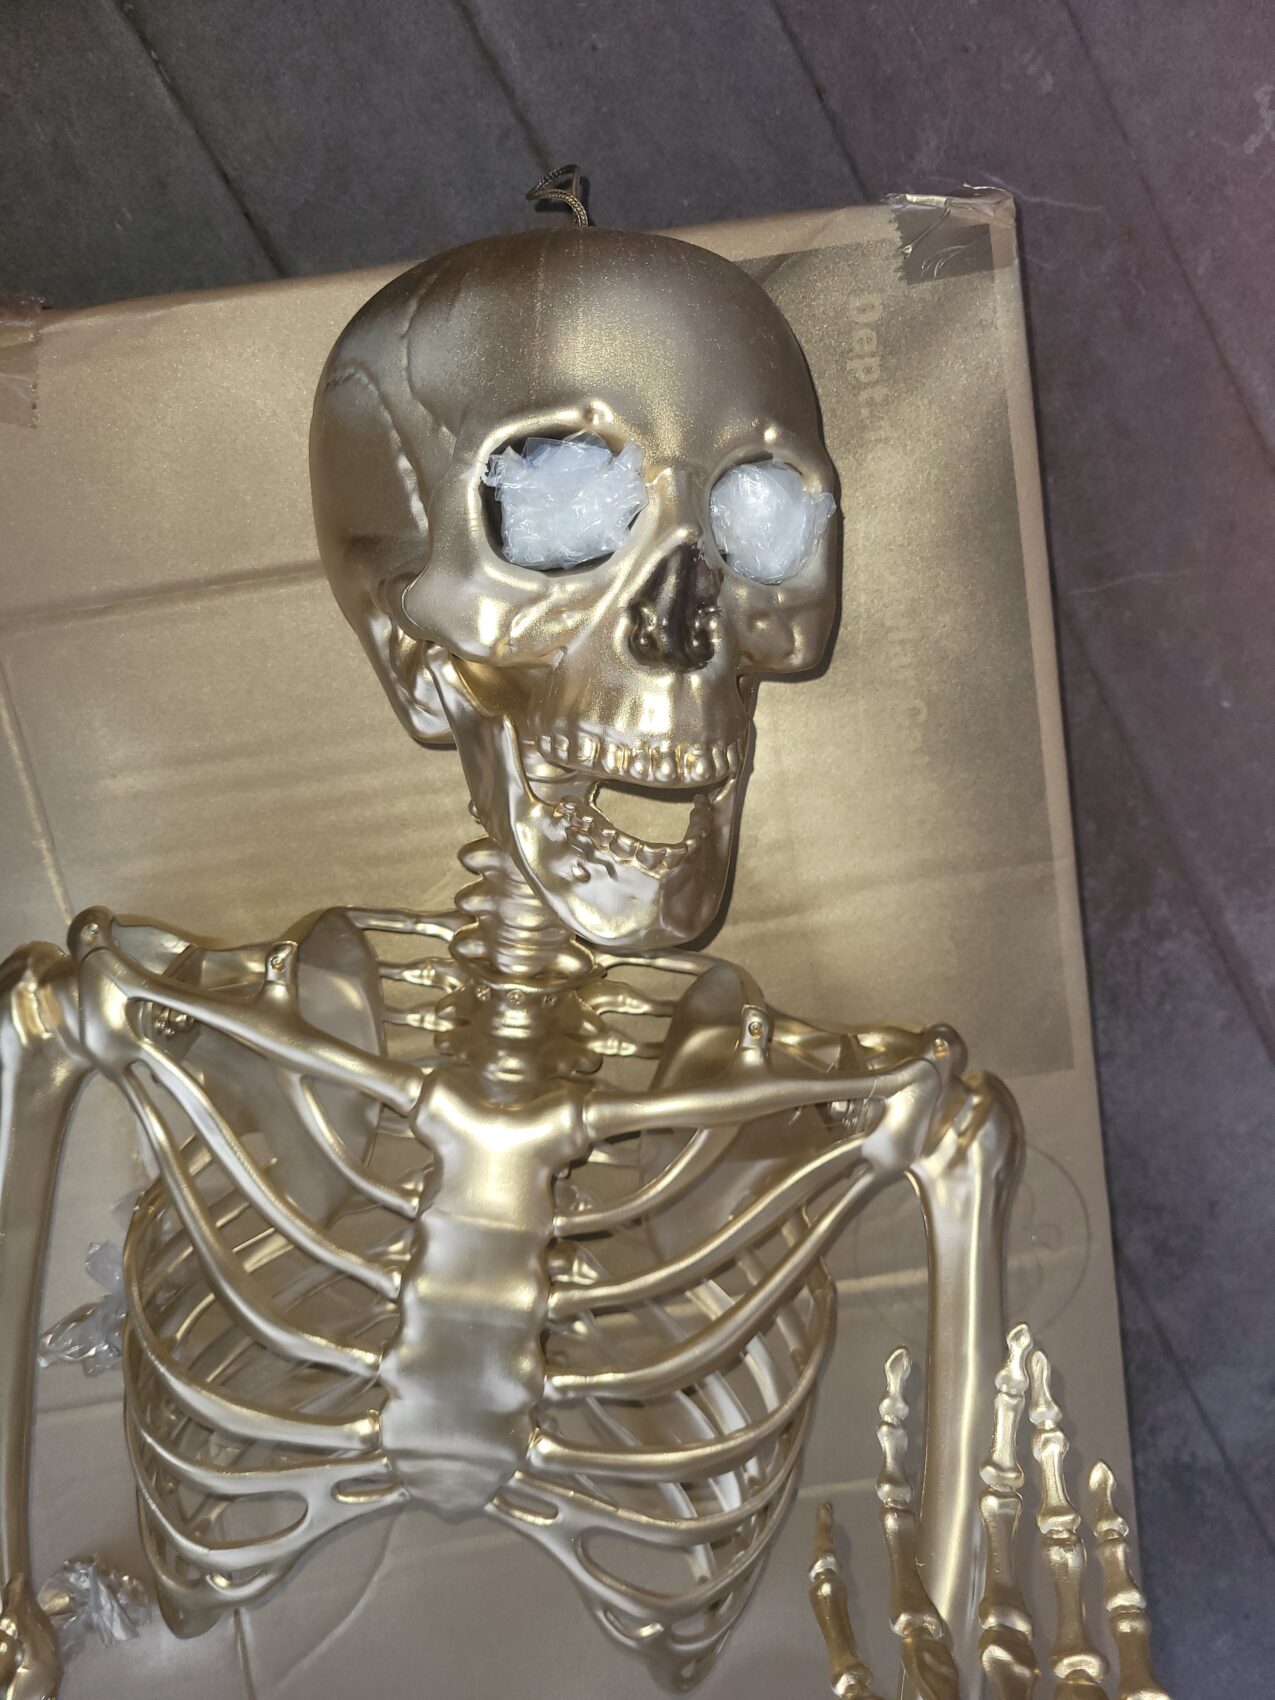
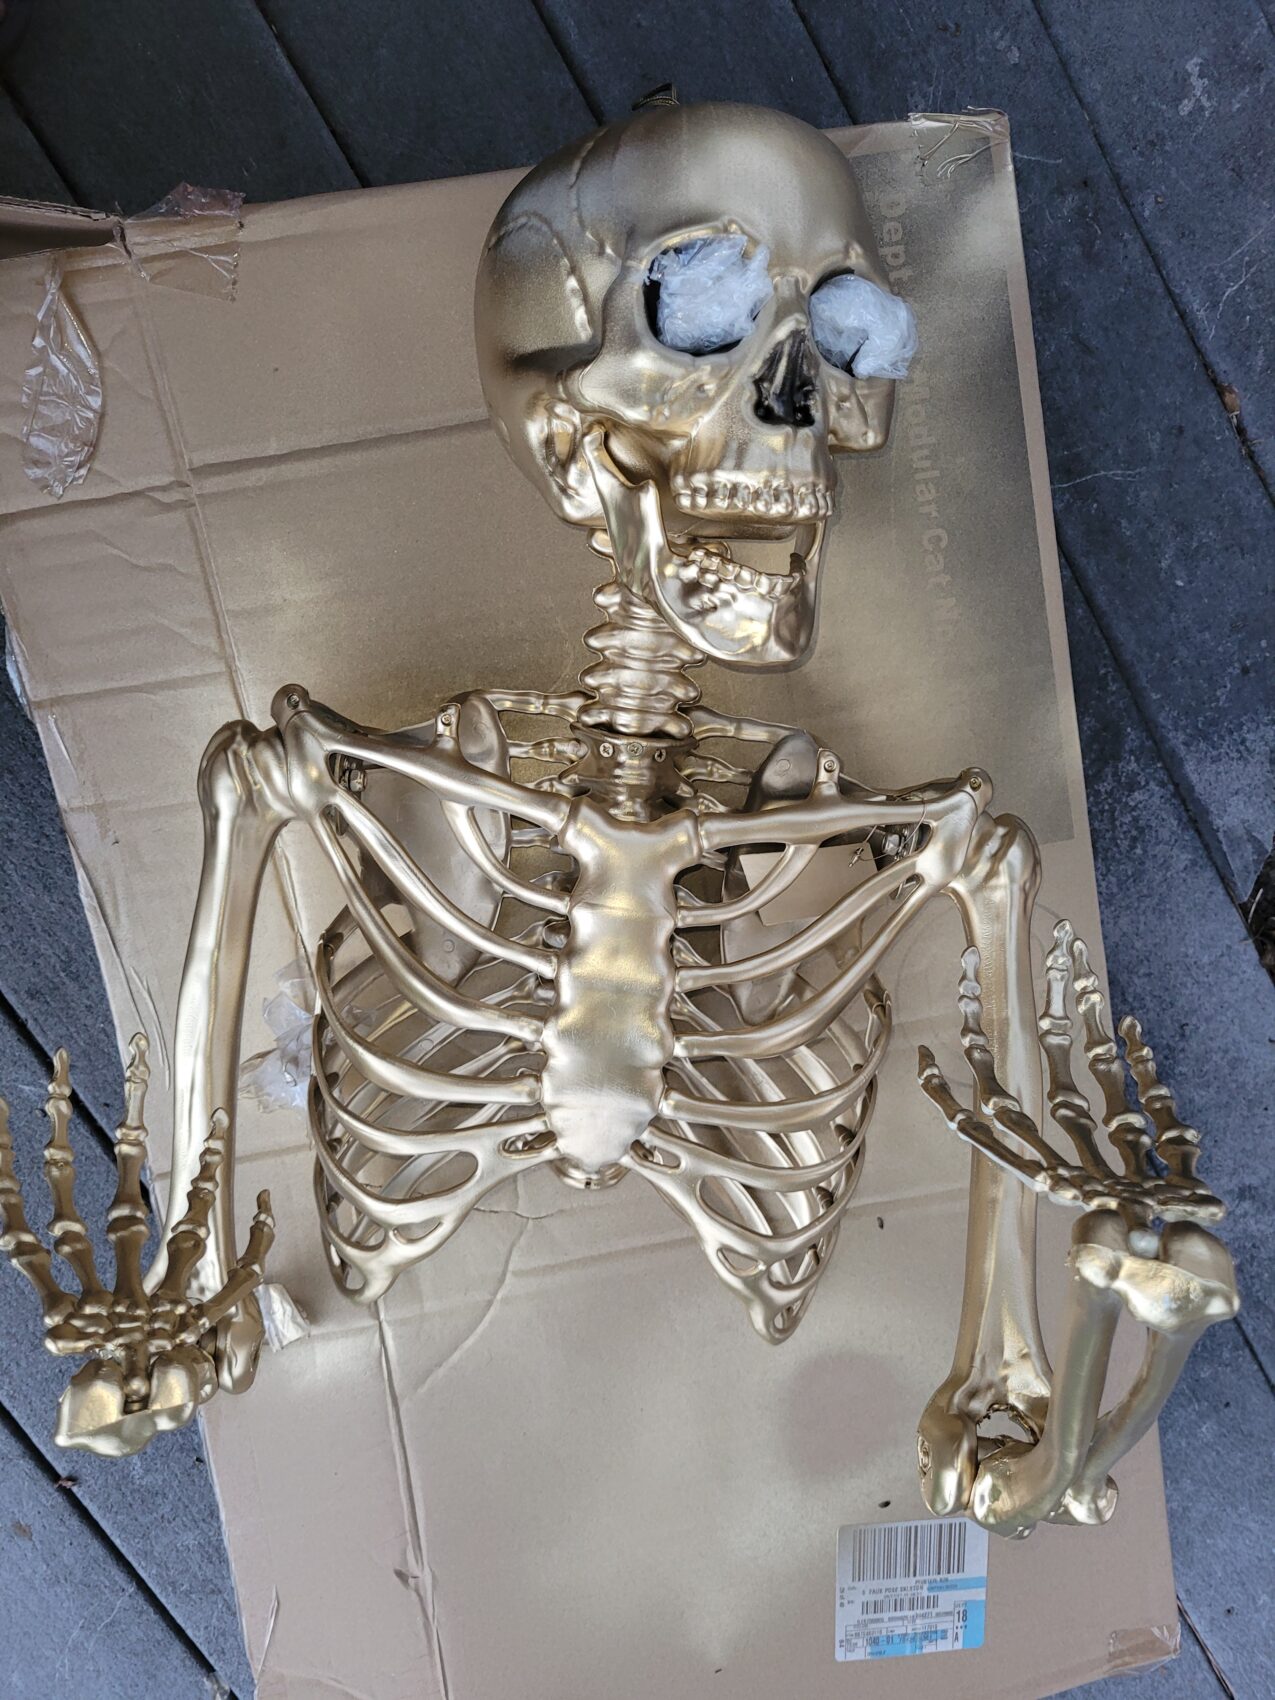
I want my skeleton to blend well with the theme of my home and bar cart, so I am going with metallic gold. The best metallic gold spray paint is hands-down Rust-Oleum Bright Gold. I stuffed the eyes with balled up scotched tape and plastic and covered the nose. This part really wasn’t necessary since I am going to bling out the eyes once dried.
1 can of Rust-Oleum Bright Gold spray paint is more than enough for two coats while making sure the every inch has an even coat. First, I need to find some cardboard to protect the space and spray my skeleton one side at a time. I’ll allow one side to dry for an hour and then repeat with the other side.
My Painted Gold Skeleton Results
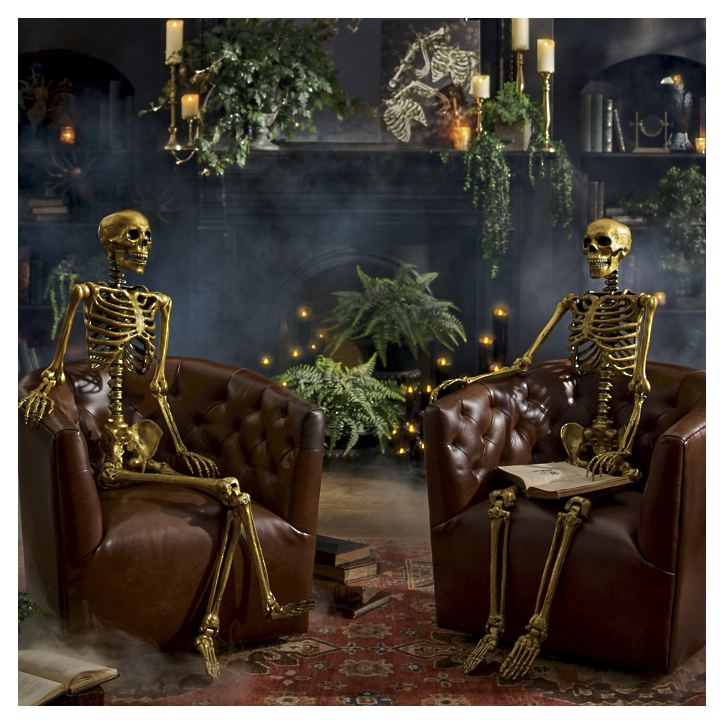
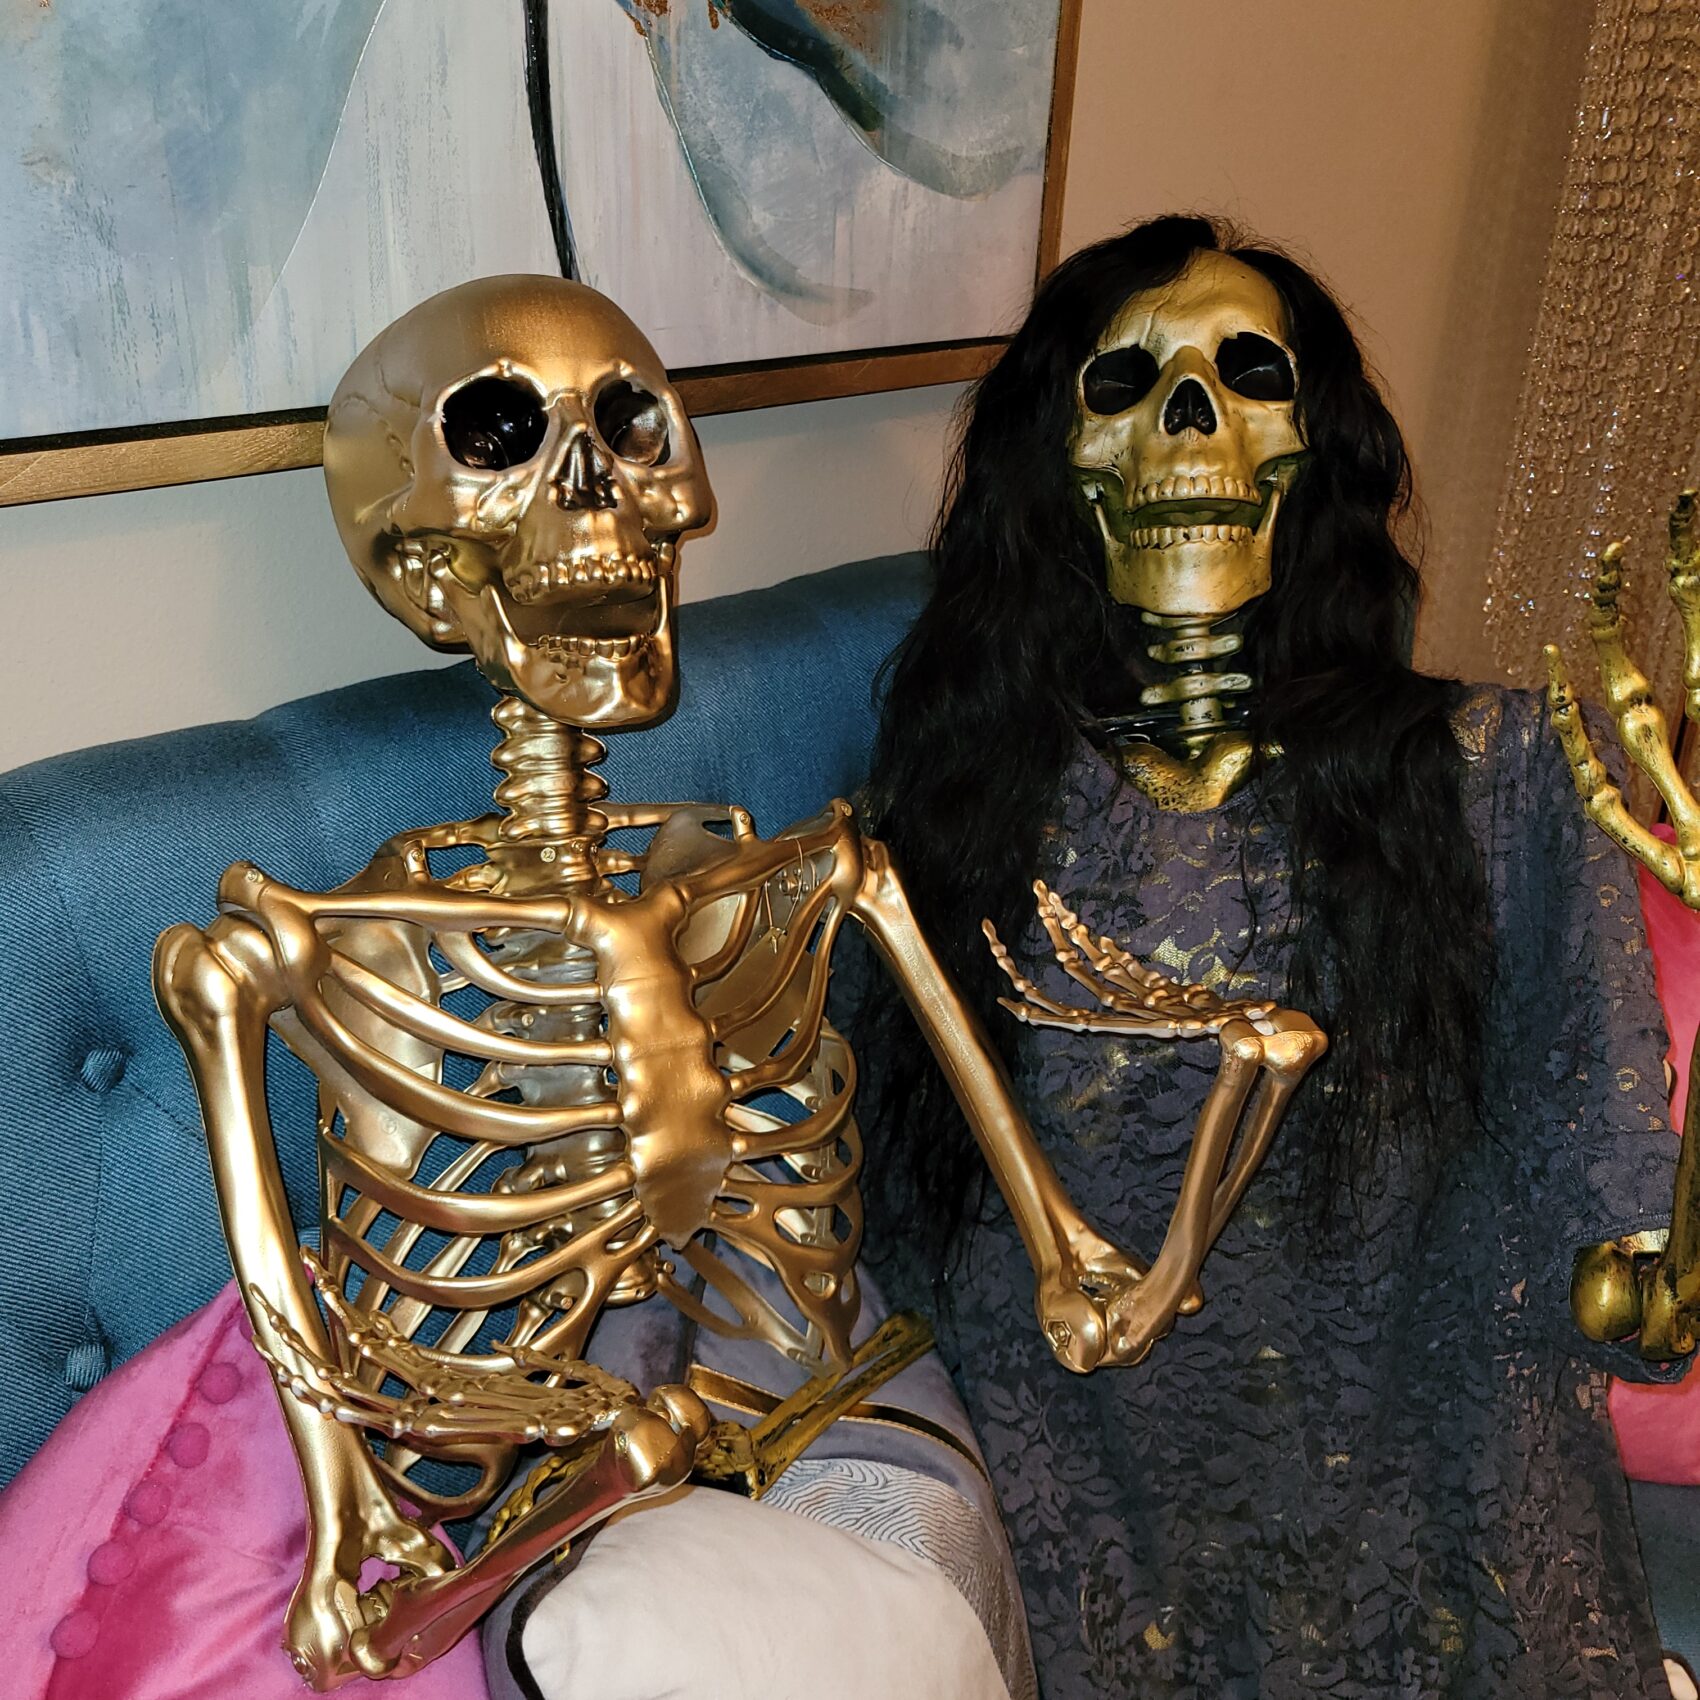
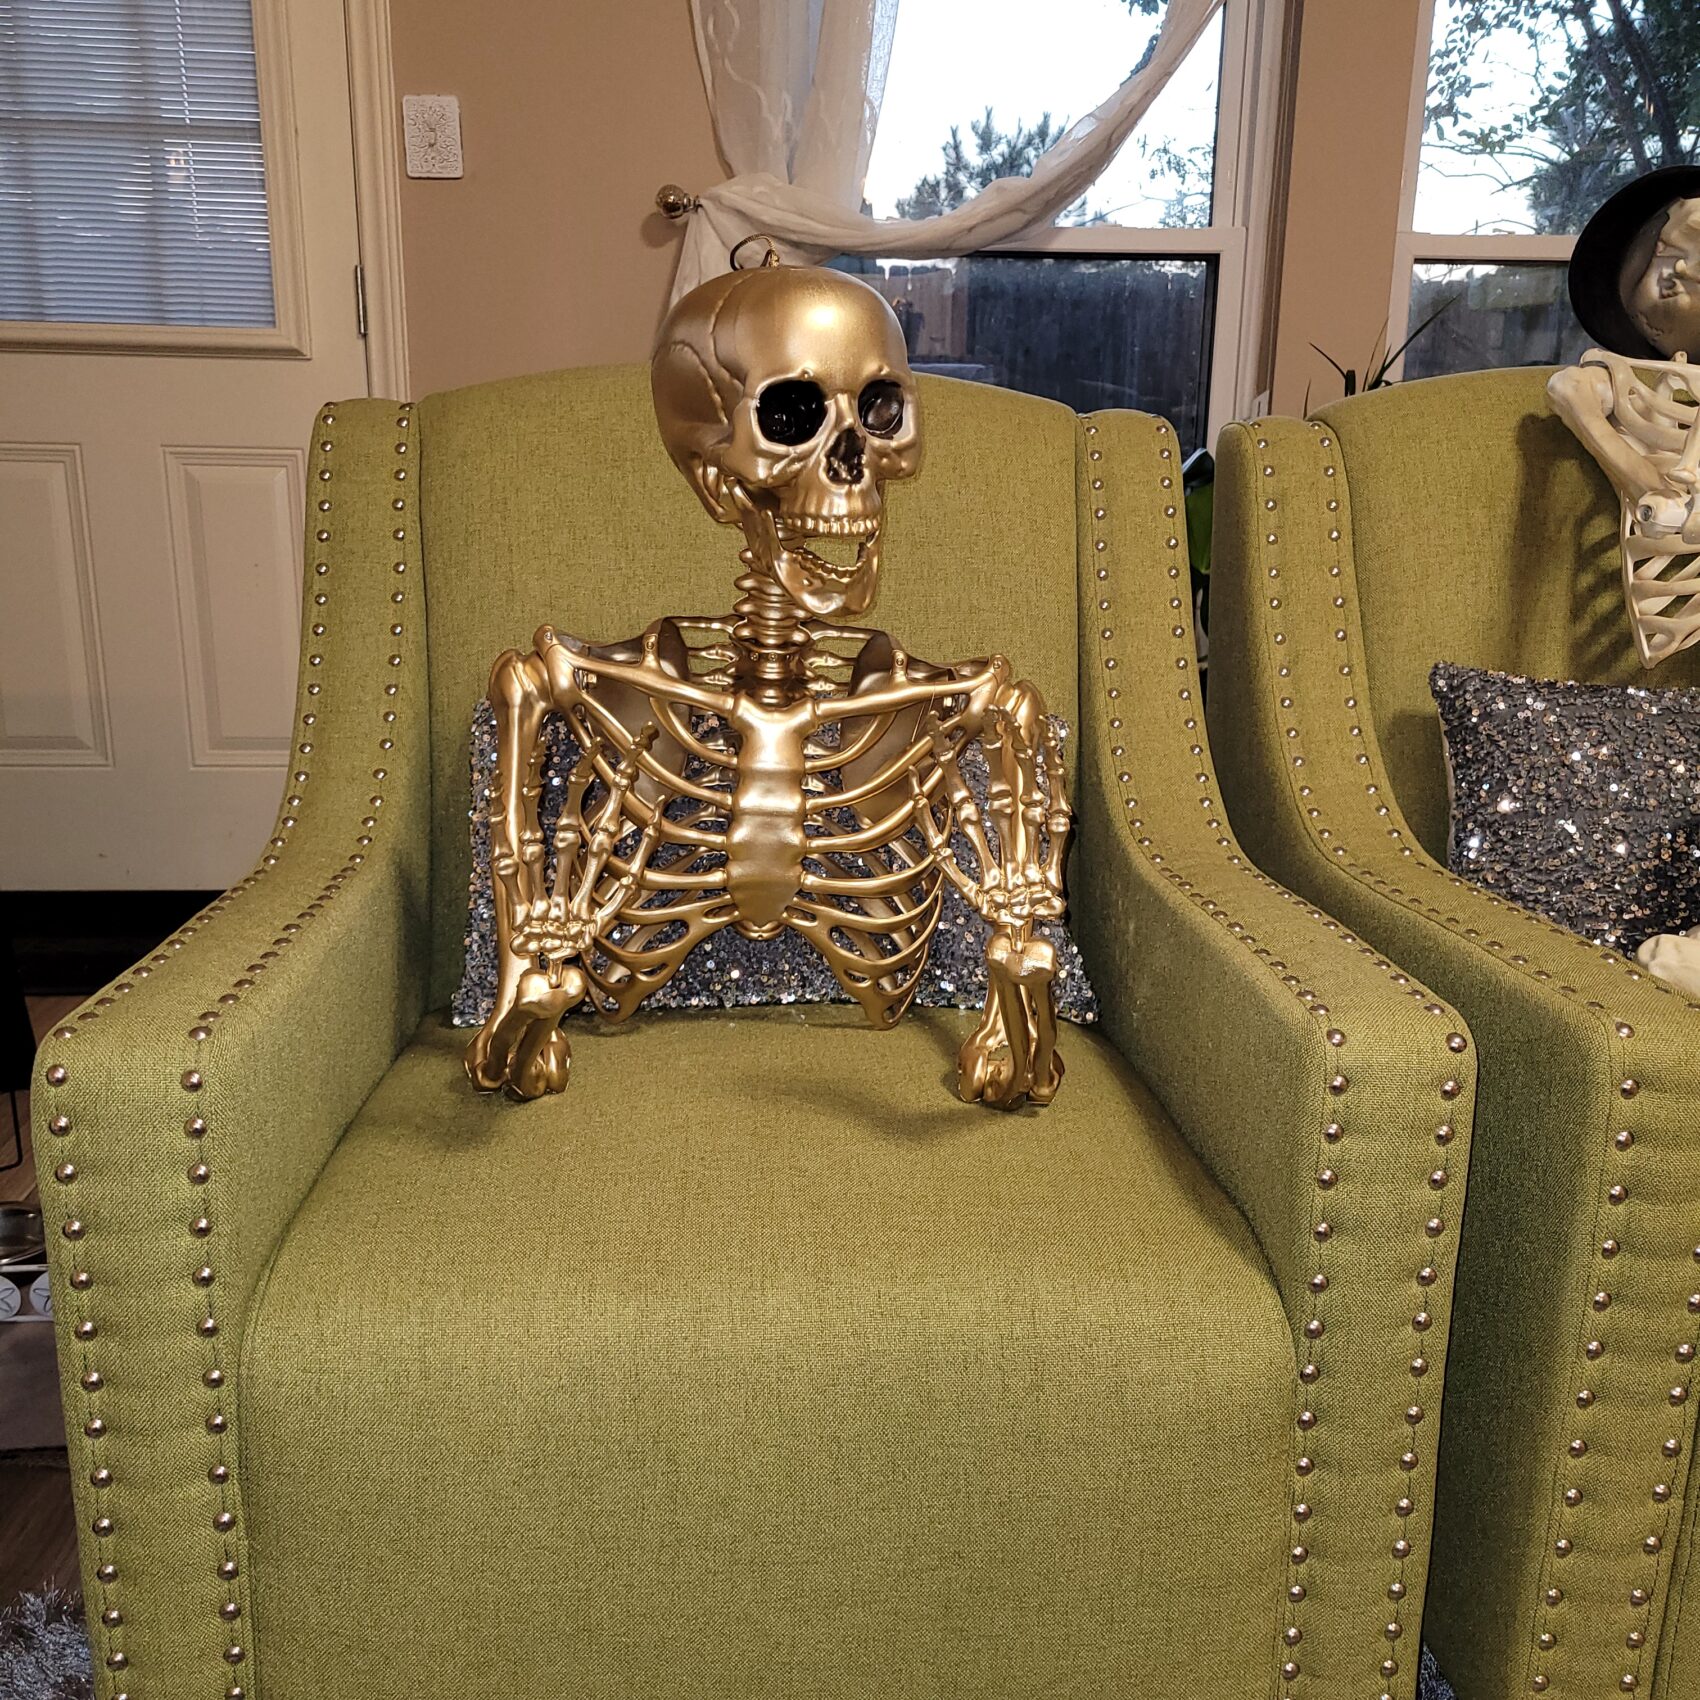
My skeleton is now painted and dried and ready for me to dazzle out the eyes and nose. In the photo below you can compare my sprayed painted skeleton next to a store bought gold skeleton from Target. I like them both, but my painted skeleton is more my kinda GOLD!
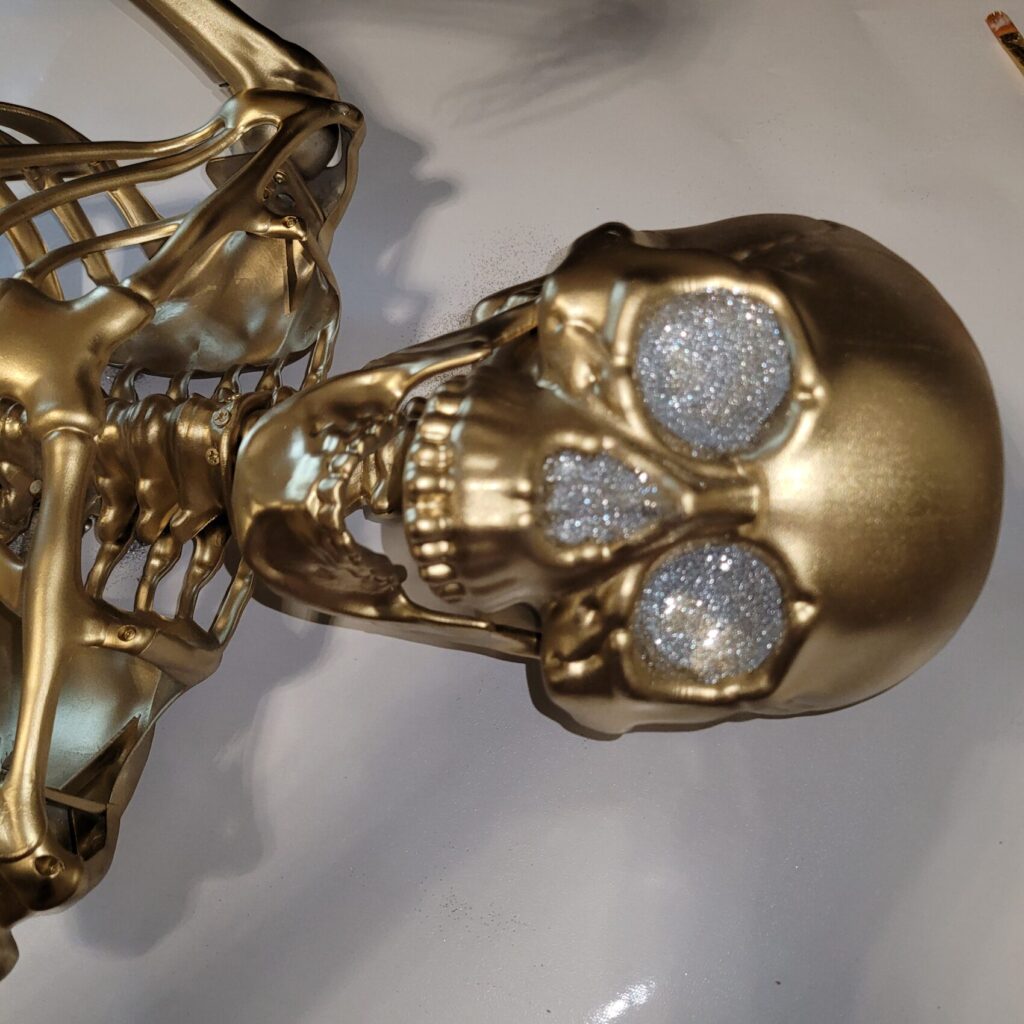
Blinging Out My Skeleton Eyes
I want my skeleton eyes to pop and gold and silver looks so good together. Instead of applying rhinestones one at a time, I’m using a really fine silver glitter to fill the eyes and nose. The glitter is messy so remember to cover your workspace.
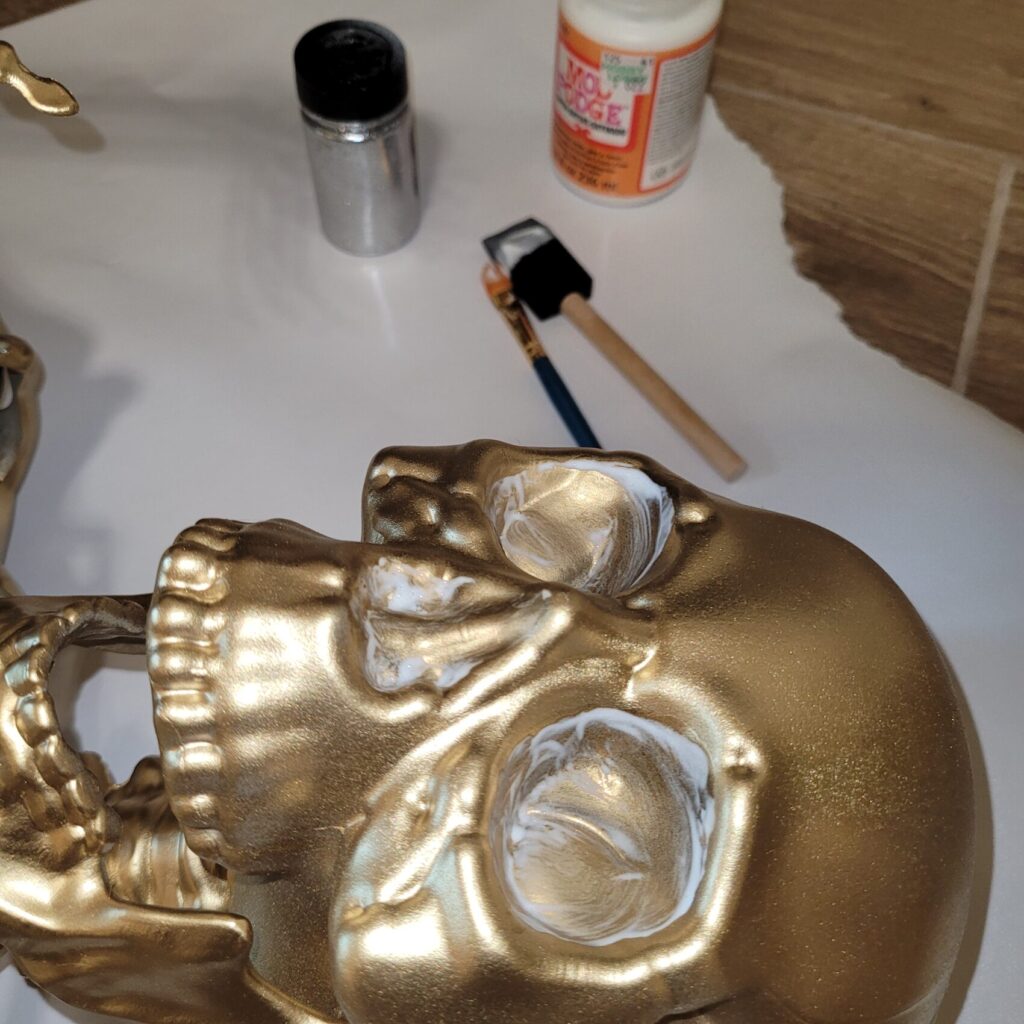
I am using a sponge brush to circle the eyes with Modge Podge. To get smaller areas such as the nose and fill gaps of missing glue in the eyes, I use a small brush. The brush can also even out the glue to make sure its a equal layer and not chunks or uneven glue.

The glue comes in a shaker bottle, similar to a salt shaker. After allowing the Modge Podge to semi-dry where it’s sticky or tacky, simply sprinkle the glitter all over the eyes. You may need to turn the skull to make the glue roll to other areas. After about 30-60 minutes, you can shake off any loose glitter and proceed to the next step.

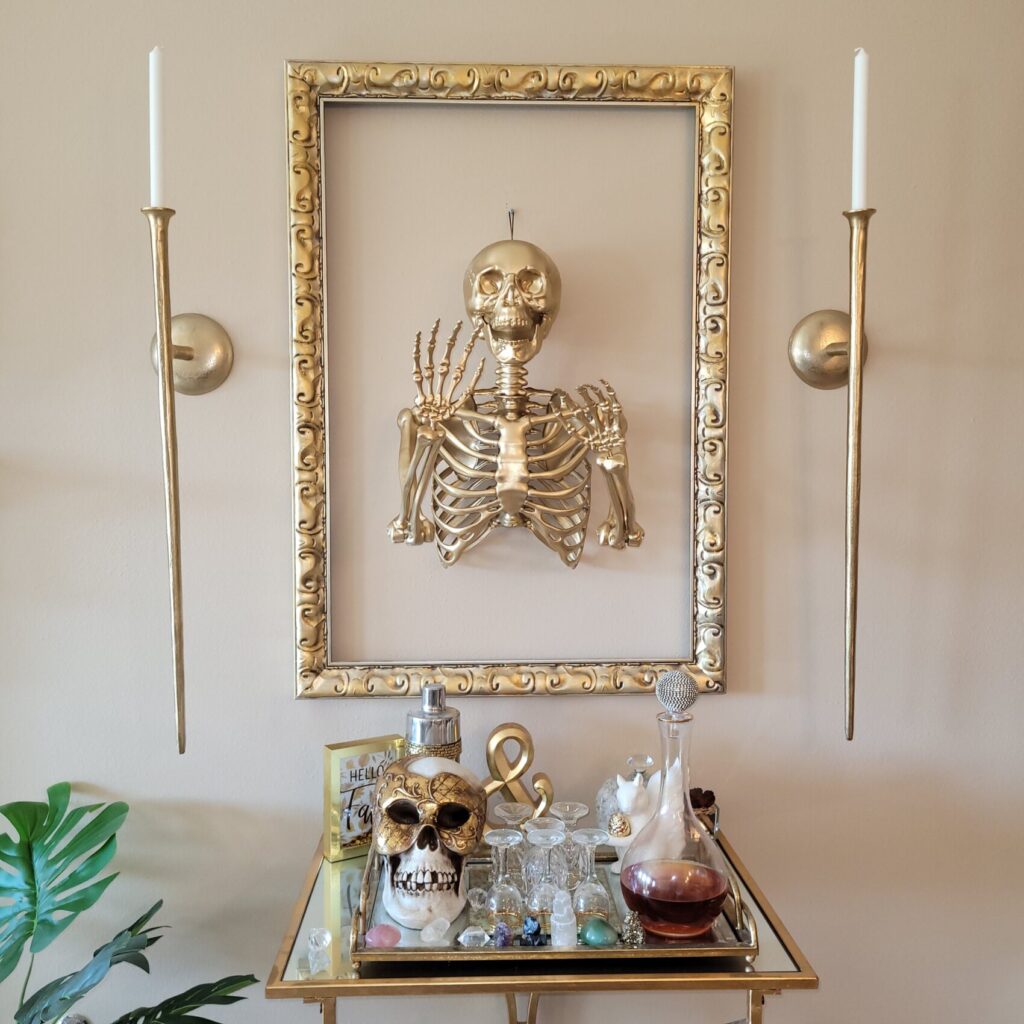
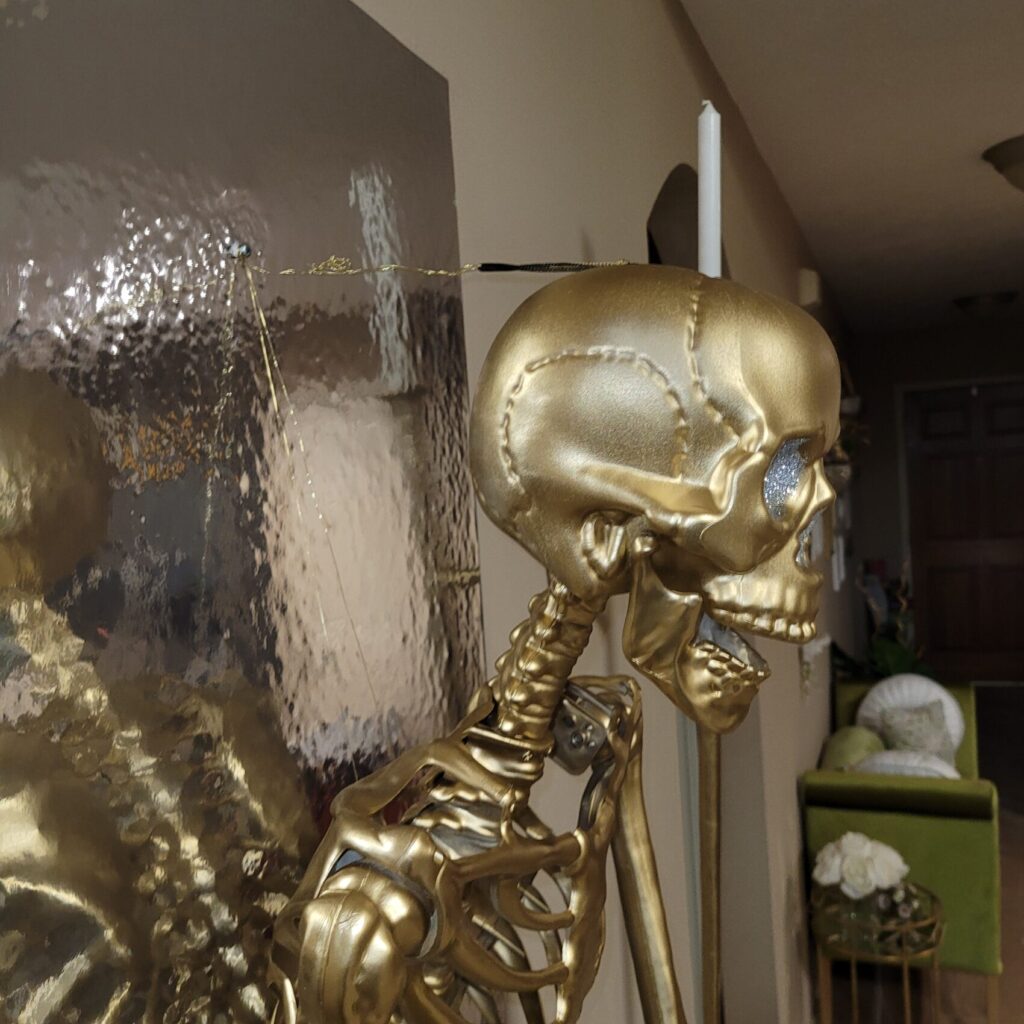
Checking Placement For Faux Mirror and My Gold Skeleton
My Any-Theme Frame already had a nail in it where my other pieces would hang throughout the year. In the photo below, I’m checking the placement for my skeleton and it is perfect if I want my skeleton laying flat. I actually want my skeleton at somewhat of a tilt to appear as if it is reaching out of the wall for ATTACK! Making folks wanting to watch their back around here! 😀 I should just call it my Scareleton! To create a tilt, I will elongate the nail and loop using either invisible thread (or fish line), or fine crafting wire. Invisible thread will look more attractive or hidden, however the fine metal thread will be easier to manipulate into position. I found some fine gold wire in my craft drawer. Keep reading to see how I attached to the existing loop on the skull of my skeleton.

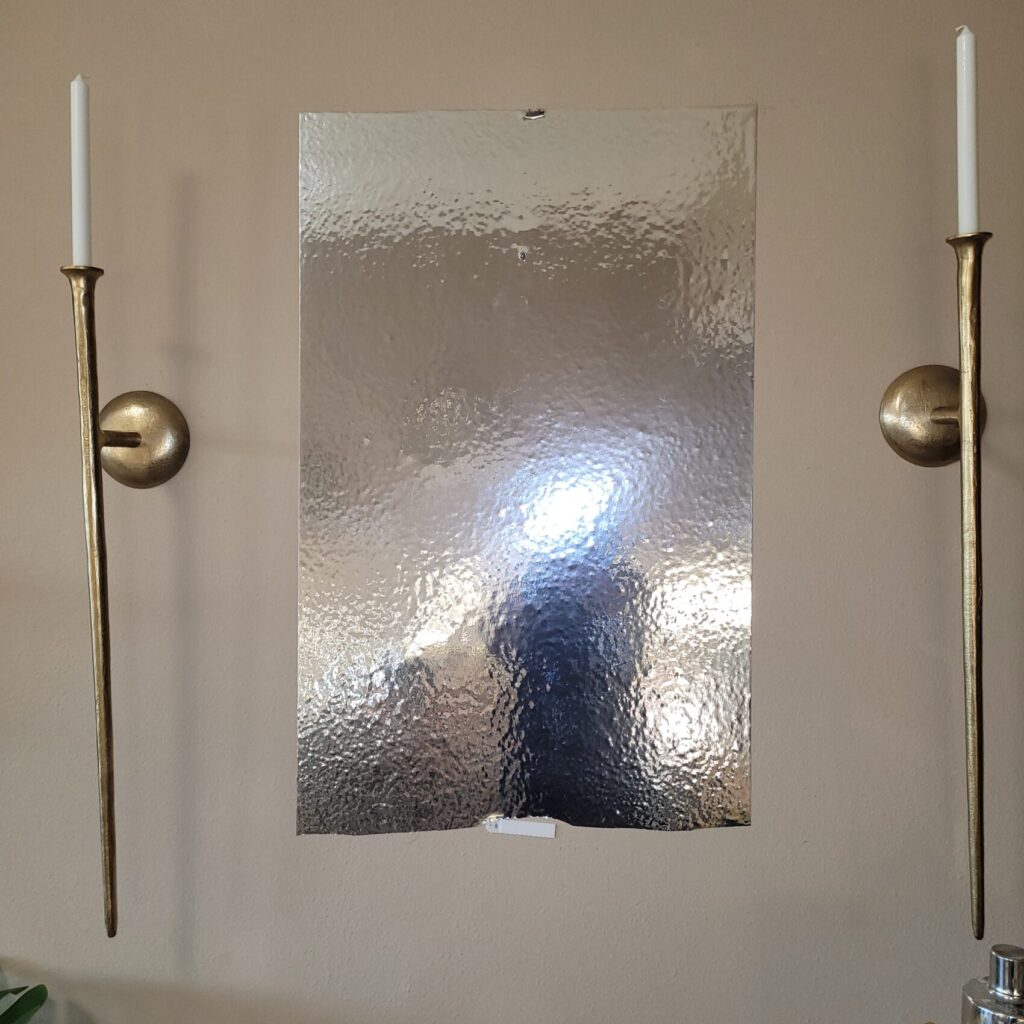
Creating A Faux Mirror Using A Old Large Frame
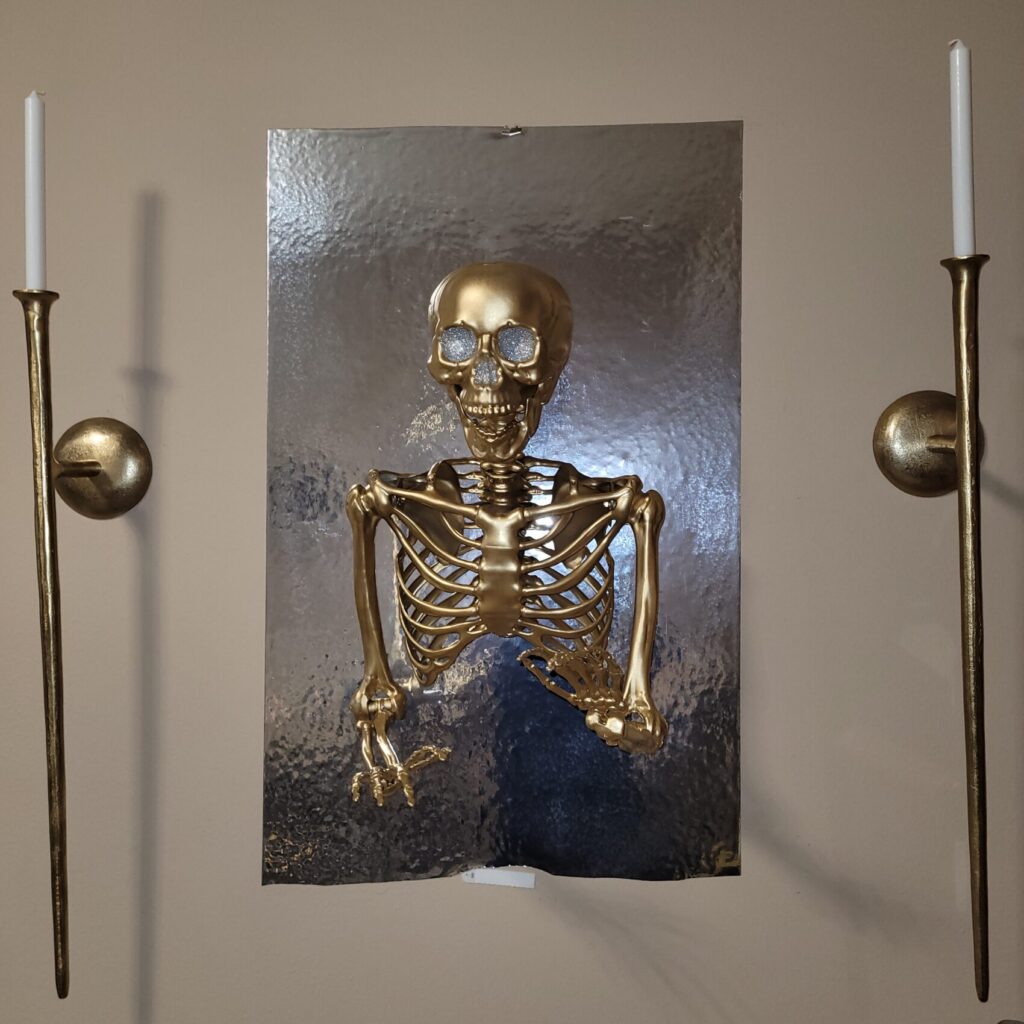
I decided I AM NOT going to be traveling all around town in search for a mirror. Instead, I’m going to create a mirror look by placing Mirrored Vinyl Decal on the wall or behind the Any-Theme Frame. It’s inexpensive and easily removable and reusable. I will say, it doesn’t not stick well to textured walls and you may have to add tape to corners. You could also use Chrome Gift Wrapping Paper. The goal is find some that is shiny and mirror like which will fit behind your frame. This is my Any-Theme Frame in it’s usual. I’m using a pencil to mark where the top of the interior of the frame starts and also on the sides, just to guide my placement of the Mirror Decal.
This mirrored decal I purchased came in a roll at 24×78 inches. It was much longer than I needed, but it won’t go to waste. I simply cut off what I don’t need. This decal was easy to apply and easy to rub out smoothly and slowly to avoid bubbles. However, I have textured walls so I did not stick in the corners long so I added a small piece of tape to each corner. Since I placed the decal over the existing screws, I just punctured tiny holes around the nail so that the nail is above the decal. It’s a silver nail, so it isn’t noticeable.

Adding My Skeleton To The Faux Mirror And Old Frame
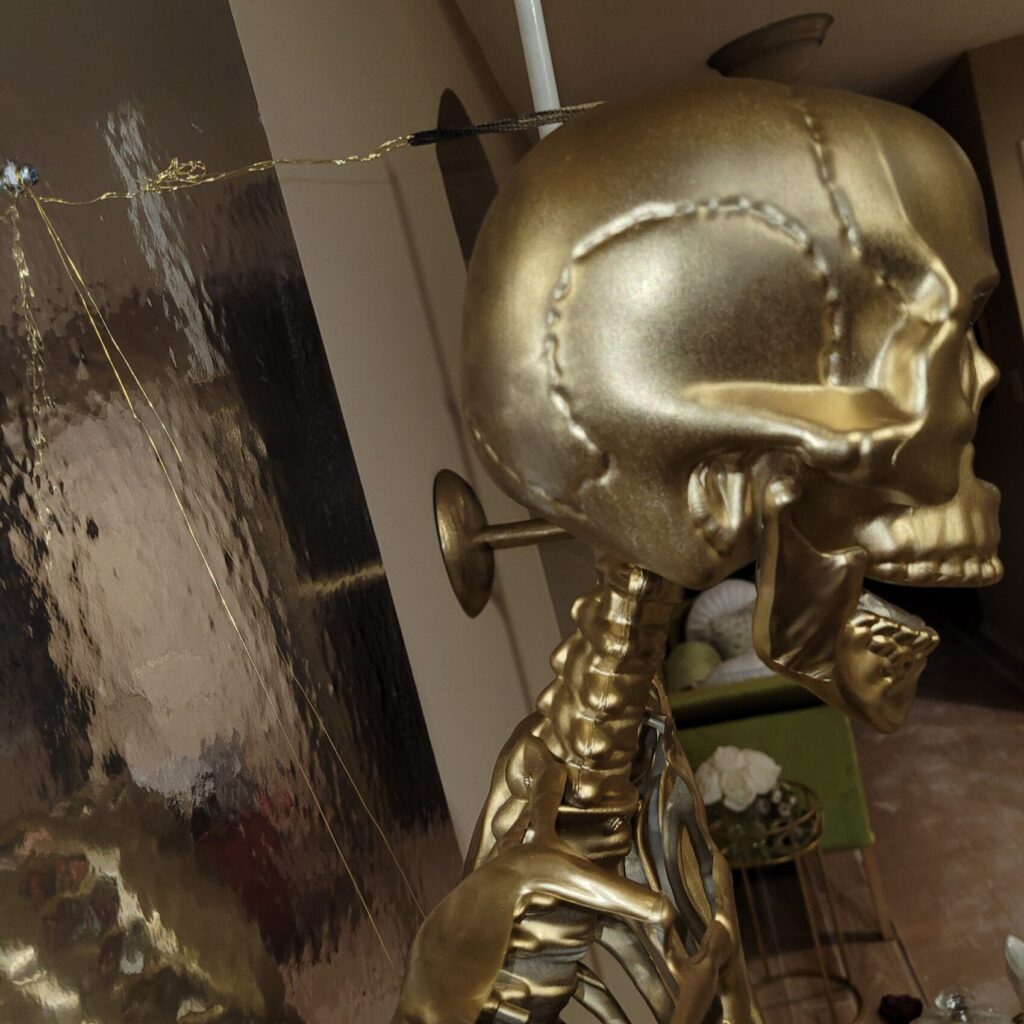
To make my skeleton tilt, first I will be cutting a long piece of craft wire which I’m going to wrap around the center of its rib cage and twist the ends together to close the circle. Next, create another tiny loop at the top of the circle and twist until you’ve created a secure not. Place that loop on the nail. Then place the built in loop on top of the skull on the nail as well. Cut another medium size piece of wire. Gently remove the black loop in photo while holding the skeleton up. Finally, place the other piece of wire through the black loop, over the nail and wrap several times until the ends are knotted.
Securing the skeleton at a tilt on the wall can workout in a variety of ways, but this is how I made it work and it works easiest for me with the flexible fine craft wire.
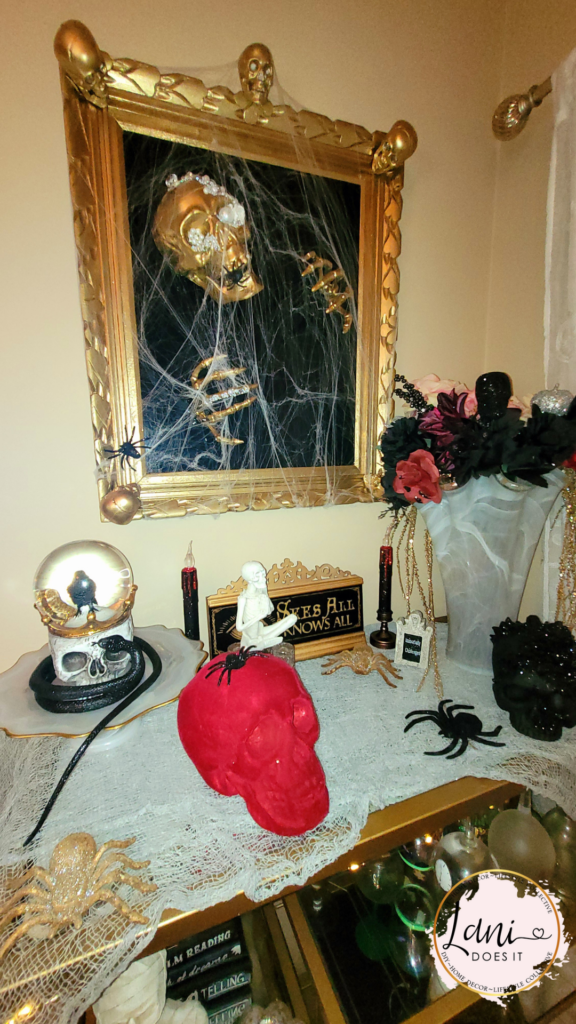
Final Touches for my DIY Skeleton Mirror
Now that my skeleton and faux mirror is mounted, it’s now time for the final touches. To make it look super haunted, I’m adding faux spider webs. I love the stretchable faux spider webs. A little bit really does go a long way and one pack of the 1000 SqFt stretch spiderwebs could decorate my entire home and then some!
Even More Halloween Ideas | DIY Skeleton Mirrors & Skeleton Framed Art
I searched the internet and Pinterest for the very best DIY Skeleton Mirrors and other 3D Skeleton Halloween decor and found amazing Halloween framed art using skeletons. I love the spooky creativity! Keep scrolling to see what I found to share with my audience.
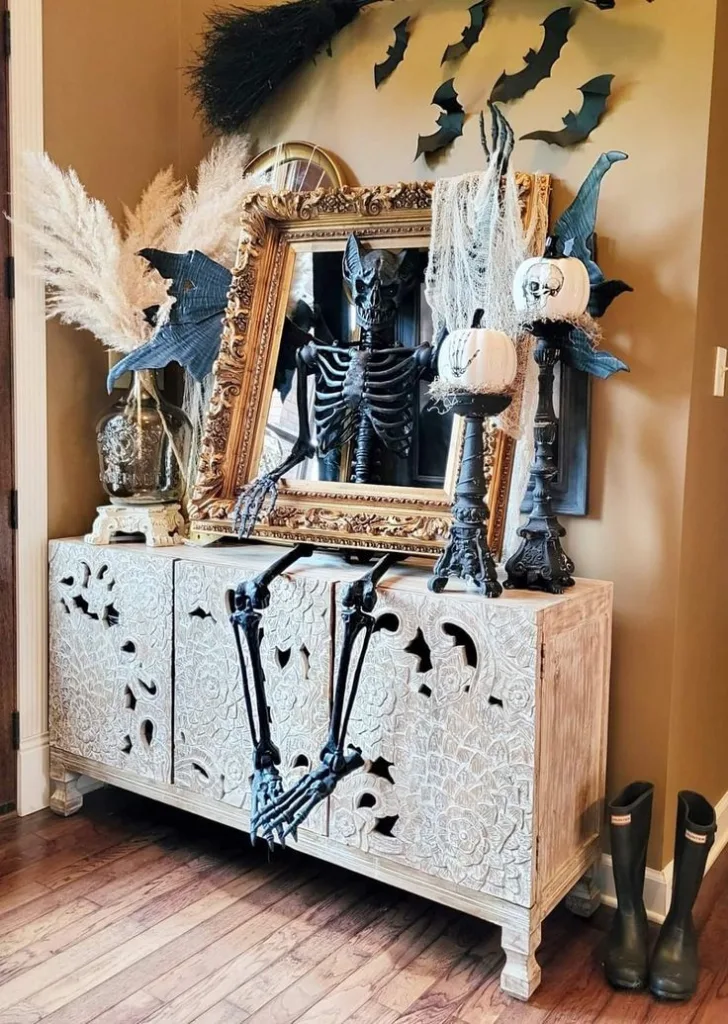
DIY Bat Man Skeleton Framed Halloween Art
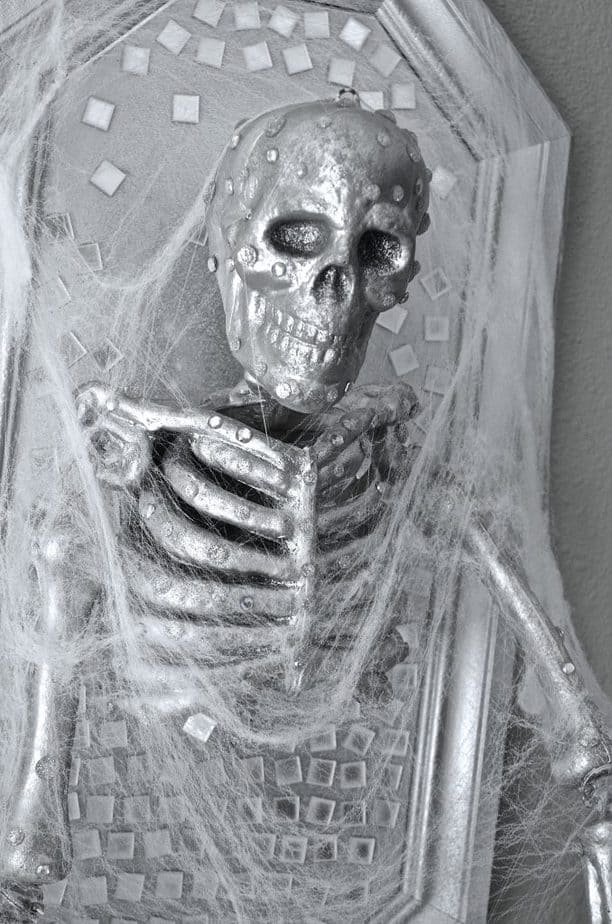
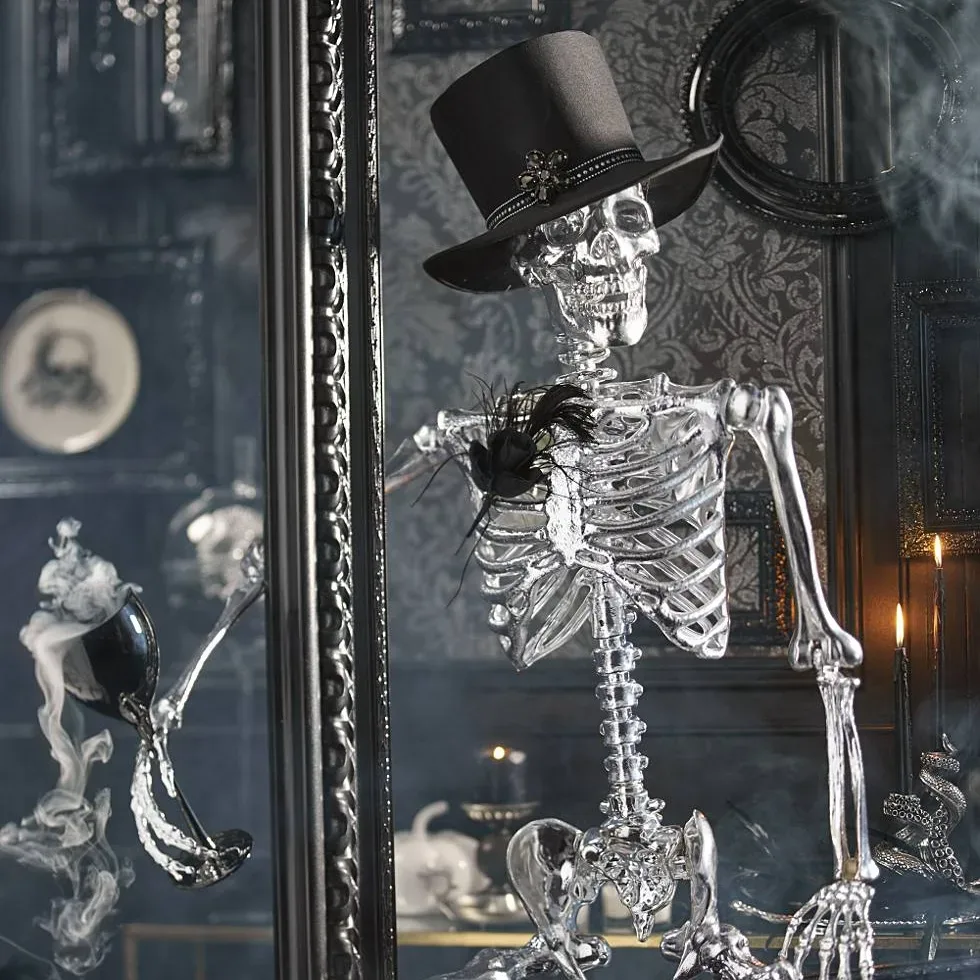
Chic Silver Haunted Skeleton Mirror Idea
Sharing another Haunted Skeleton Mirror Idea. Rustoleum provides a step by step tutorial how to make a skeleton mirror. It looks really good in silver and goes great in this space.
This DIY haunted Halloween skeleton mirror is another grim idea to try this Halloween to impress your visiting guests. Check out the short video below:
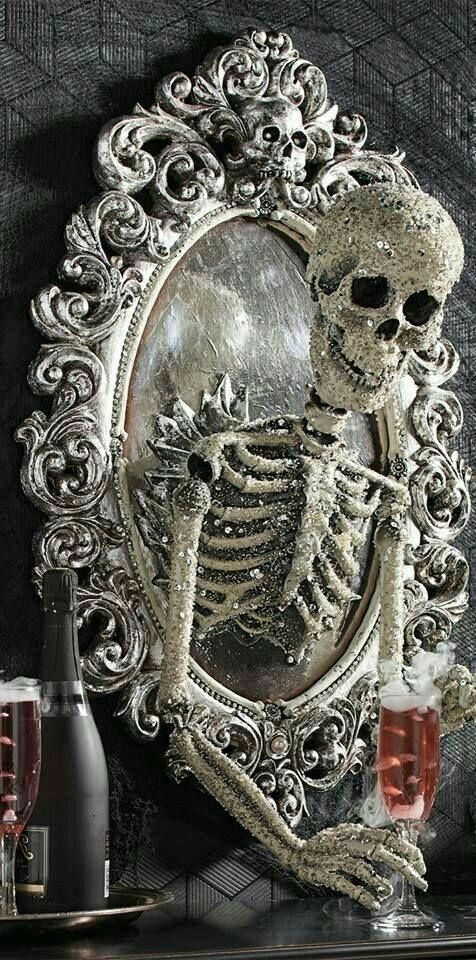
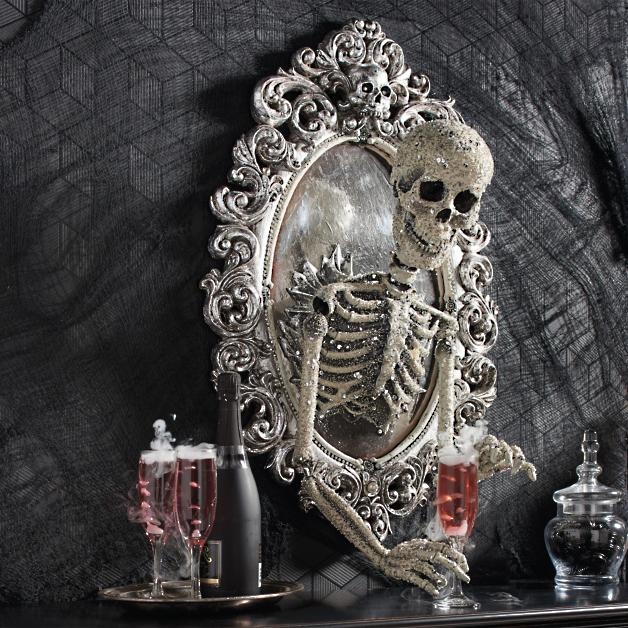
Spooky Dark Skeleton Mirror
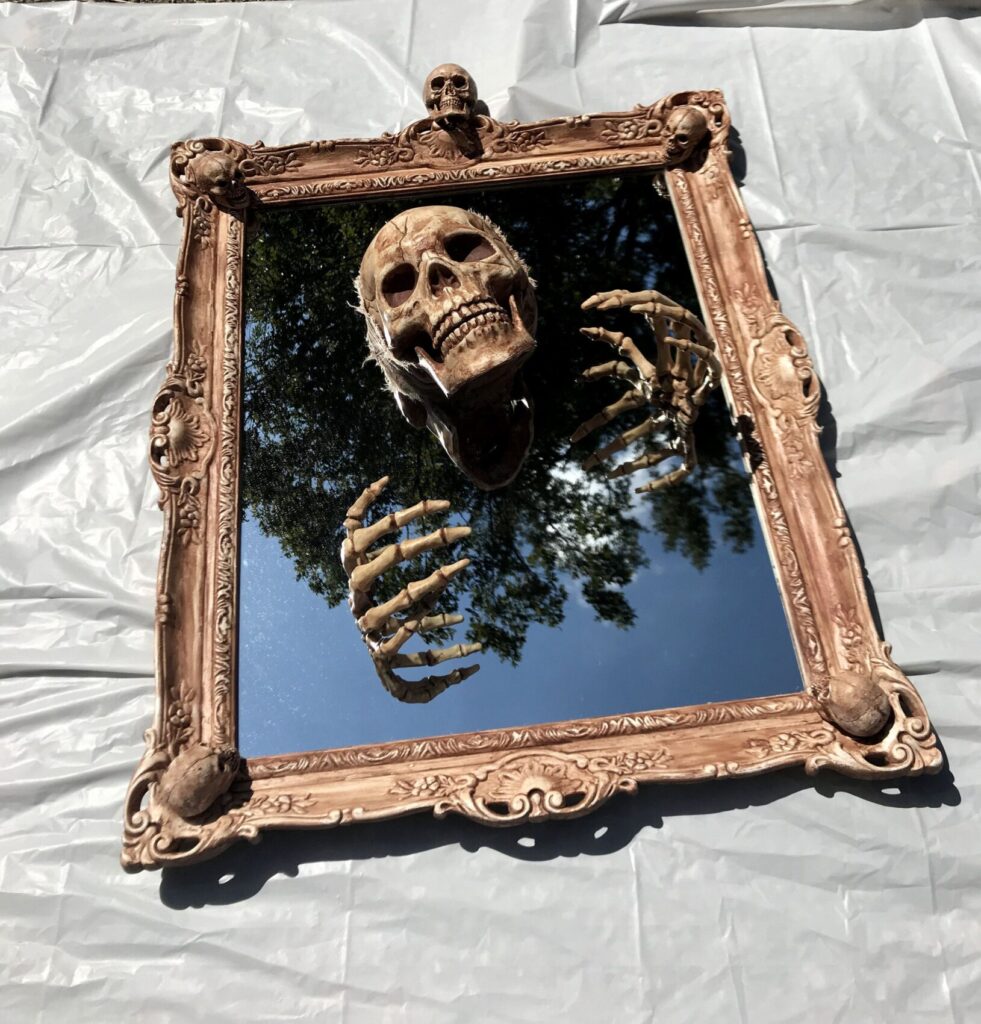
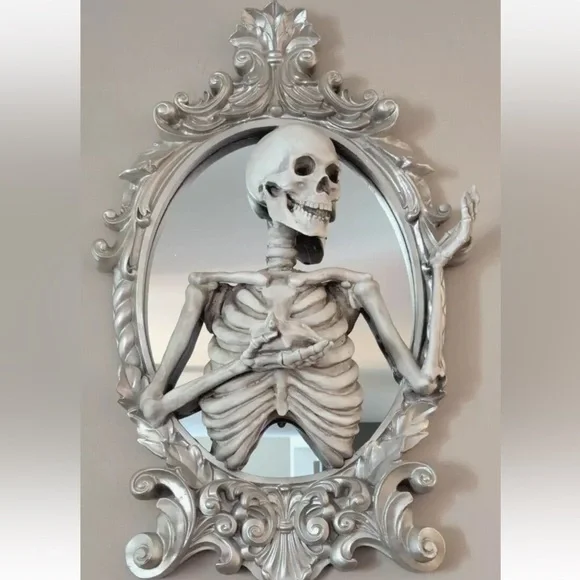
Dabble in the darker side of skull decor with with this Haunted Skeleton mirror below actually looks pretty scary, yet intriguing at the same time. You could get the same look by finding some small skulls to glue on the corners of a ornate large frame, just like in the photo below. Check your local Goodwill, OfferUp App and Facebook Marketplace for good deals on a pre-owned large vintage wood frame or any frame you like.
To get the wood to have the distressed look as the frame below use bronze paint or Miniwax wood stain to a lightly sanded ornate wood frame. Check out this tutorial on How to Make Your Skeleton or Bones Look Old or Dirty by Manning Krull. If you want to go even more CREEPY, check out “corpsing a skeleton“. For the miniature skulls on the frame, check out your local Party City store or check Amazon here. Then glue your choice of Black gloss acrylic sheet/Or Custom Cut Mirror Or Mirrored Acrylic Plexiglass with gorilla glue on to the inner edges on the back of the frame. Glue your skeleton skull and hands with E5000 glue to the plexiglass/acrylic and allow it to cure over night. You may have to cut your skeleton parts if unable to find exactly what you need for your pose and size frame so be sure to shop for the best price. Either way, it will be worth this haunted masterpiece below.
List of Items Needed For The Spooky Dark Skeleton Above:
- A frame of choice (ornate wooden frame in photo. Check OfferUp, FB Marketplace and Craigslist)
- Black gloss acrylic sheet/Or Custom Cut Mirror Or Mirrored Acrylic Plexiglass
- Big skull to be cut
- Skeleton hands that can be glued similarily
- Small skulls for corners (I purchased for $4.99 at At Home store)
- Quick setting epoxy for plastics or E6000 Industrial Strength glue (the JB Weld ClearWeld epoxy glue in video is the strongest, but smells bad for 3-4 days, however, E6000 is nose friendly and works great also)
- Paint of choice for frame and skulls/or stain if you want the gory look
- Blade and sharp scissors
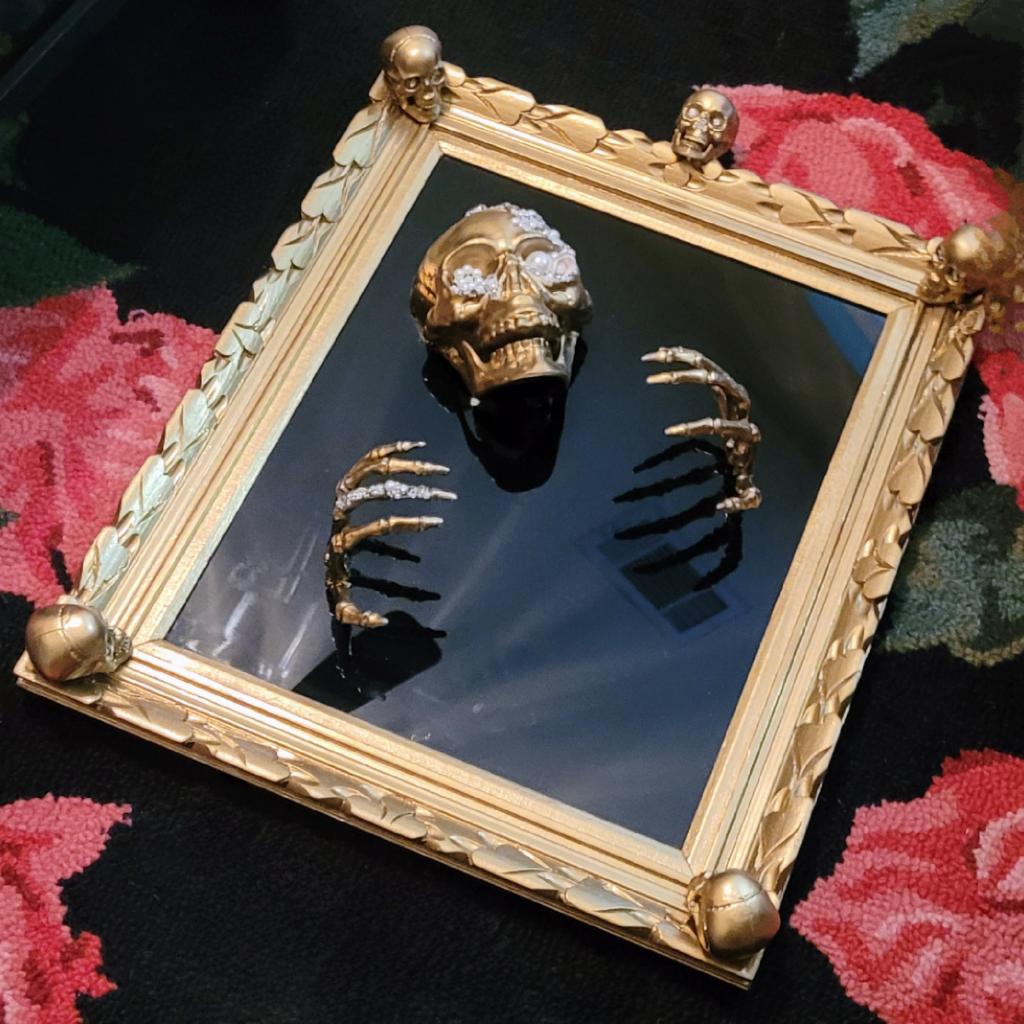
DIY Skeleton Mirror | Haunted 3D Skeleton Coming Out Of The Mirror
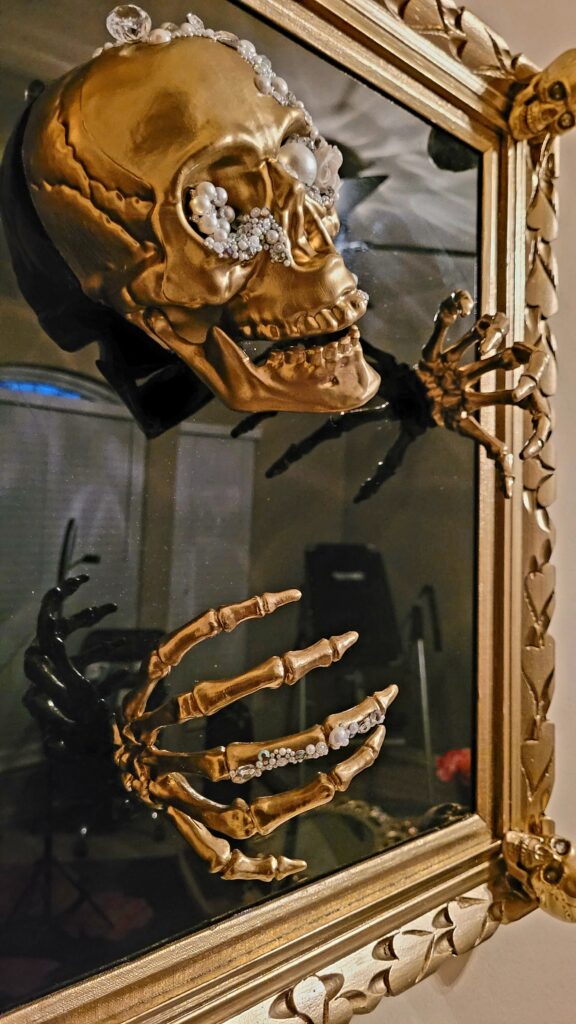
I love the creepy and gory skeleton by OohShaSha on Etsy above, which is no longer for sale. However, due to the high number of requests I’ve received to do a tutorial, I decided to share the steps so you can get the same look, but in my own style using items from Dollar Tree and At Home Store. I bedazzled mine with gems and pearls using a wax tip jewel setter, however, this is optional. You could use anything you want to accessorize your skeleton or nothing at all. It’s completely up to you.
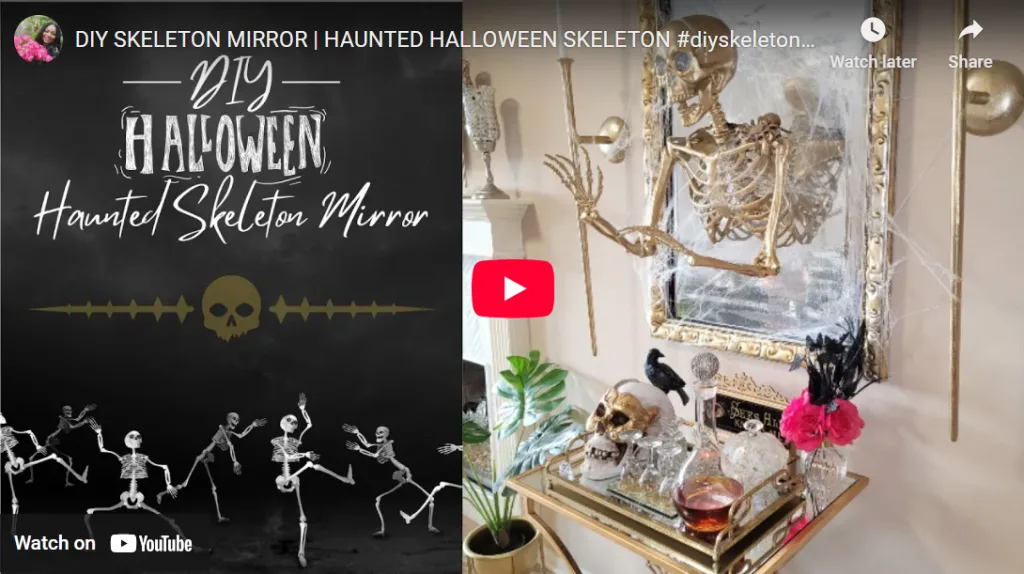
DIY SKELETON MIRROR VIDEO TUTORIAL
Follow the steps in the video DIY Skeleton Mirror tutorial below to to get a similar look of the DIY Skeleton Mirror | Haunted 3D Skeleton Coming Out Of The Mirror, or use it as a guide to create a version in your own unique style.
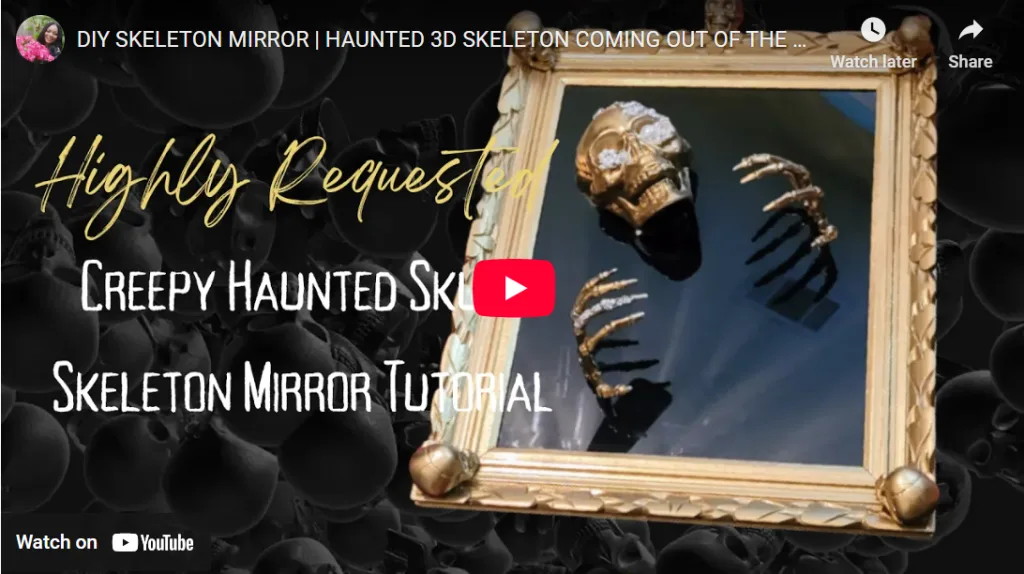
If I can do it, so can you! Watch the tutorials below or save and check it out later on YouTube. Be sure to like and share it with your friends – Thanks in advance! 🙂
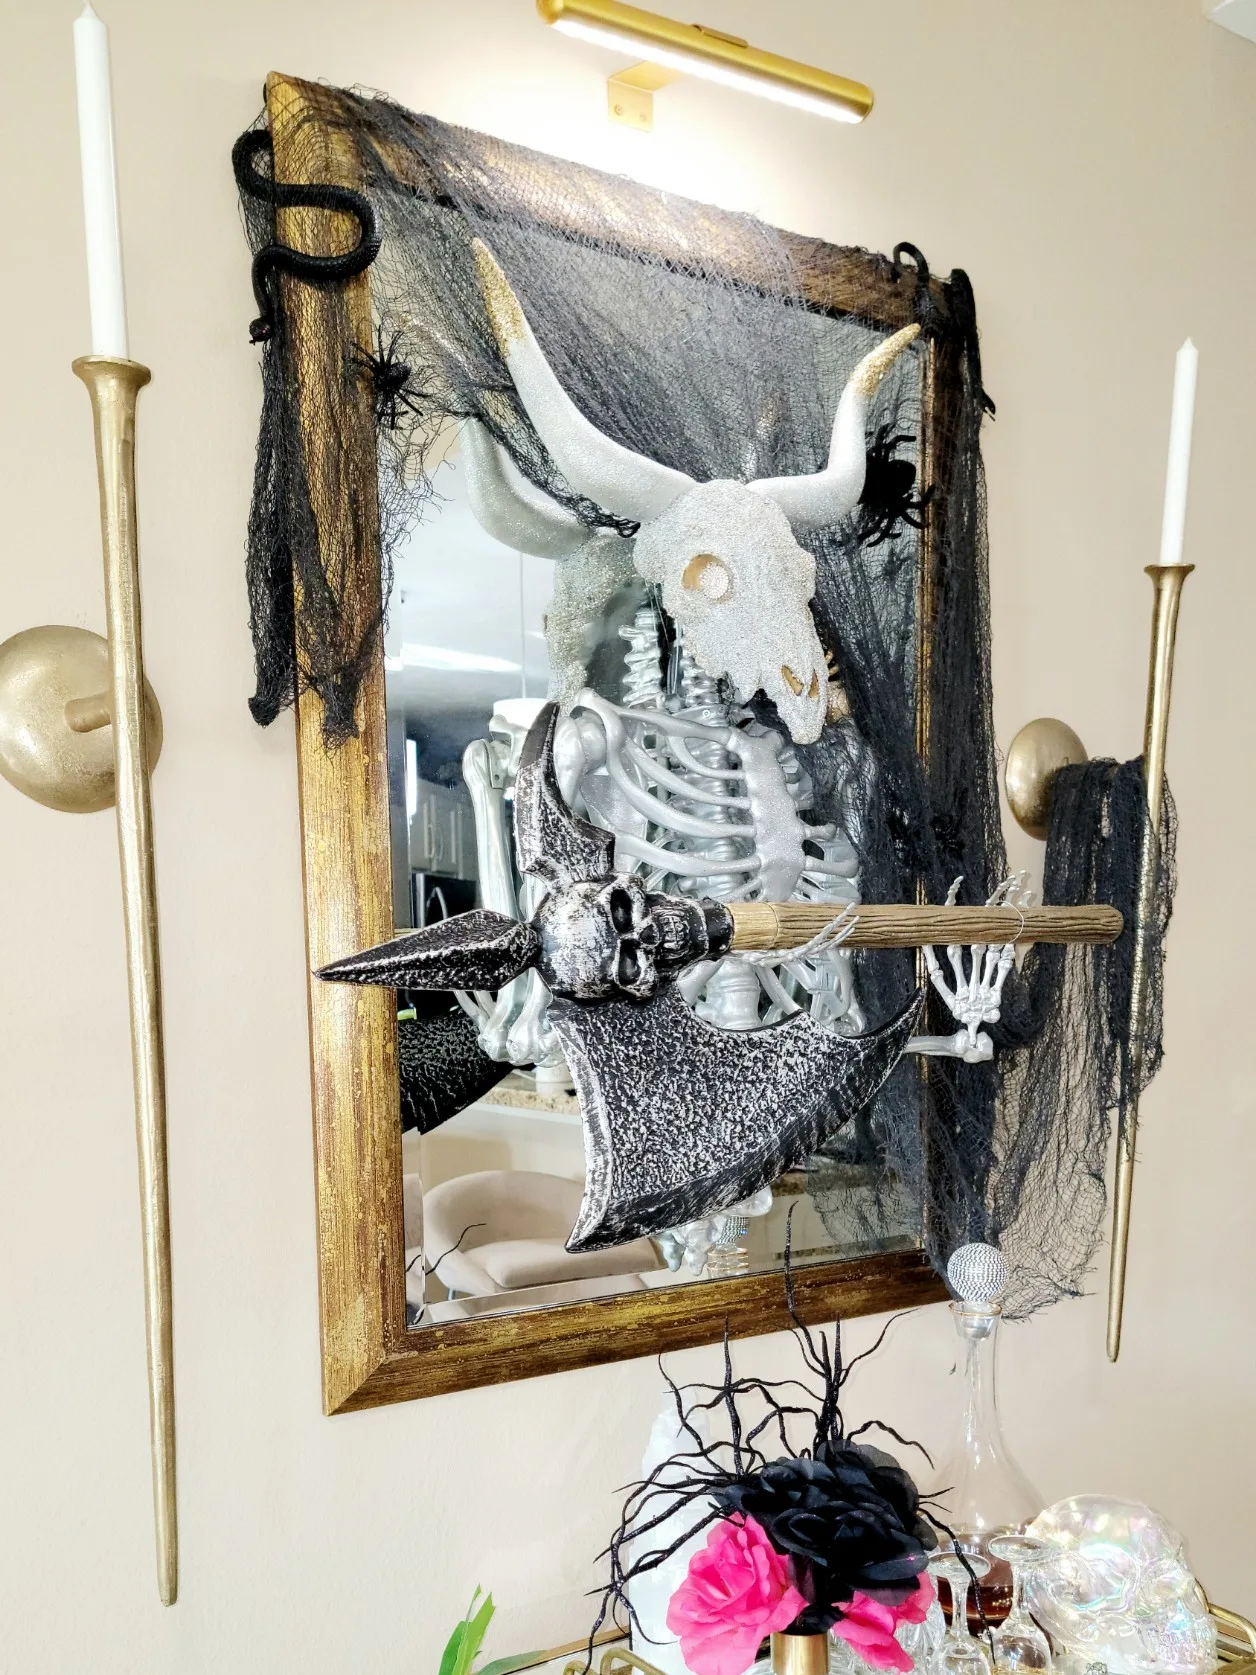
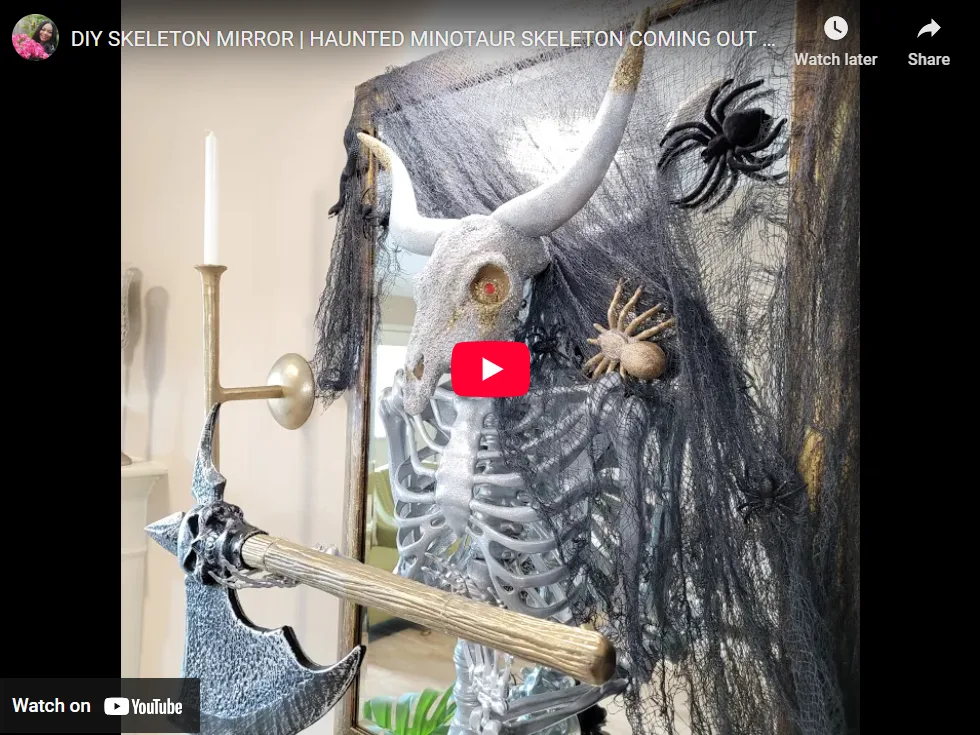
DIY Skeleton Mirror | Haunted Minotaur Mirror
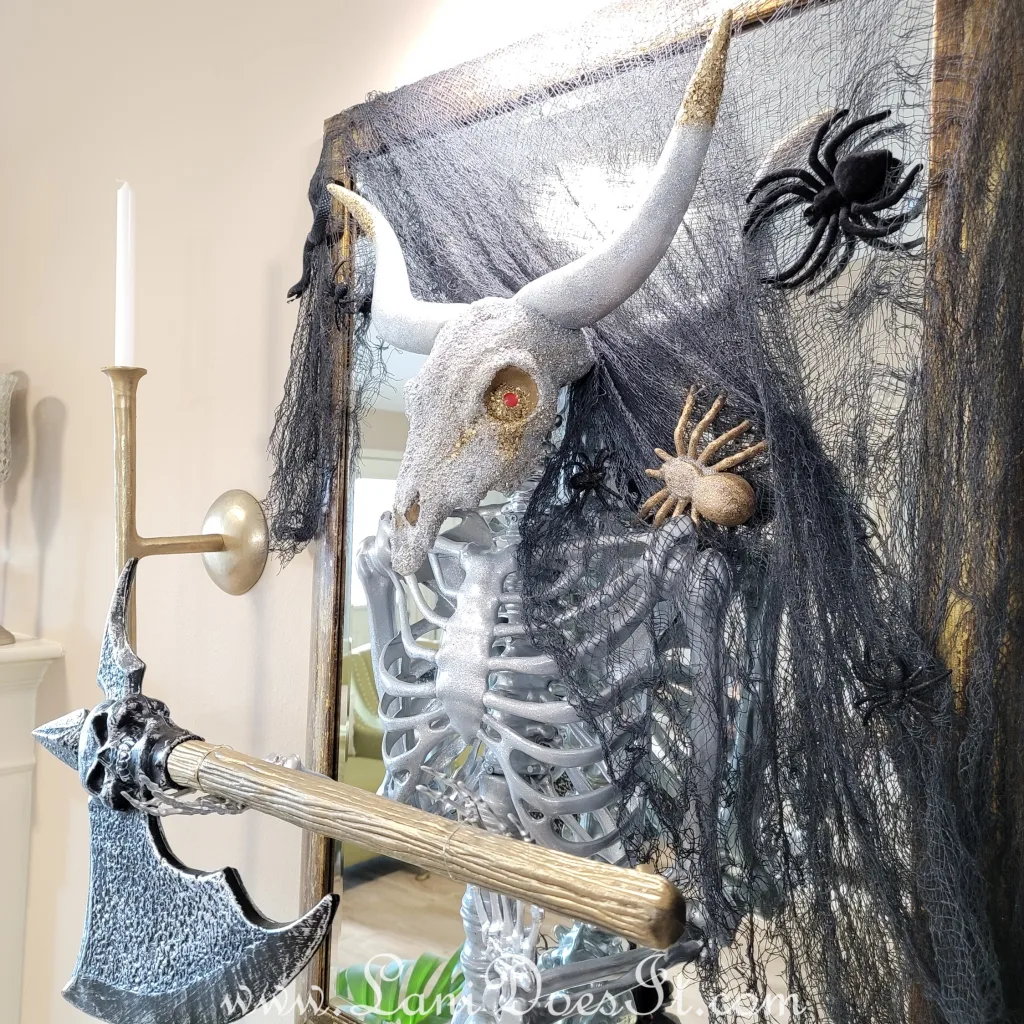
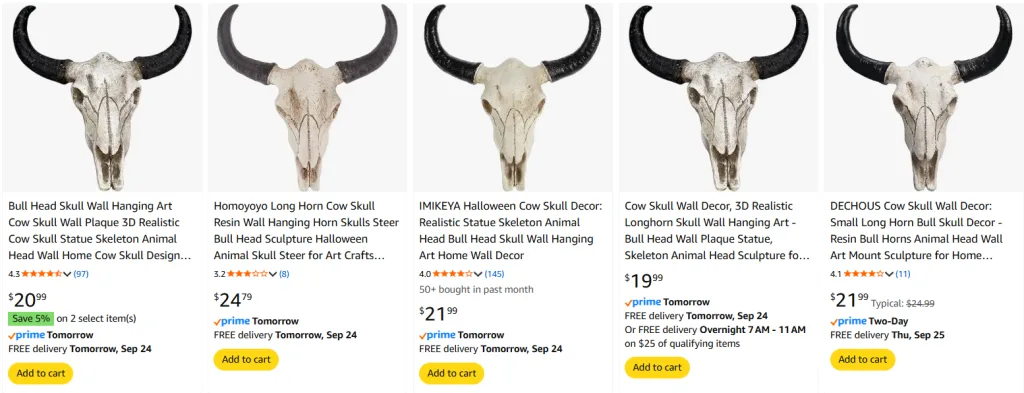
I created a DIY Skeleton Mirror of the Last Known Minotaur (Boris) trying to break free of the mirror… only this time, I’ve got the tutorial to help you make one too—minus the getting stuck part! A minotaur is a mythological creature that is half bull and half man. I had to switch it up this Halloween and was inspired to go with this DIY Haunted Skeleton Minotaur Mirror after seeing the skeleton long horn or bull head at my local grocery store.
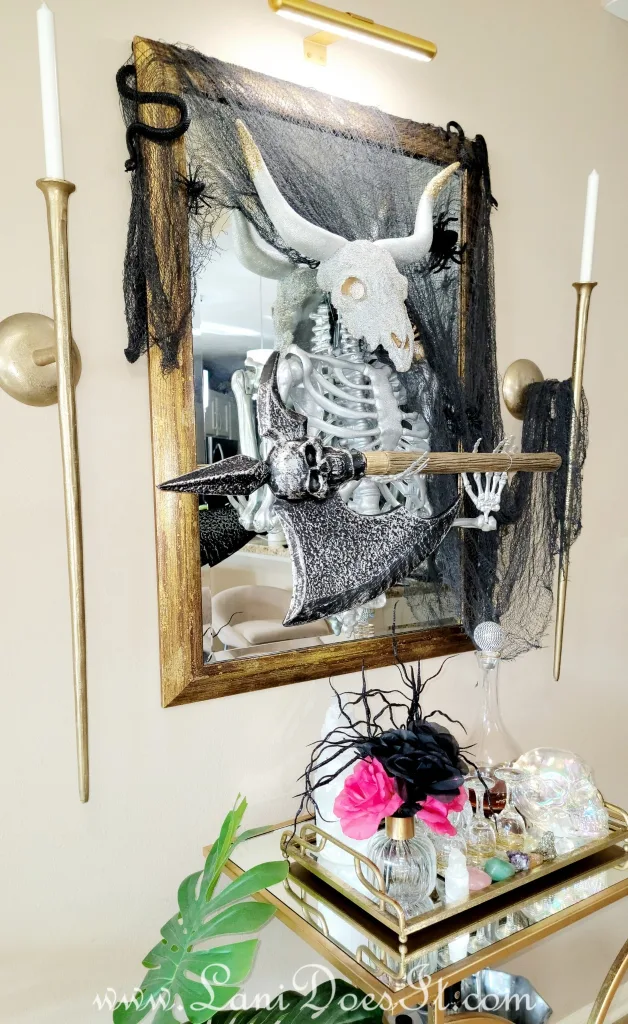
Check out the skeleton mirror video tutorial below and all supplies used are listed so you can create your own Minotaur Skeleton Mirror too.
Thanks for reading and hope you’ve been inspired on How to DIY Your Own Haunted Gold Skeleton Wall Mirror will take action soon! If you enjoyed this post, please share it with your friends.
Happy Halloween!!
For more Halloween Inspo, check out 17 Halloween and Fall-O-Ween Bart Cart Ideas and
DIY with Wickedly Chic Halloween Wreaths You’ll Want to Craft Right Now.
And remember, the fun doesn’t stop here. Come hang with me on Pinterest, Instagram, TikTok, and YouTube (@LaniDoesIt), I’ll keep the glow-up ideas coming long past Halloween. And if you’re ready to shop the look without endless scrolling, check out Curated By Lani. I handpick durable, beautiful pieces I actually use, so you don’t have to second-guess your style choices.
Trust me, your budget Halloween setup is just the start of a home that feels spooky, stylish, and oh-so-you.

![]()