Welcome to the ultimate guide for transforming your entryway into a spooktacular scene that’s both chic and a little wicked! In this post, we’re diving into the world of DIY with Wickedly Chic Halloween Wreaths You’ll Want to Craft Right Now.
Whether you’re aiming for eerie elegance or a touch of spooky sophistication, creating your own Halloween wreath is the perfect way to set the tone for the season. The best part? You don’t need to be a crafting pro to pull it off. With just a few simple supplies and a dash of creativity, you’ll have a stunning wreath that will make your front door or entryway the talk of the neighborhood.
This site contains affiliate links at no additional cost to you, view the Privacy Policy for more information.
Get Your Boo-tiful On With DIY Chic Halloween Wreaths Inspo
Are you ready to make your entryway spooky yet elegant? Crafting your own stylish Halloween wreaths is a fun way to add festive flair do your entryway or front door. As Halloween approaches, there’s no better time to get crafty and infuse some festive flair into your home. These DIY wreaths are all about blending style with just the right amount of spooky charm. Think dark florals, glittery skulls, and maybe even a touch of lace—each element adding its own unique twist to your Halloween decor. So, grab your glue gun and let’s get started on crafting a wreath that’s not just hauntingly beautiful, but also uniquely you!
DIY Dollar Tree Halloween Wreath (That Doesn’t Look Cheap)

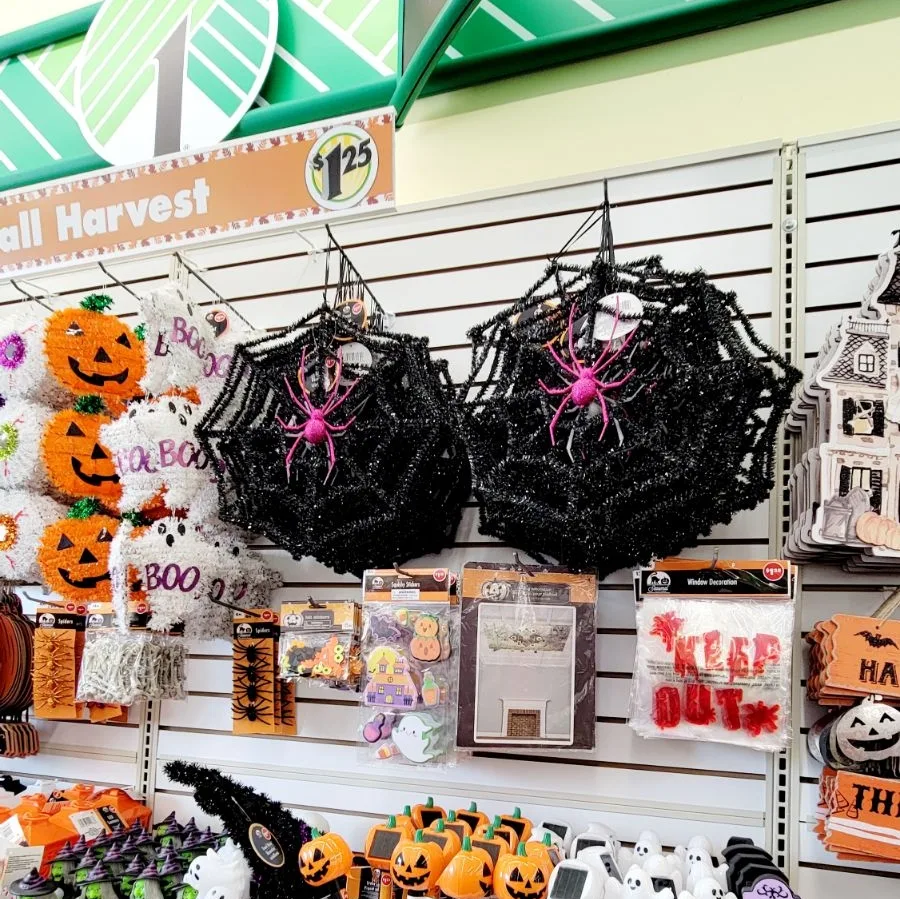
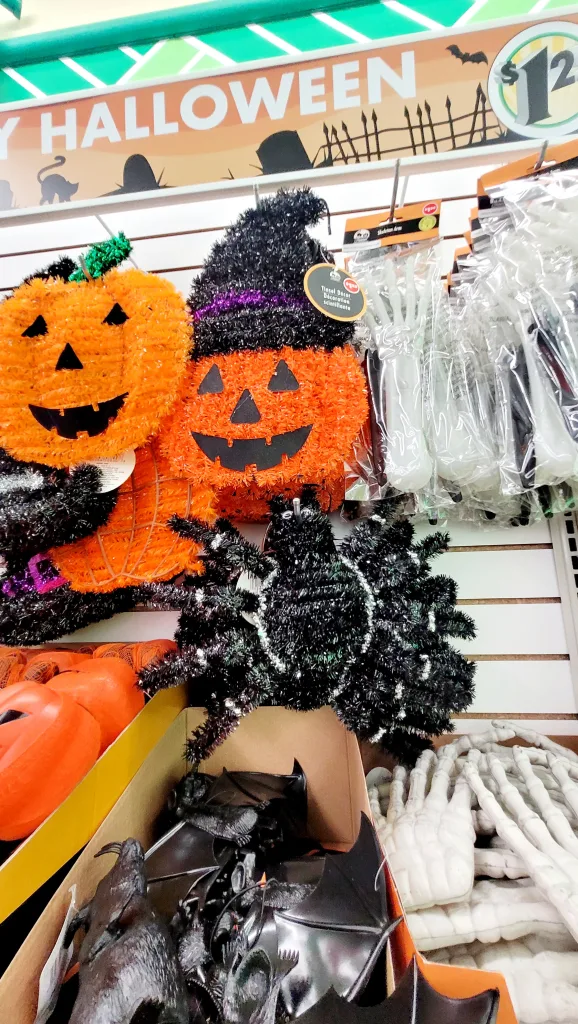
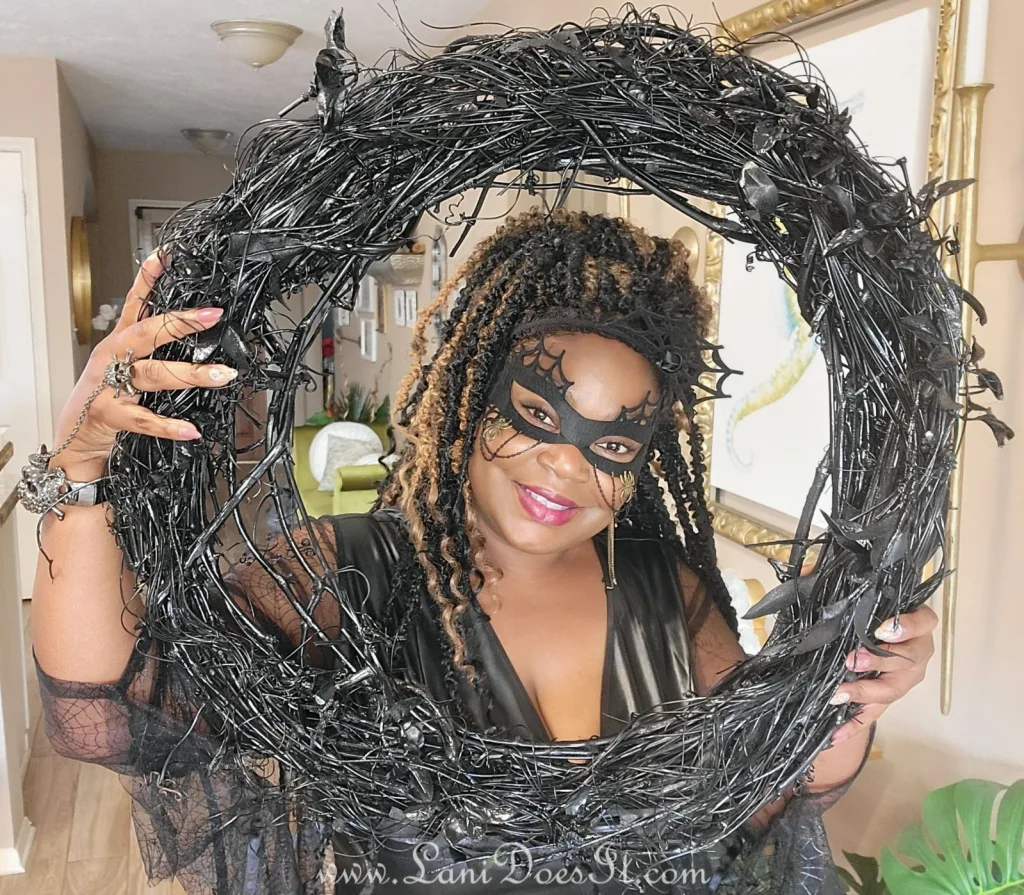
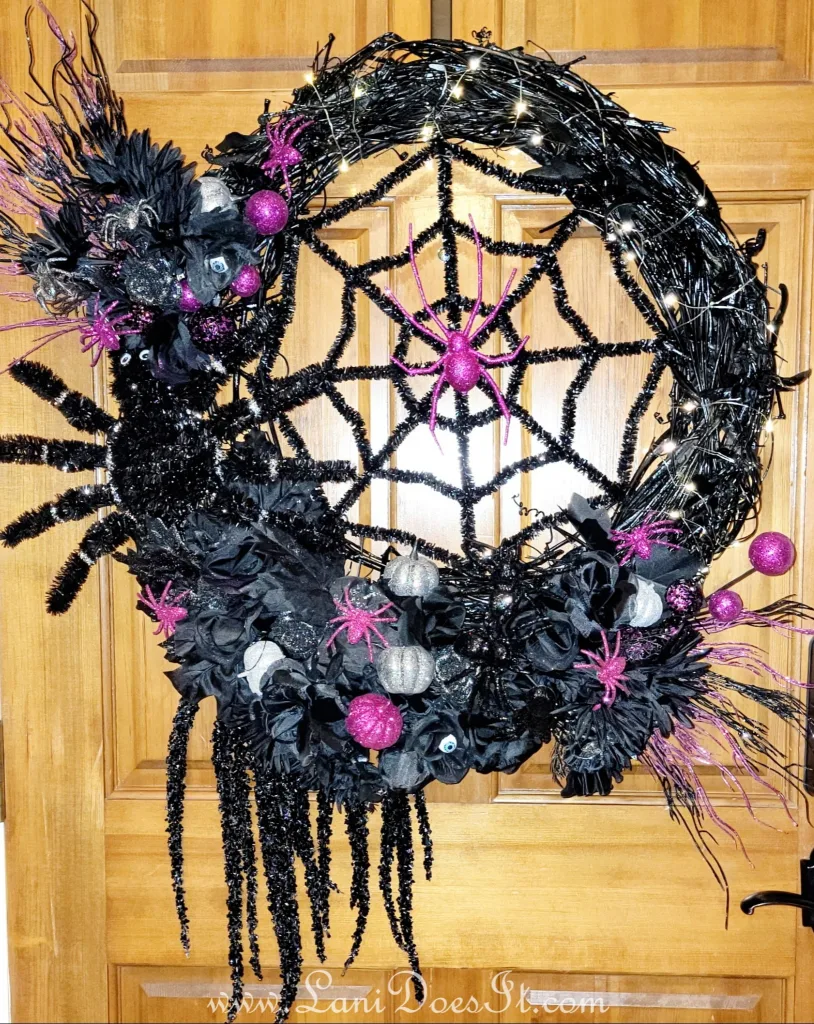
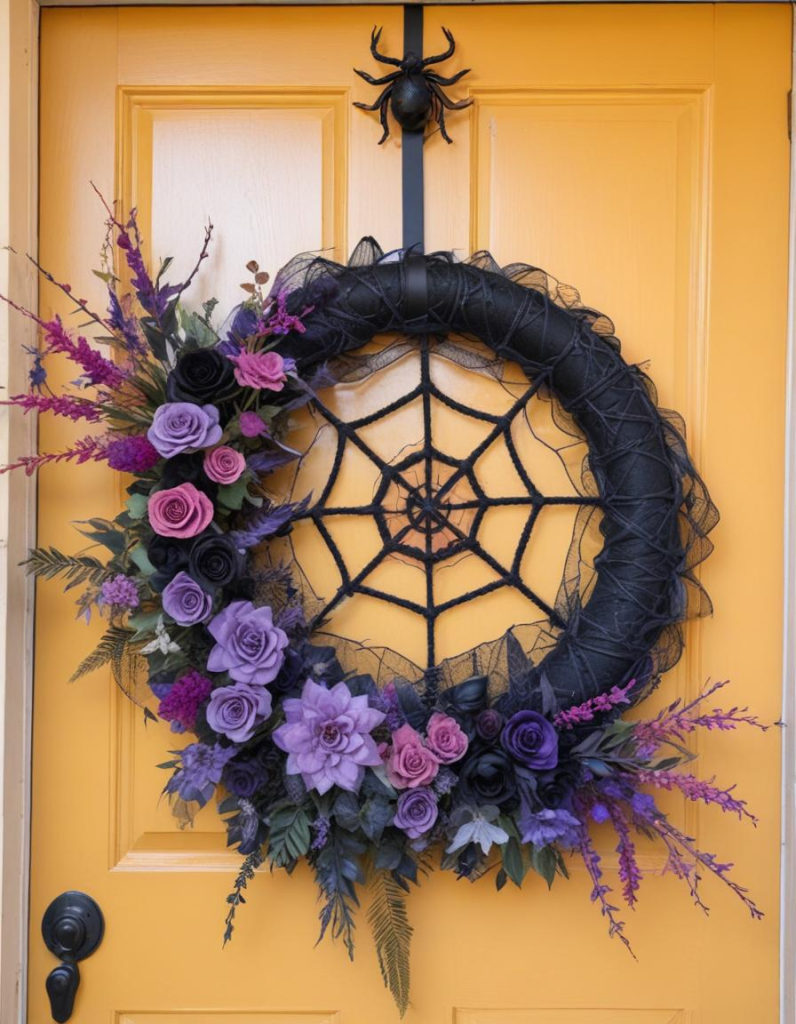
During a recent trip to my local Dollar Tree, I found myself in DIY heaven yall! With Halloween around the corner, I couldn’t resist checking out their spooky selection, and I was thrilled to discover an array of coordinating accessories in black, magenta, and silver. My mind immediately started buzzing with ideas when I saw a giant tinsel spider, glittery flowers, and creepy-cute decorations that came in coordinating colors. To top it off, I had just rescued a large (23 inch) grapevine wreath from my neighbor’s curb—it was in perfect condition, just waiting for a makeover, by the one and only! LOL
With a little creativity and a few budget-friendly finds, I knew I could turn this into a DIY hauntingly chic dollar tree styled Halloween wreath that would be the envy of the neighborhood.
Here’s how I transformed this discarded grapevine wreath into a DIY Dollar Tree styled Halloween wreath:
- You’ll need a grapevine wreath, or a wooden wreath, or foam wreath. I recommend a grapevine for quicker execution and durability, and also very little glue needed. Check out FB marketplace, Amazon or your local craft store for a grapevine wreath.
- Painted my grapevine wreath with Rust-Oleum Black Gloss spray paint, giving it a sleek, modern look that set the tone for the chic and spooky theme. I just sprayed over the wreath as is and only removed what was hanging or out of place.
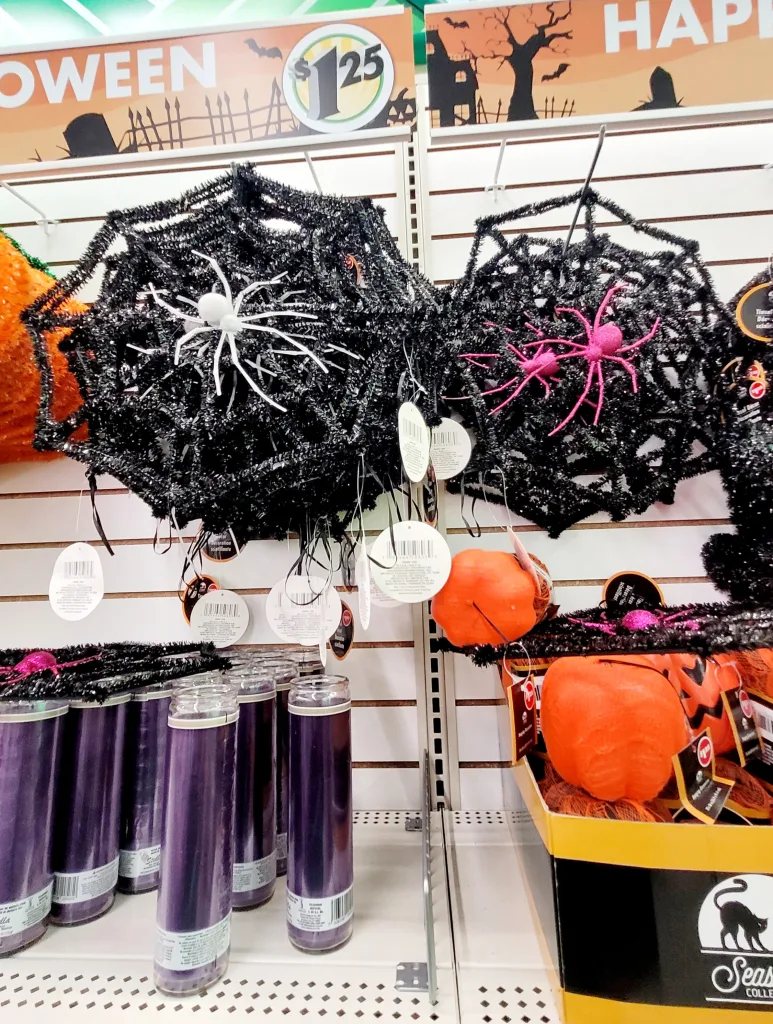
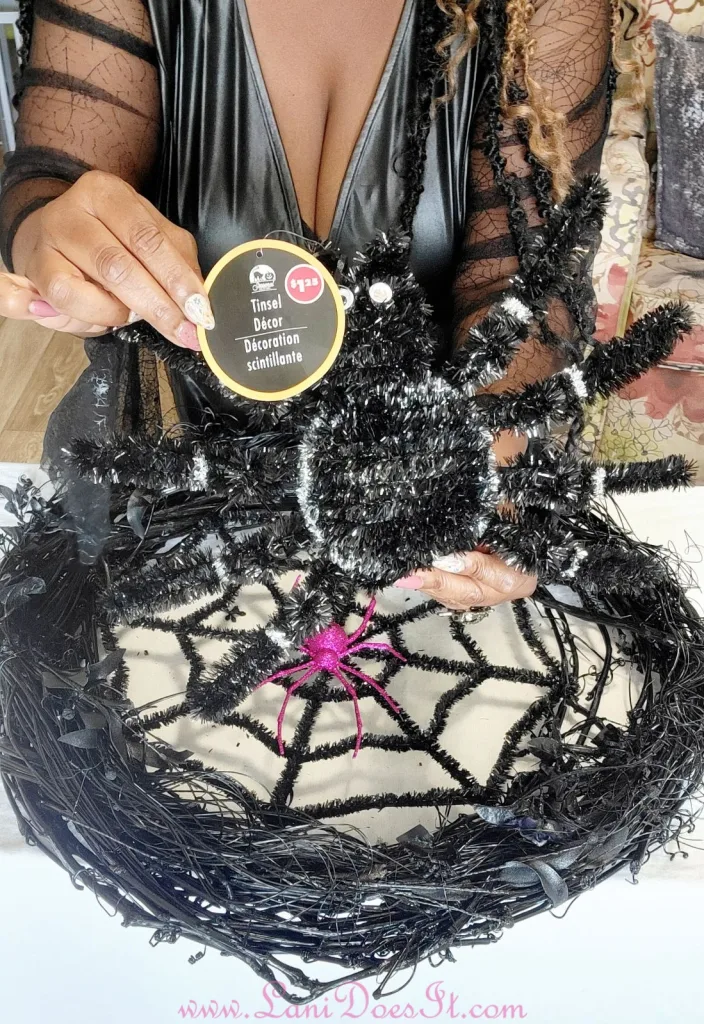
- Placed the Dollar Tree black tinsel spider web in the center of the wreath and secured it with leftover black paper twist ties, making sure it stayed in place.
- Added the giant tinsel spider in my favorite spot, tying it securely to the wreath using its existing loop and twist ties for a striking focal point. You can cut the top of the loop to tie it around the grapevine wreath branches.
- Decorated half of the wreath with silver and black glitter clip-on roses, layered glitter faux maple leaves, magenta and black glitter spiders, glitter faux branches in magenta and black, faux rose flower sprays with eyeballs and spiders, and used a hot glue gun kit for the other glitter spiders and pumpkins that didn’t have clips, creating a beautifully eerie, yet stylish design.
- The key to getting a full wreath is layering the decor closely. I later added fairy lights to half of the wreath.
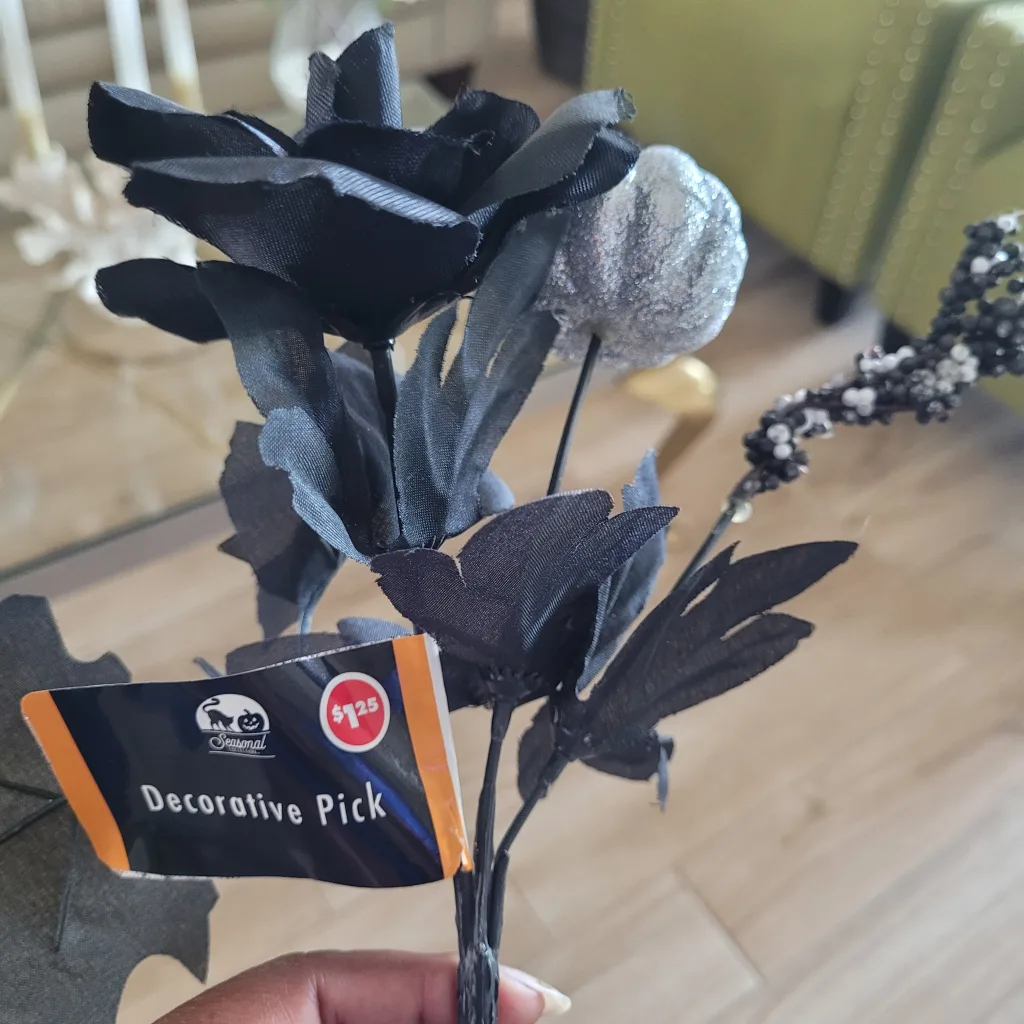
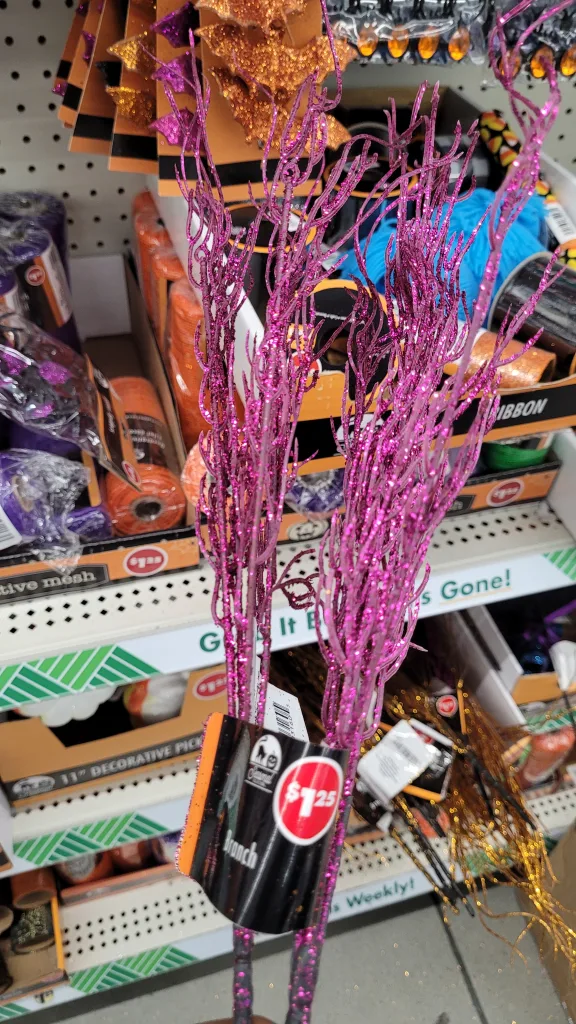


Almost every accessory I used was only $1.25 each at Dollar Tree totaling around $17, and I also spent $8 using a coupon at Michaels (1 glitter multi-spider spray pick and two of the glass like beaded faux Amaranthus stem which were on clearance), proving that you don’t need to spend a fortune to create something fabulous darlings! I didn’t even use all of my decor and it filled out perfectly for the look I was aiming for. I ended up with more than enough supplies and will use what’s left on another Halloween Project. In the end, I spent $25 and will end up with multiple Halloween home decor pieces.
This project was so easy and inexpensive, and the best part was the fun I had along the way! Now, I have a hauntingly chic spider Halloween wreath that’s perfect for welcoming trick-or-treaters and setting a spooky, stylish tone for the season.
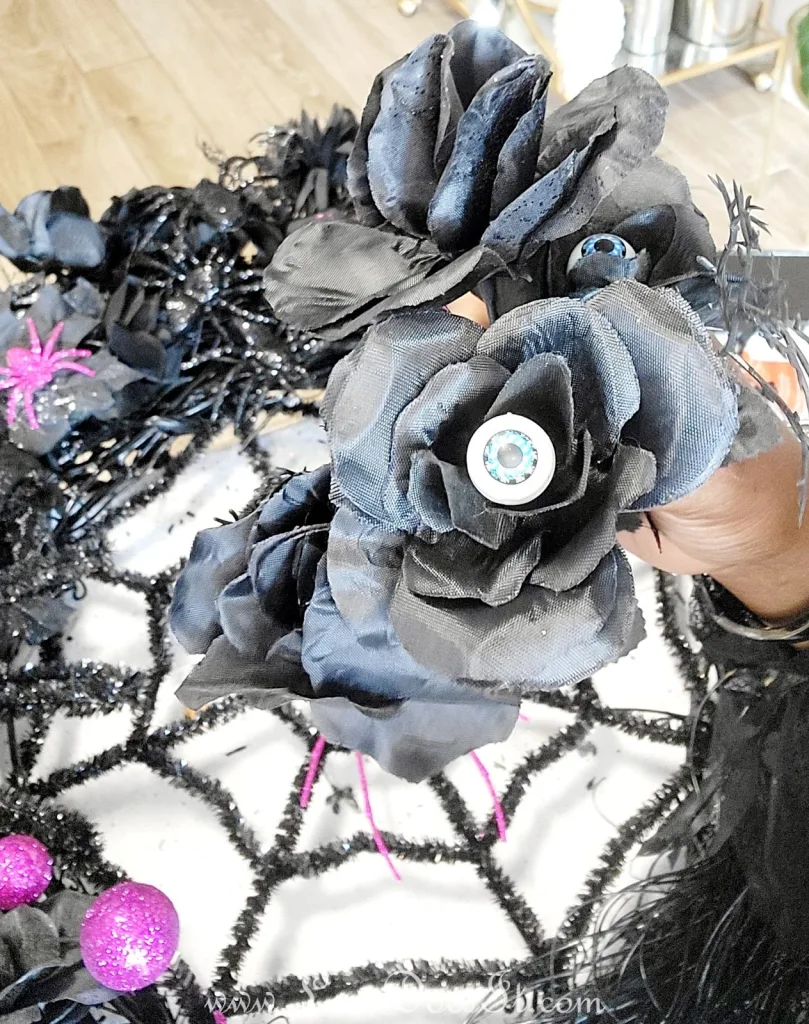
These eyeball roses were the icing on the cake for the creepiness for you since spiders are my friend and I don’t find them creepy at all. I went to about 3 different Dollar Tree stores near my home and I saw all of the same decor at every store, however in different colors. If you’re near Katy, check out the newest Dollar Tree on I10 (Katy Freeway) Just west of 99. It is huge and has the best variety. I was very surprised to see all of the Halloween decor and crafts throughout the entires store.
Check out my steps to get this look at the video above. It’s a pretty quick video, but it’s pretty self-explanatory, only because it’s a grapevine wreath and you’re pretty much just sticking everything inside and layering the Dollar Tree Halloween Decor. You can also use a wooden wreath or a foam wreath. Both are sold at Dollar Tree, however in smaller sizes.
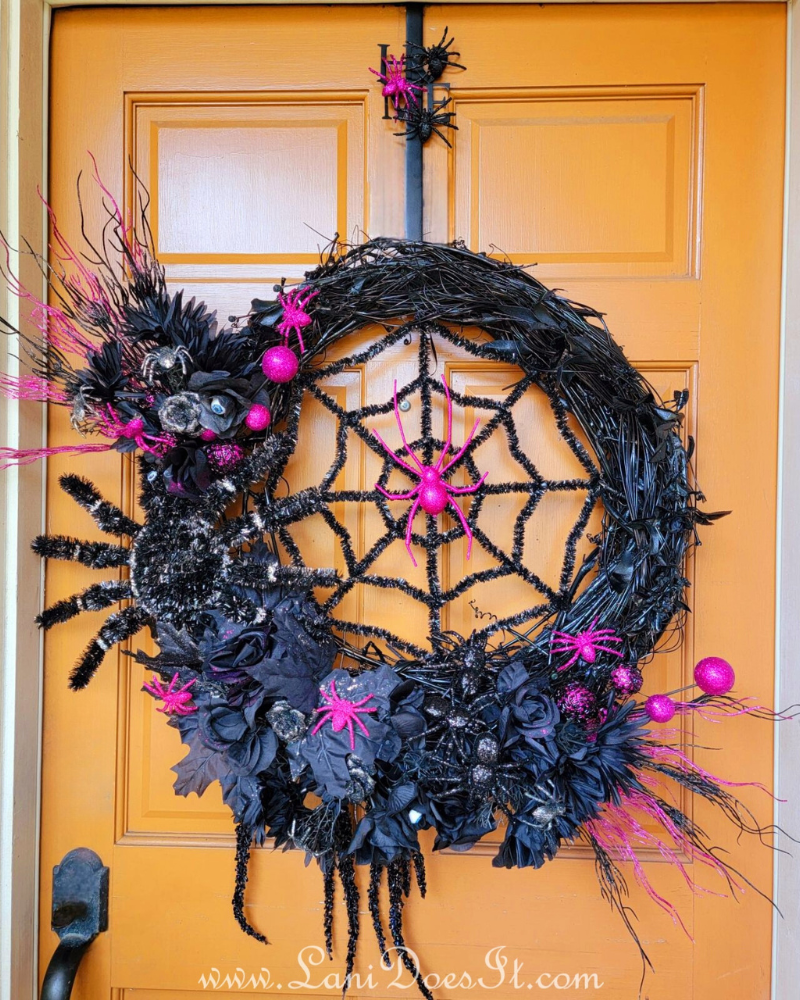
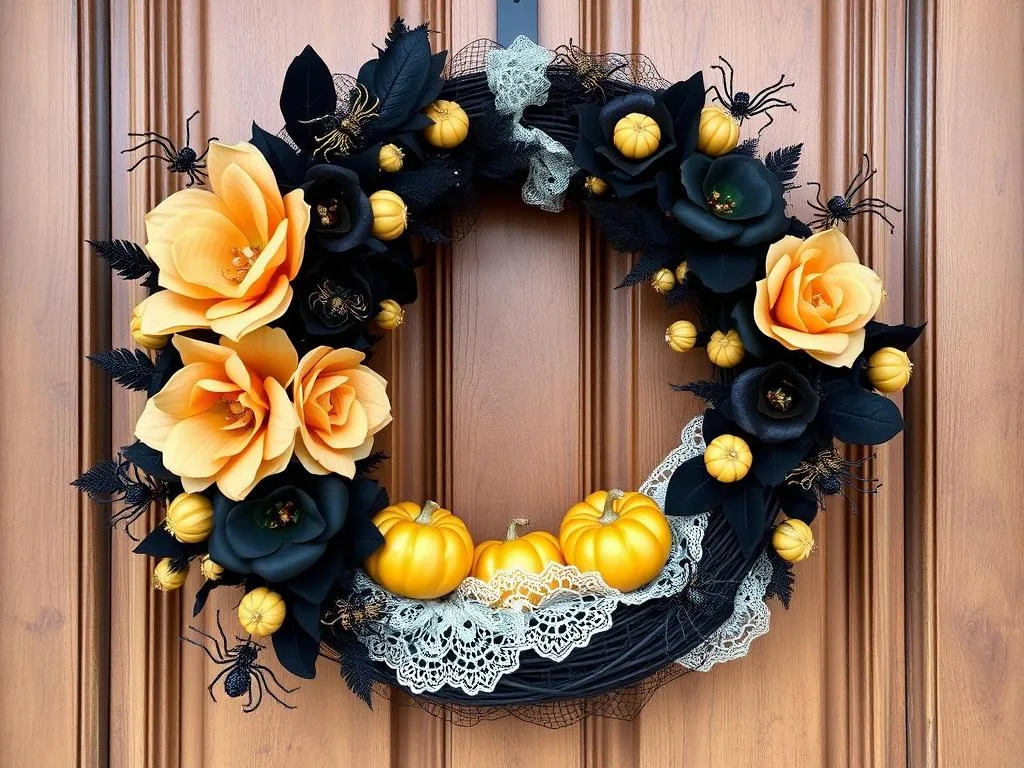
Below is the end results of my wickedly chic Halloween spider wreath. I added the other Amaranth, a few glittler pumpkins, and some fairy lights. I absolutely love it! And funny how I never really liked the color of my door until now because the color actually pops now and looks so fabulous with this dark Halloween wreath on it.
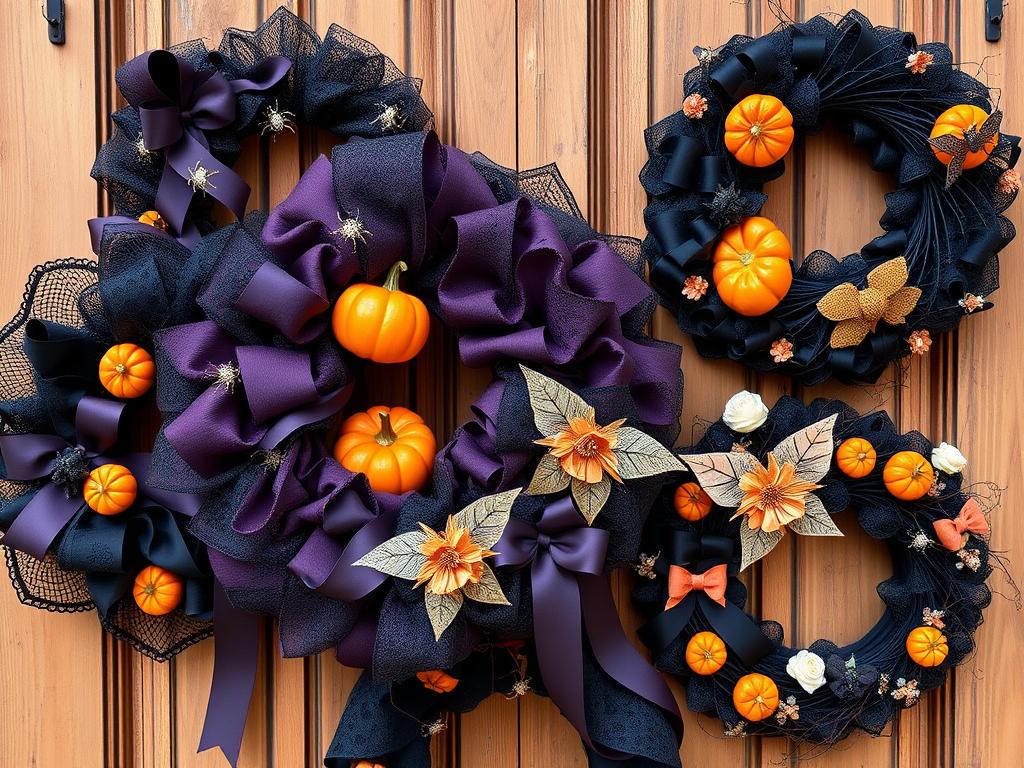
Dollar Tree Decor That Looks Anything But Cheap
Yall, I promise you that decorating with Dollar Tree crafts and flowers doesn’t have to look cheap—in fact, it can look downright chic! It’s all about how you mix and match those pieces and get creative with your arrangements. Picture this: a gorgeous DIY wreath made with lush faux blooms, a touch of greenery, and a few metallic accents. The key is layering textures and playing with color palettes that complement your style. Use neutral tones or soft pastels for an elegant feel, or go bold with rich, deep hues for a more luxurious vibe. And don’t be afraid to upcycle! A little spray paint or a few embellishments can instantly elevate even the simplest items.
With a few clever techniques, like mixing faux florals with real greenery or adding some ribbon for that extra flair, your Dollar Tree finds can look like they belong in a high-end boutique. The best part? You get to create something that’s uniquely yours, all while staying on budget. So go ahead, grab those Dollar Tree blooms, and let your creativity run wild—you’ll be amazed at how stunning and sophisticated your decor will turn out!
Preparing & Shopping For Your DIY Halloween Door Wreath
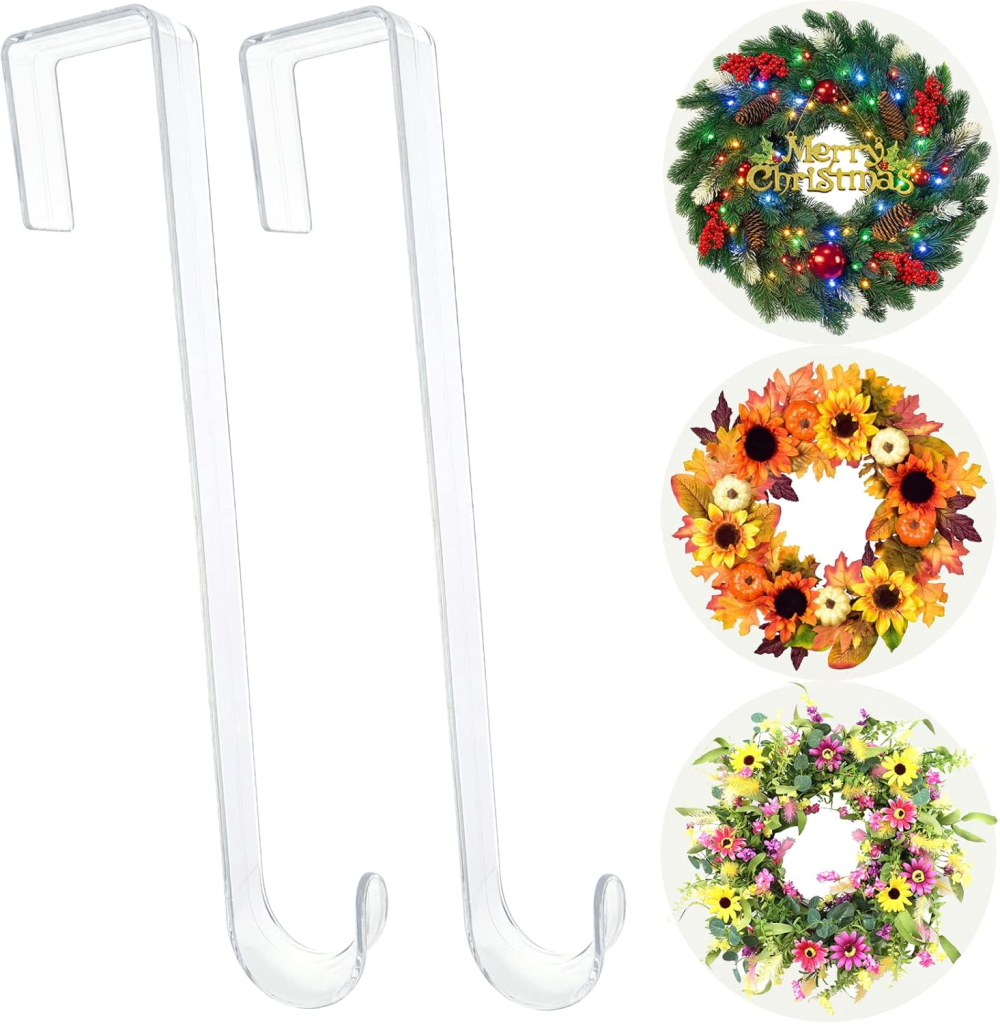
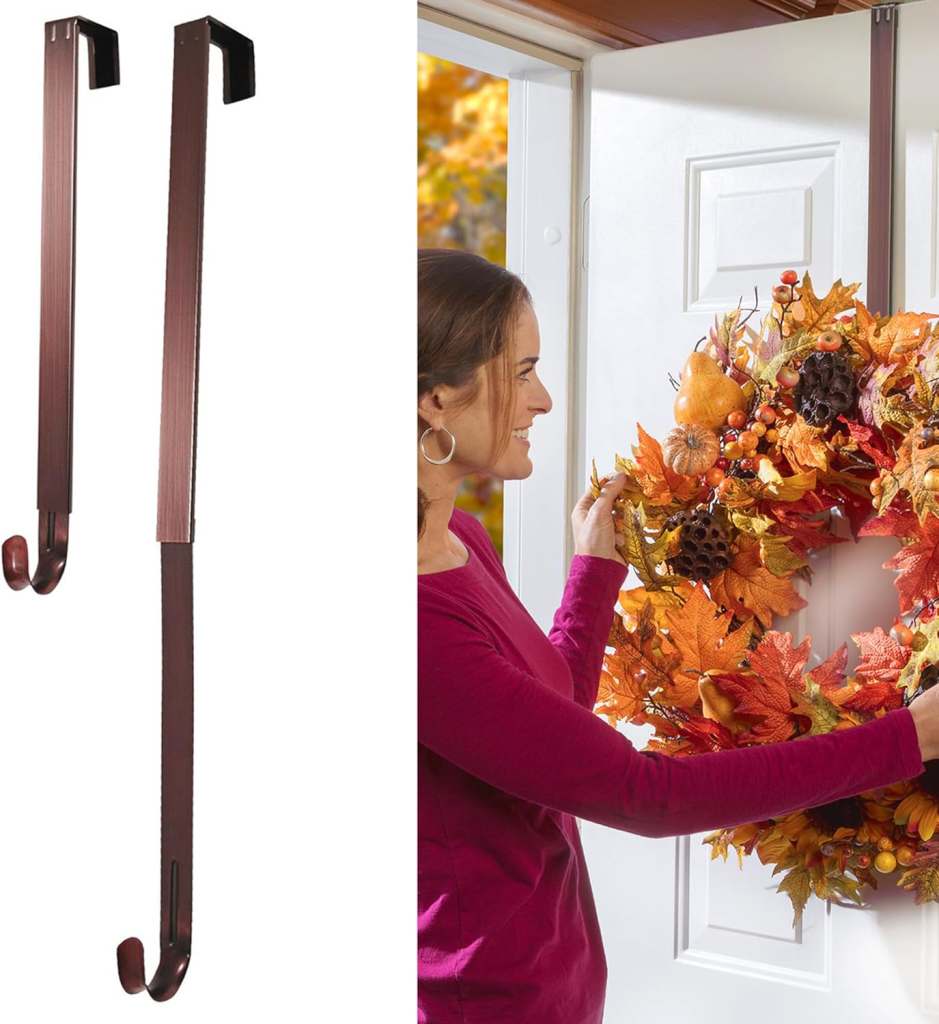
Getting ready to craft your own DIY Halloween door wreath is half the fun! Start by deciding where you want to place your wreath—whether it’s on your front door to greet trick-or-treaters or inside to add some spooky flair to your entryway. Once you’ve got the perfect spot picked out, make sure you have a wreath hanger handy. If you don’t already have one, now’s the time to grab one while you’re shopping. Speaking of shopping, whether you prefer browsing your local stores or getting a jump on things by ordering online, it’s smart to start early. This way, you’ll have plenty of time to gather all the spooky and chic accessories you need without the last-minute rush.
Budgeting is key when planning your DIY Halloween wreath. Think about how much you want to spend and stick to it—it’s totally possible to create something stunning without overspending! I’ll be sharing several DIY Halloween Decor Wreath ideas that are not only budget-friendly, but also easy to make, so you’ll have plenty of inspiration to get started. As you plan, remember that a little creativity can go a long way. Be sure to keep reading or save this post for later, and don’t forget to share it with friends. Spreading the word helps me continue bringing you more fun, affordable, and creative DIY projects! Thank you in advance!
DIY Upcycled Old Halloween Wreath
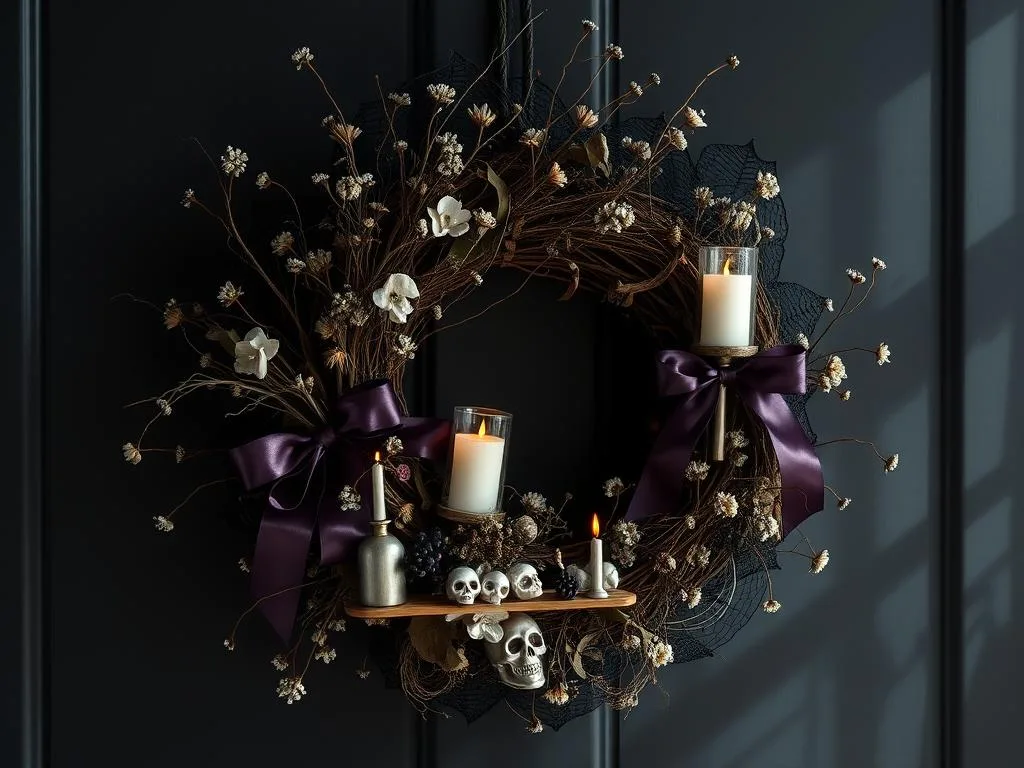
Don’t let those old Halloween wreaths gather dust in the attic this year! Instead of splurging on a brand-new wreath, why not breathe new life into the one you already own? With a little creativity and a few modern accessories, you can transform last year’s wreath into something fresh and fabulous for this Halloween season. Upcycling isn’t just a budget-friendly option—it’s also a fun and rewarding way to get those creative juices flowing and make something truly unique for your home.
Start by digging up any old wreath and taking a good look at what you’ve got. Whether it’s a bit faded or just doesn’t quite match your current style, there’s always potential. Keep in mind, even an old green Christmas wreath can be turned Halloween with just a little paint. Strip off any elements that feel outdated or worn, and think about how you can refresh the base with a new color or finish. A quick spray of paint can work wonders, instantly giving your wreath a sleek, modern look. And don’t forget to dive into your stash of leftover decorations—those little trinkets from previous years can be the perfect additions to your upcycled wreath.
Now for the fun part—adding in those small, modern or trending Halloween accessories! Head to your favorite discount store or even browse your craft drawer for trendy accents like glittery spiders, metallic skulls, or vibrant faux florals. These little touches will help bring your old wreath into the present, giving it a fresh twist without breaking the bank. And because you’re reusing what you already have, you’ll not only save money, but also create a one-of-a-kind piece that reflects your personal style.
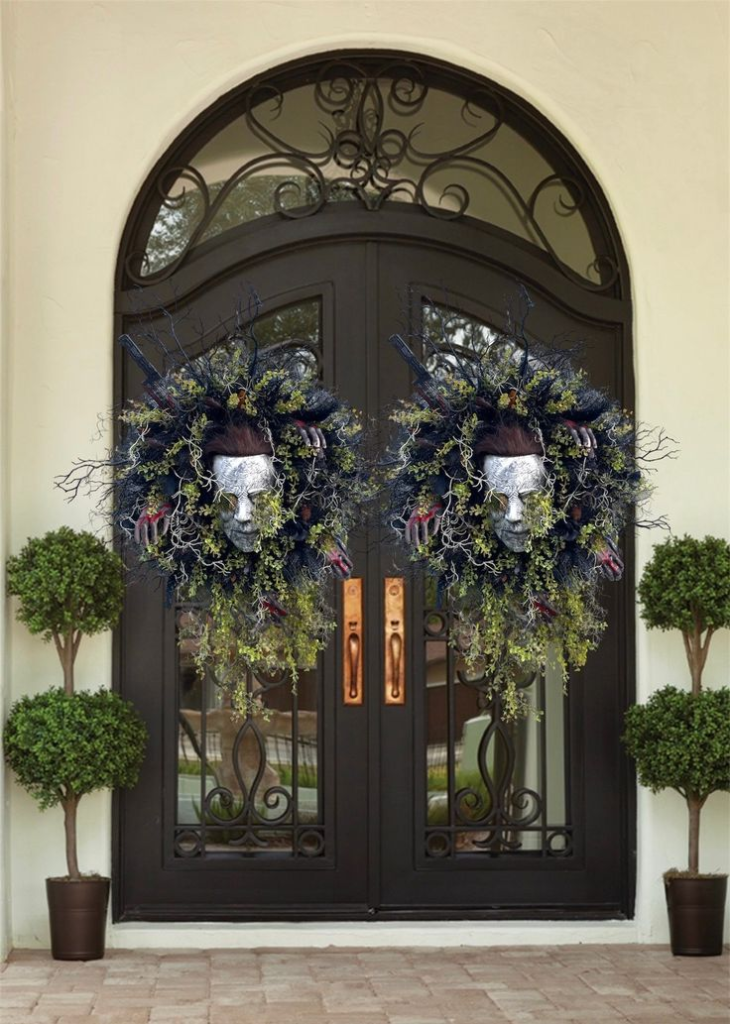
For example, the upcycled wreath in the photo above is giving us elegant Halloween wreath that is adorned with delicate black lace leaves, shimmering deep eggplant ribbons, and eerie silver accents, featuring a mixture of dried flowers, twigs, and vintage ornaments like tiny skulls and glowing candles, all set against a dark, moody background with soft shadows, evoking a sense of haunting beauty.
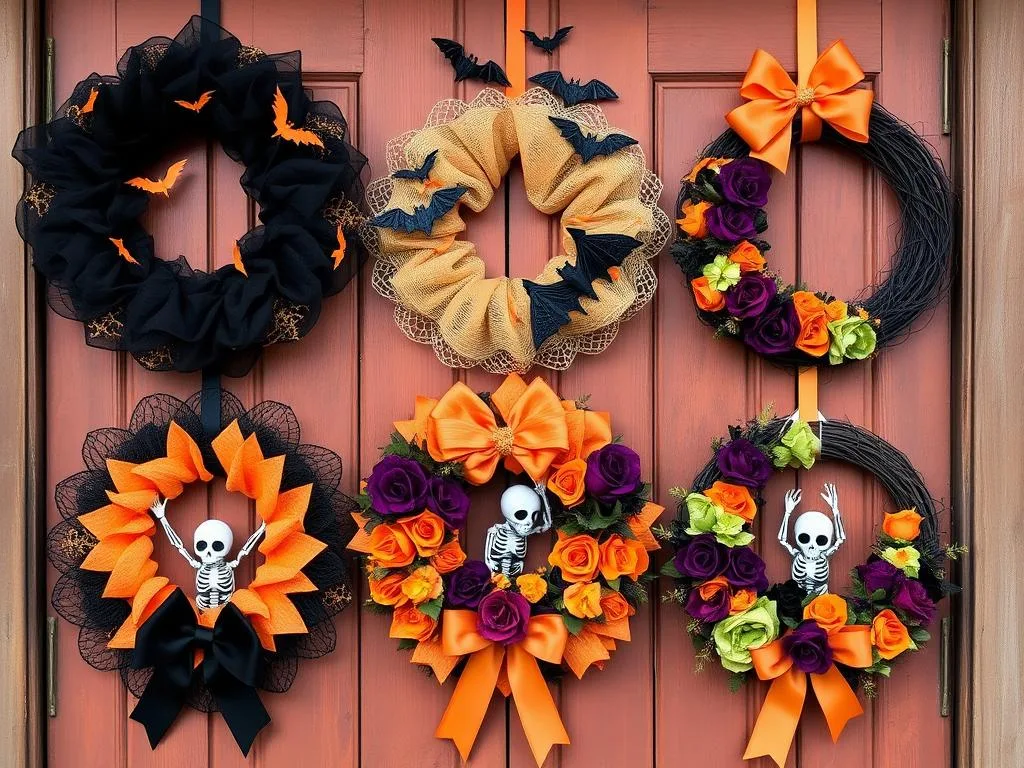
11 Different Styles Of Easy Chic DIY Halloween Wreaths
Ready to add a personal touch to your Halloween decor? Let’s explore 11 chic styles of easy DIY Halloween wreaths. These styles range from glamorously gothic to autumnal elegance. You can personalize these ideas using elements that speak to you.
Think about textures and colors that excite you. Whether you like dark, rich hues or bright, festive colors, feel free to experiment. Remember to assess you old decorations first before you check out stores like Jo-Ann Stores, Hobby Lobby or Michael’s for unique supplies. Turning familiar materials into new wreaths is both satisfying and eco-friendly.
No matter your crafting skill level, these 11 ideas are easy to follow. They’re perfect whether you’re a beginner or a pro at making wreaths. So, grab your glue guns, ribbons, and faux foliage. Let’s make some enchanting DIY Halloween wreaths that will be the highlight of your door!
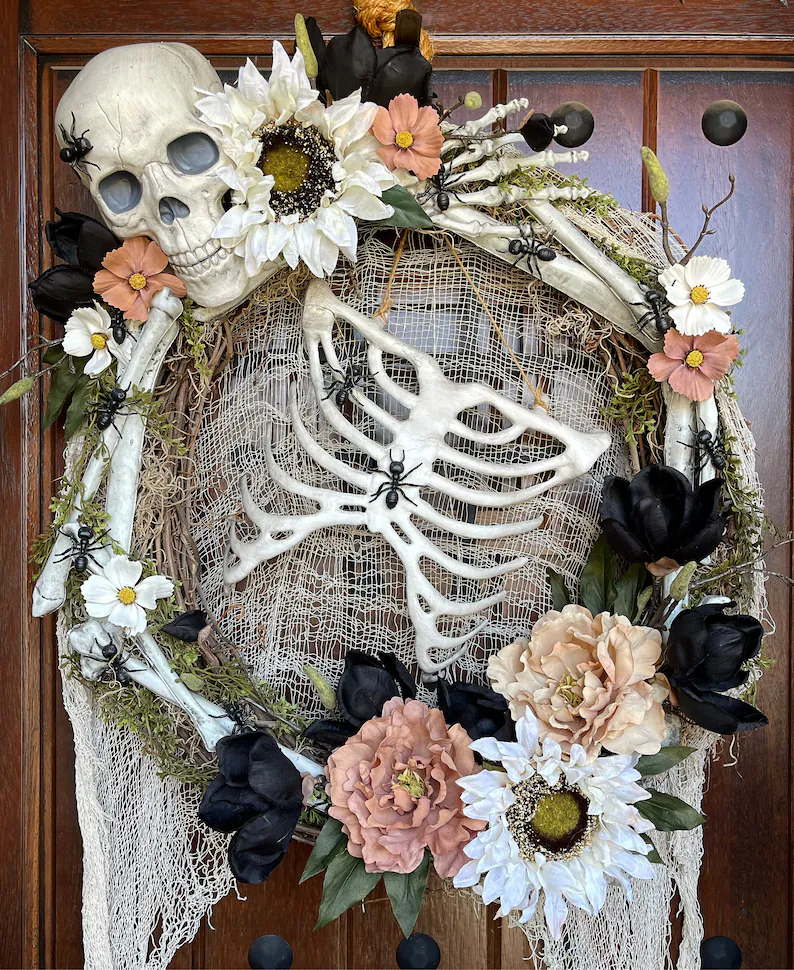
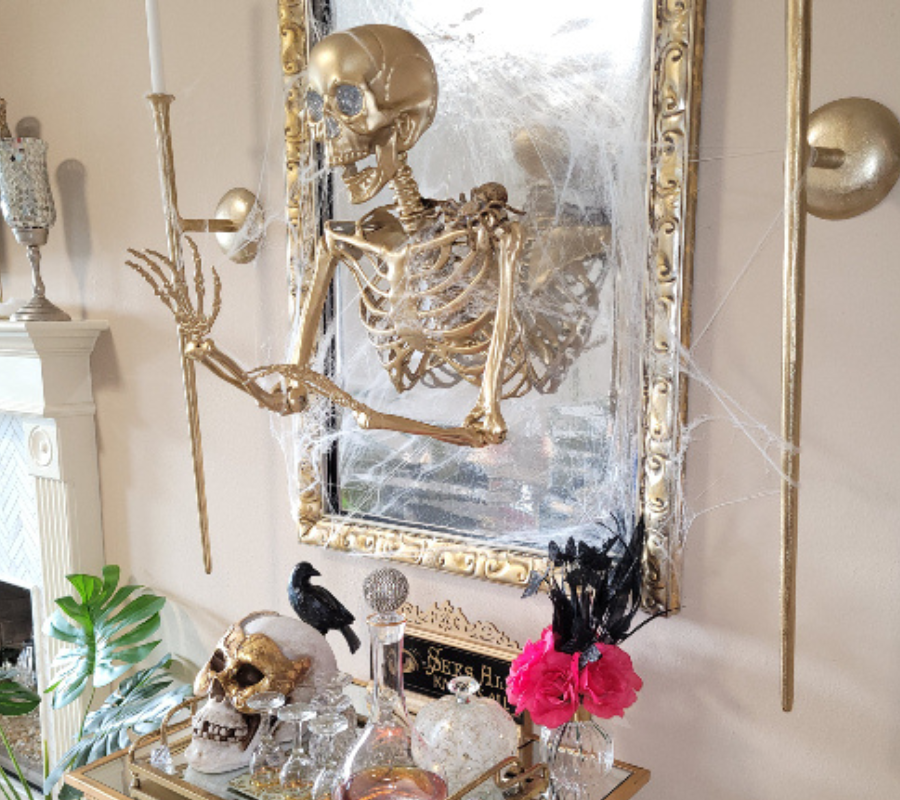
Skeleton Torso DIY Wreath
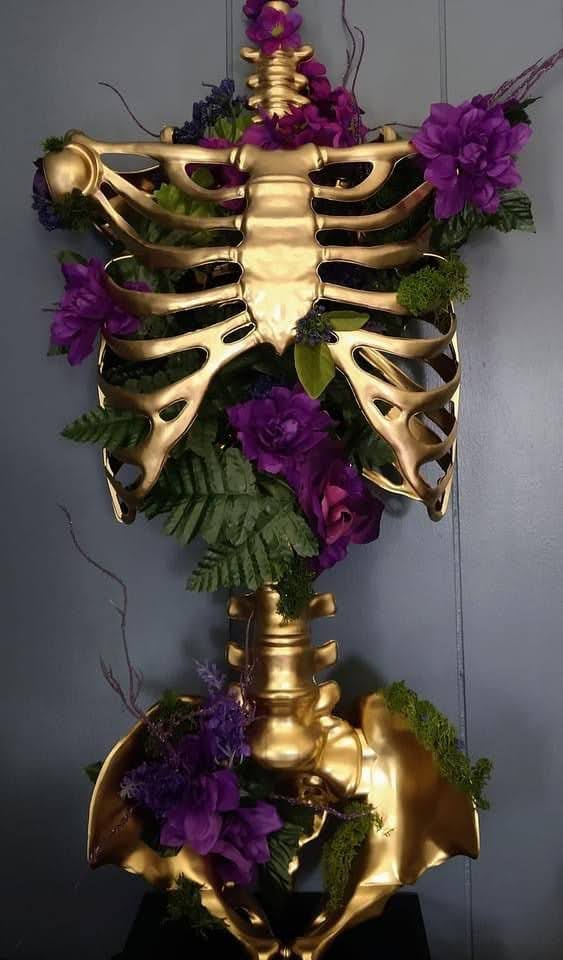
How about using a plastic skeleton torso to stand out with 3D Halloween Skeleton wreath. Get this look with plastic skeleton torso, metallic gold spray paint, a glue gun kit, moss, ferns, faux branches/twigs and elegant artificial florals. I would SO add several glitter spiders to this if I go ahead and dupe this one some day!
Foam DIY Halloween Wreath
There’s something incredibly satisfying about crafting your own Halloween decor, especially when it’s easy on the wallet and big on creativity. One of the best-kept secrets for budget-friendly Halloween decorating is the DIY foam wreath. You may not need much glue because most picks and florals can stick snug through the foam.
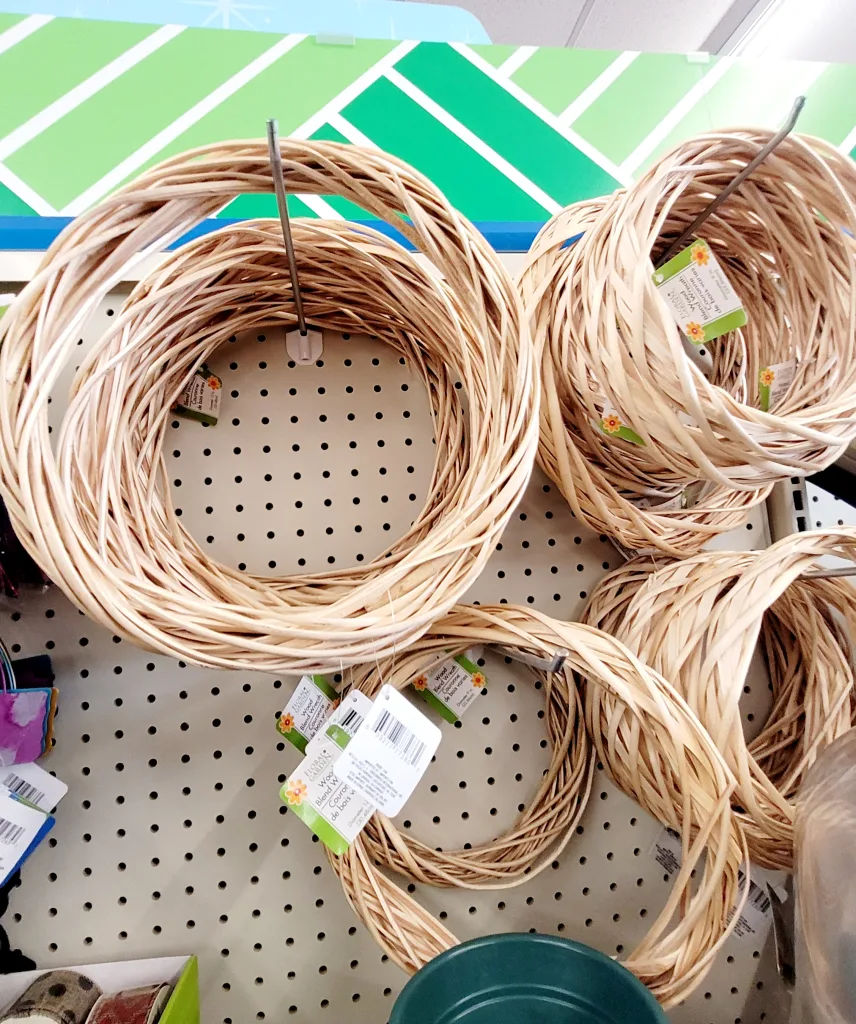
Straw DIY Halloween Wreath

You’re certain to find straw wreaths at your local craft stores on on Amazon for a very good price. Get this look with a flat straw wreath, black semi-gloss spray paint, a glue gun, variation of pumpkins, straw, and your favorite dried flowers. This wreath could be completely fall transitioning into Halloween by adding a bat like the photo, or even skulls and spiders.
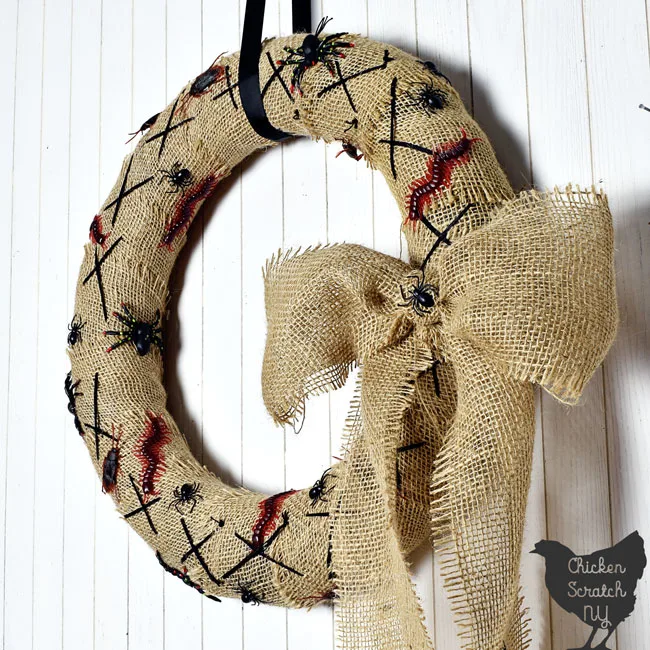
Straw wreaths are a good choice for being the most creative because you can wrap them or glue just about anything to them. This straw wreath covered in burlap below is a cool, quick, inexpensive DIY Halloween Wreath that can be done by even kids or the entire family for a fun project.
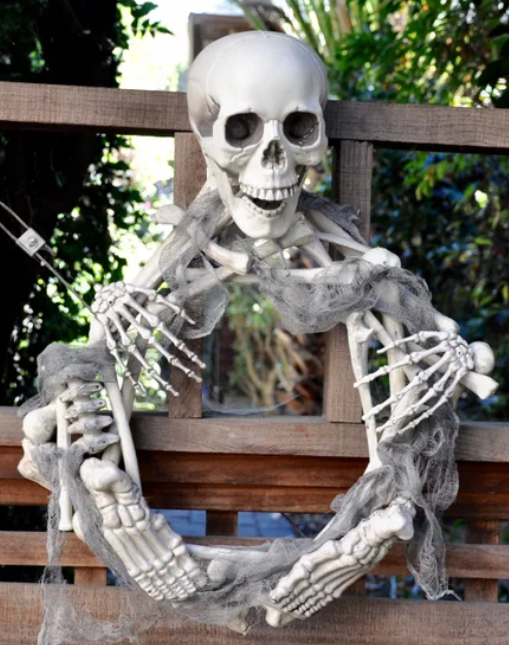
Floral Hoop DIY Halloween Wreath

Going with an floral hoop for your DIY Halloween wreath is an excellent choice for simple elegance and minimalist design. For this project you’ll need a large hoop, a variety of feathers, a plastic skull, ribbon and zip ties/twist ties. This wreath is very lightweight and makes a fabulous DIY gift for any occassion and design theme.
Grapevine DIY Halloween Wreath
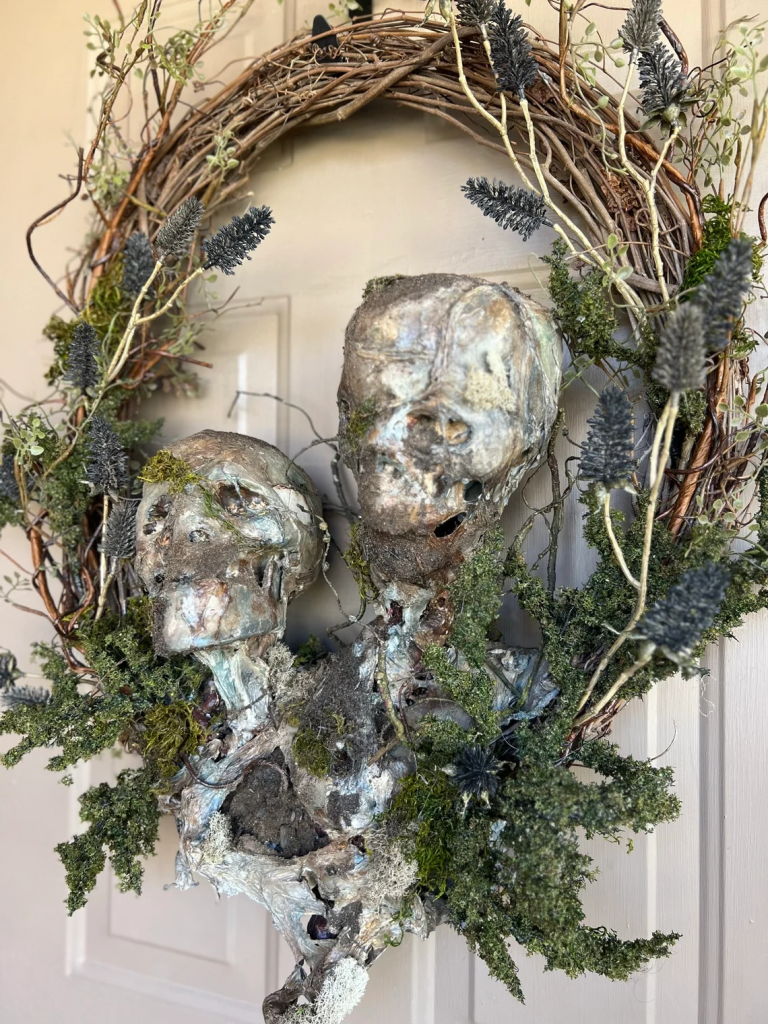
This wreath is so freakin creepy! I almost didn’t post it because it’s like I can’t stand looking at it, but at the same time it’s alluring and even romantic at the same time. The white background, gives it even an elegant look. The designer used of course the grapevine wreath, variations of moss, dirt/mud, faux phalaris grass or artificial thistle and two skulls. She used a technique called “corpsing” for the skulls. Corpsing a skull will require more supplies other than I listed, and this will depend on the style of Corpsing you choose to go with.

Grapevine wreaths are my go to for DIY wreaths. I like that they are somewhat lightweight, but also require less glue. Hot glue is quick, but over time humidity and other elements causes it to expand and loosen. The the grapevine branches are great to stick things into or wrap around, so to me, grapevine wreaths are more resilient, thus standing the test of time.
Skeleton Bones DIY Halloween Wreath
Using just the bones, you can create a wickedly fabulous wreath and then name him Sir Bones. For this project, all you’ll need is a hot glue gun kit, black cheesecloth, skeleton and bones, and your wreath hanger.
Wire Frame DIY Halloween Wreath

Wire wreath frames come in a variety or shapes and sizes, such as pumpkins and witches hats. They’re lightweight, inexpensive and versatile. Wire wreath frames can also often find them sold in milti-pack of various sizes.
The wreath above only required the large wire ring, rolls of decorative mesh, decorative spiders and a hot glue gun kit. Check out their tutorial at the link above and below.
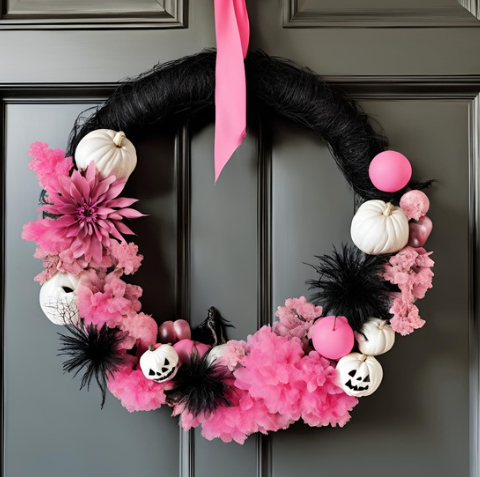
Wire Coat Hanger DIY Halloween Wreath
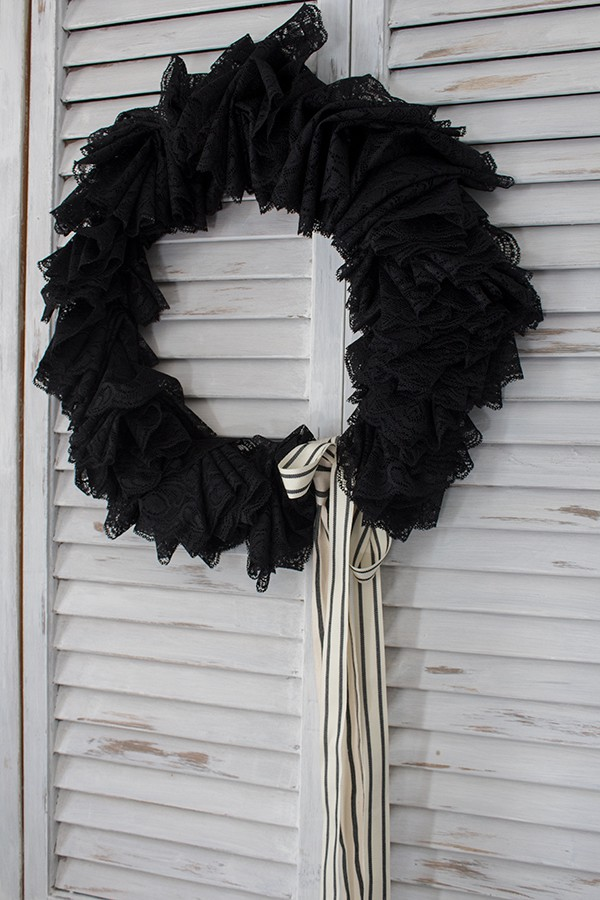
I believe wire hangers are still sold in the stores because they come on all my drycleaning. Eitherway, most of us have at least one somewhere in the house already. If so, try a DIY Coat Hanger Halloween Wreath. The above wreath was simple to create with just three supplies, a wire coat hanger, ribbon and lace.
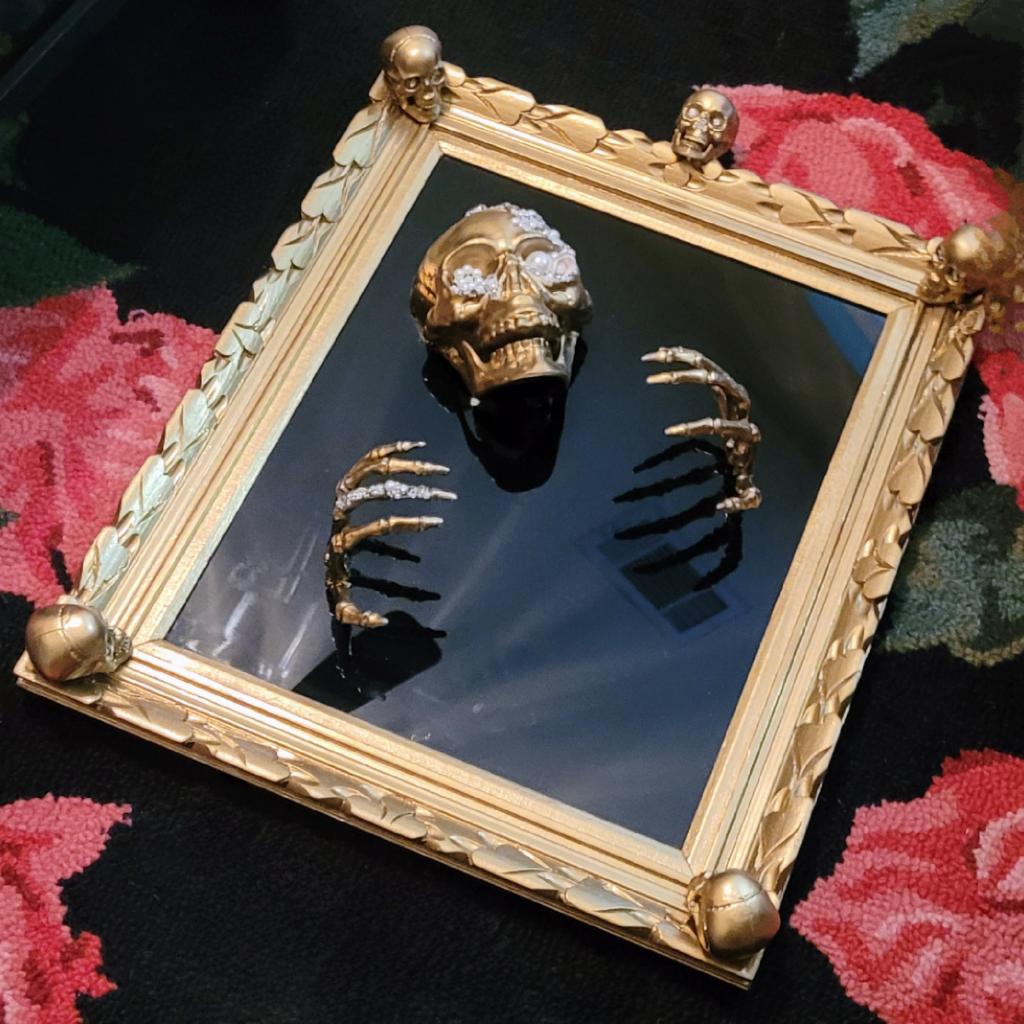
Picture Frame DIY Halloween Wreath
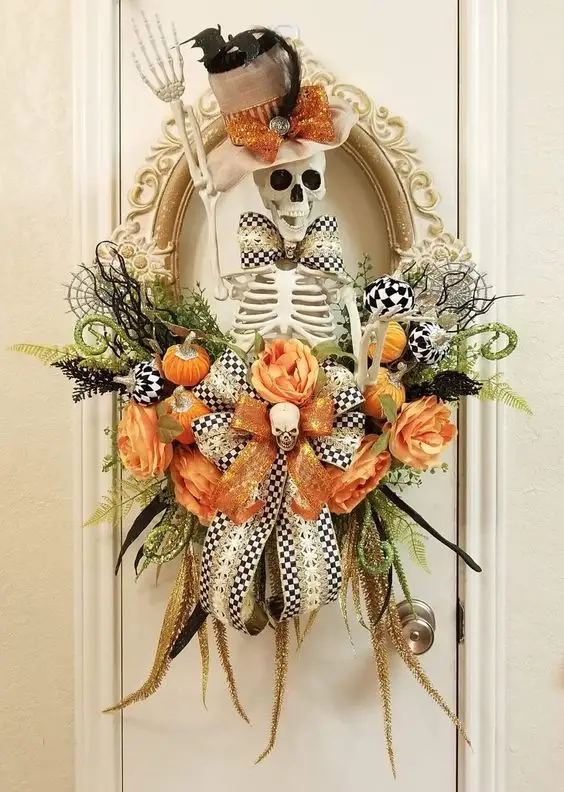
Using a old picture frame or mirror frame to create a DIY Halloween wreath is another way to make your wreath authentically your own and unique. If you don’t have a frame on hand, you can find frames online of course, but I recommend Facebook Marketplace and Hobby Lobby clearance section.
Get the look above with a ornate oval frame, shop for a skeleton based on the size of the frame, ribbons, faux or dried amaramth florals, faux ferns, glitter Halloween picks, velvet pumpkin picks and a top hat for your skeleton. Absolutely a fun project!
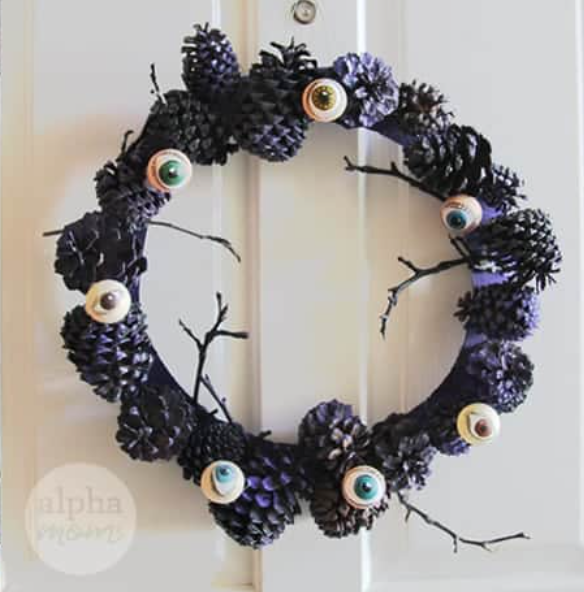
Cardboard DIY Halloween Wreath

Cardboard is so easy to come by, especially with Amazon deliveries. The above wreath is simply black tissue paper, cardboard ring, clear fast drying tacky glue and a pre-looped glitter spider.
The project below requires primarily cardboard, pinecones, branches, eyeballs and glue. Check out the link below the photo for the tutorial.
Tire Rim DIY Halloween Wreath
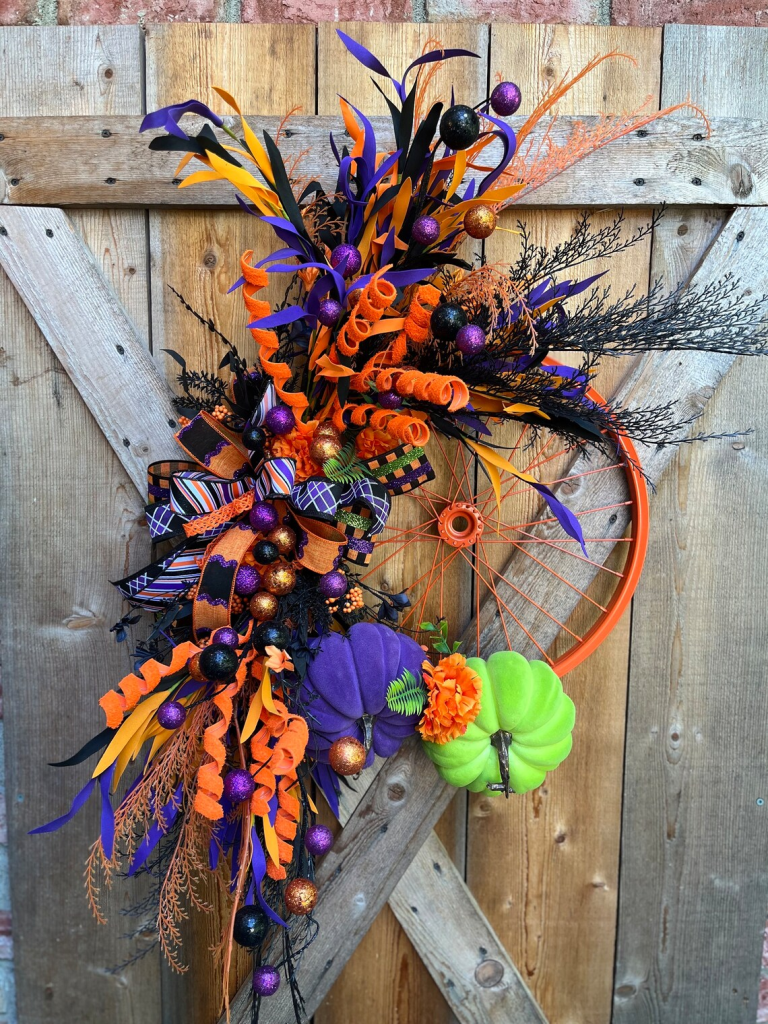
Transform an old bike tire rim into a stunning Halloween door wreath and bring a touch of nostalgia and creativity to your home decor! Imagine repurposing a beloved, no longer-used bike part and giving it new life with vibrant fall colors like greens, blues, oranges, and purples. Adding elegant Halloween florals and charming ornaments in these bright hues creates a modern, eye-catching look that’s perfect for the season. To top it all off, drape a cozy flannel ribbon around the wreath for that perfect blend of rustic charm and festive flair.
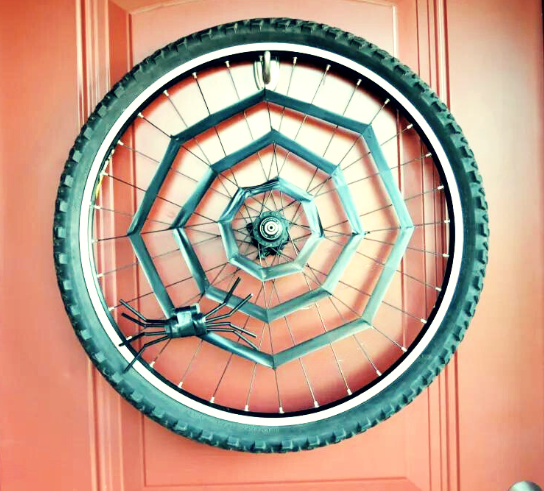
The above tire rim was made of a tire, electric tape and black bike tubing for the spider. Super cool! This project is not only a fun way to celebrate Halloween, but it also honors memories of adventures past, making your wreath a unique and heartfelt centerpiece. Get ready to enjoy the crafting process and the delightful result that will welcome guests with both style and a sprinkle of nostalgia!
Conclusion

All of these DIY Halloween Wreath ideas are really to inspire you and to be a guide, however, using your own style and creativity. Most importantly, it’s a must you have fun while doing DIY projects.
You’ve made it to the end friend of my Wickedly Chic Halloween Wreaths You’ll Want to Craft Right Now blog post, so I certainly hope you’ve been inspired.
Thanks for stopping by and wishing you a fabulous Halloween this year!
READ ME NEXT | DIY Haunted Skeleton Wall Mirror Tutorial: https://lanidoesit.com/how-to-diy-your-own-haunted-gold-skeleton-wall-mirror/
![]()