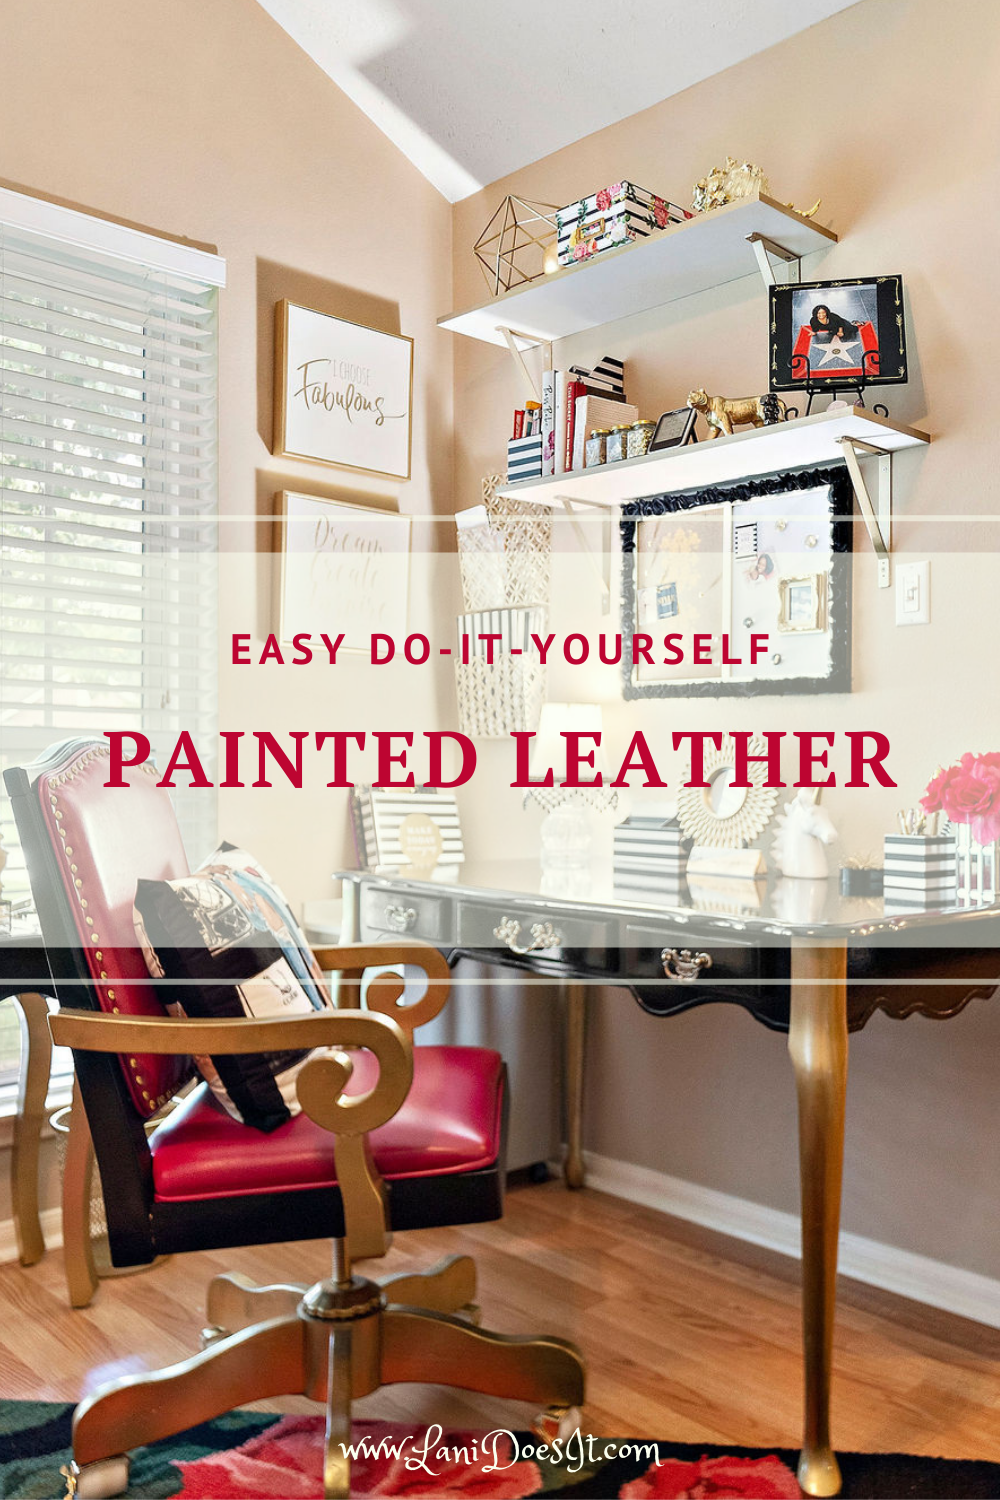
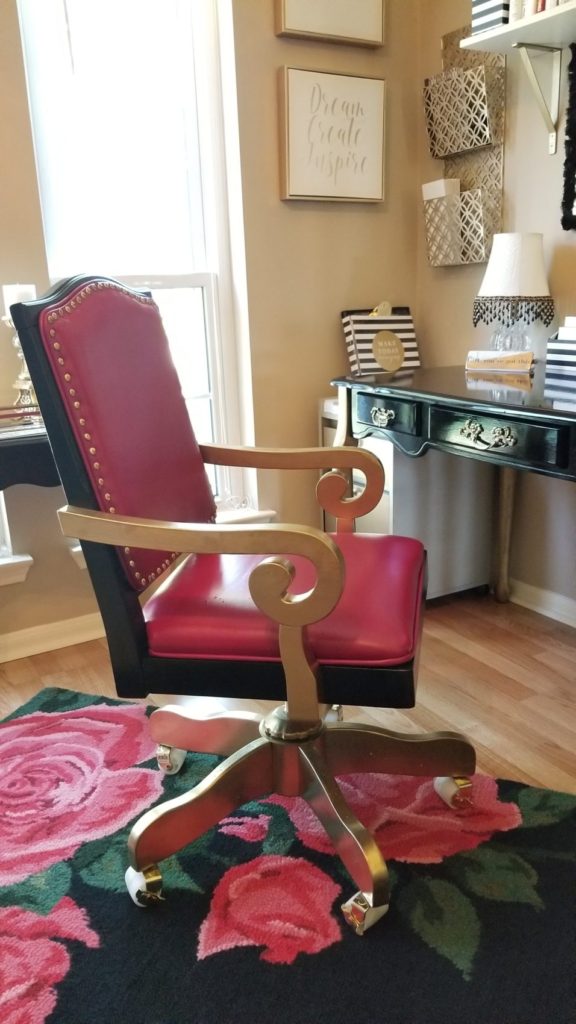
This is my most ABSOLUTE favorite project thus far this year! I found this chair on app LetGo for $20. I am in love at first sight with this chair and the vision I have in mind for it.
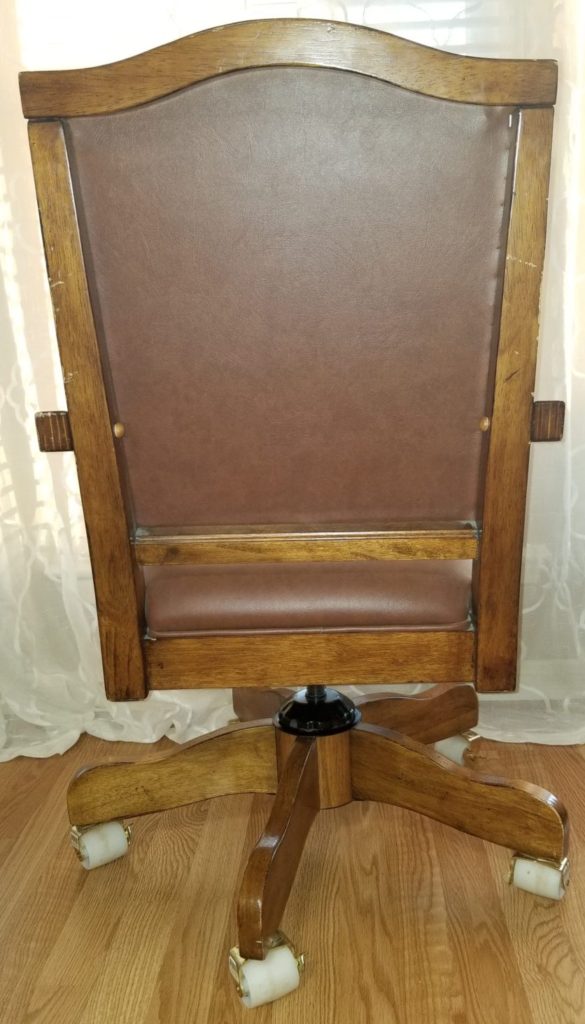
So this is the photo of the chair below. My vision for this chair is to reupholster from brown leather to a dark berry leather with gold and black wood and trimmings. I could not find the color leather I envisioned. I looked all over Houston…literally. So after a little research I decided to dye it.


My First Time Coloring Leather with Dye
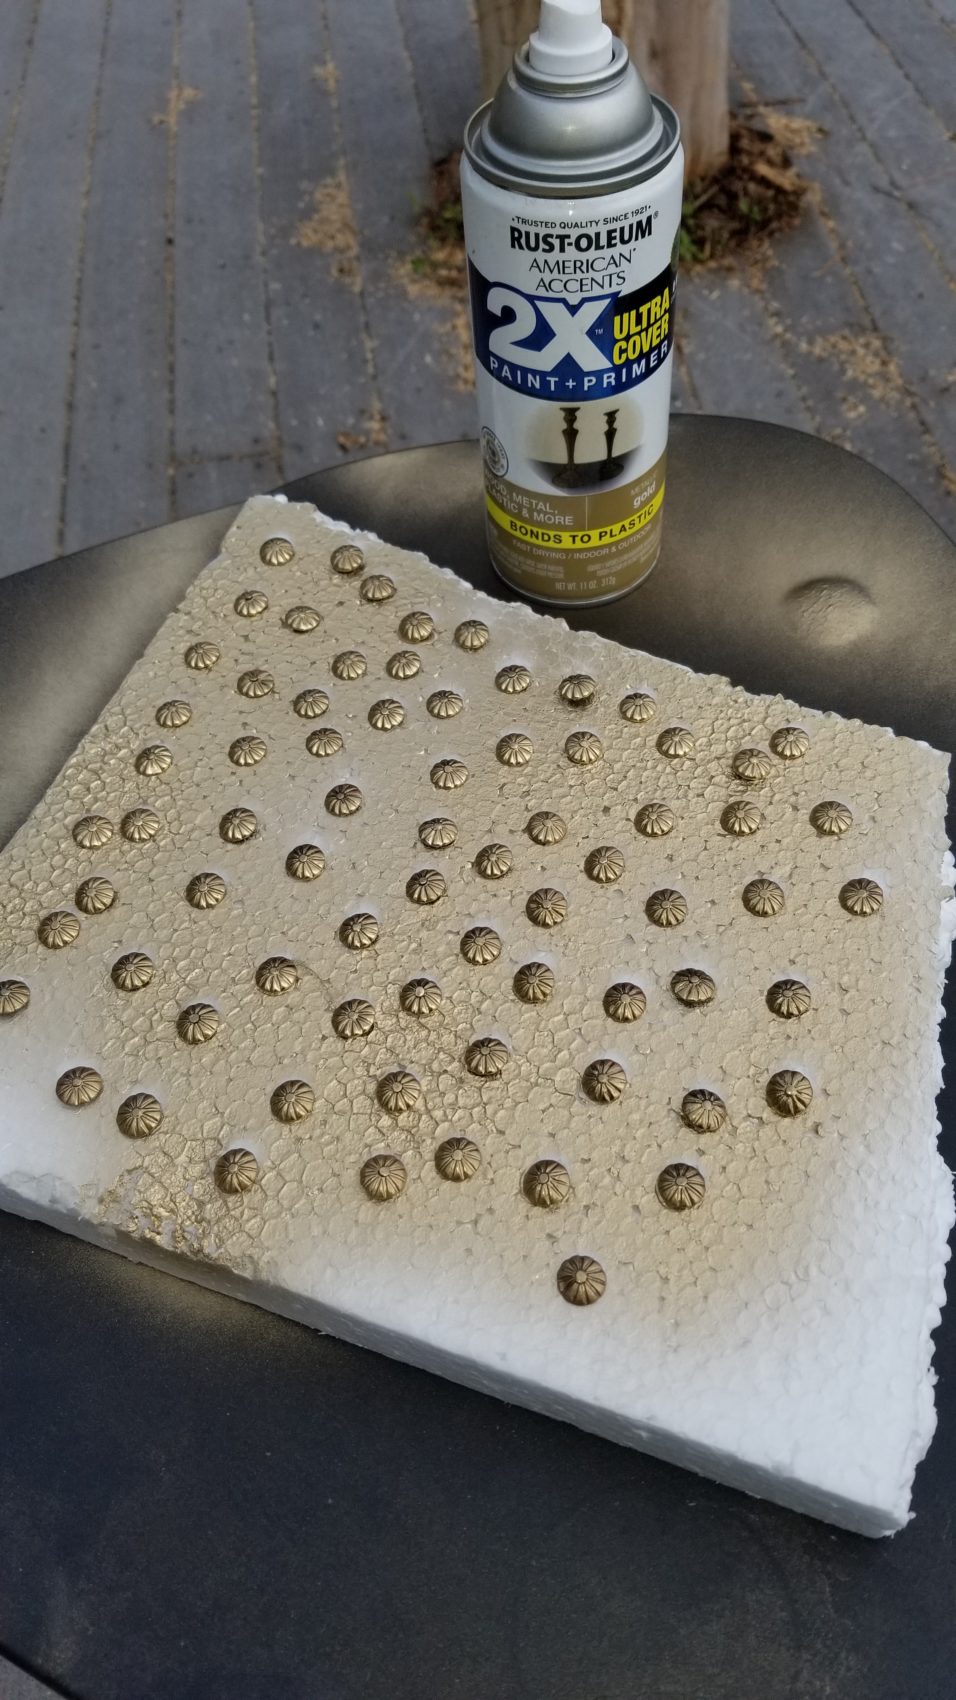
The first thing I did was removed the cushions which were quite easy to remove after removing the legs. I then removed the thumb tacks from the back cushion and I stuck them into some Styrofoam to be later spray painted gold.
Preparing Chair and Dye Application
I wiped down all the leather and furniture with warm soap towel, then wiped down again with with plain water on rag and again with a rag dampened with a small amount of alcohol.
After some research, I decided to go with Angelus Leather Dye in Rose. It’s been too hot and humid outside to work so I just used a large piece of cardboard to protect my surfaces indoors.
Angelus Leather Dye can be ordered on Ebay, Amazon or found at your local Saddlery or Leather store. Just call first because I found just 1 store that carried it in a 30 mile radius.
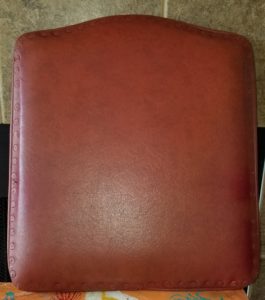
Angelus leather dye has a water consistency so I applied with Sponge Brushes. It dries really quickly so you’re able to do multiple coats after every 15 minutes. After 3-4 coats the cushion looked like the After photo provided below.
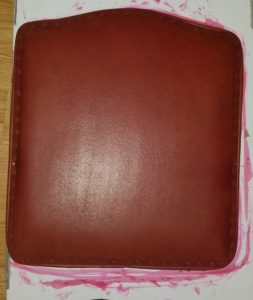
Painting Leather Furniture: Dye Versus Paint
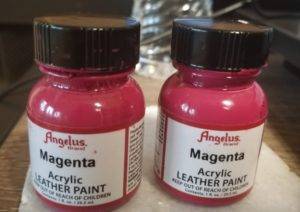
I wasn’t satisfied with the look using just the Angelus Leather dye 🙁 and I was told by the Saddle shop that it’s because of the pre-dark pigment of the leather. There is also the option to Prepare and Deglaze the Leather which prepares leather for dye. Acetone is also used to prepare leather for dye. Angelus does carry a Leather Preparer & Deglazer, however I decided to paint it instead using the Angelus Acrylic Paint in color Magenta. I purchased two bottles from a Saddlery store here for around $4 each; the closest Saddlery store was 40 minutes from me. I included an Amazon link for this paint if you’re unable to find at leather or saddle store near you. A list of all products used is at the bottom of page.
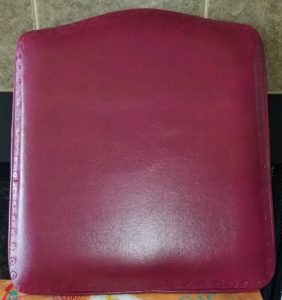
Wow, what a big difference! The after photo has 2 coats of the acrylic leather paint in Magenta. I loved the difference using the paint. It’s not sticky or anything, like I thought it would be! This was my first time painting leather so I wasn’t really sure what to expect. The acrylic paint was definitely the way to go for my project. It does take longer to dry and like regular paint, it really depends on the environment, temp and humidity you’re creating in. In my home, it dried to touch in an hour so I applied a total of 4 coats. Both the dye and the paint cleans up with water. FYI, the paint is way less runnier than the dye which I prefer.
Painting the Legs and Frame
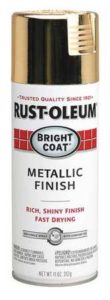
While my painted leather cushions were curing over night I moved on to painting all the wood pieces. I removed the wheels and sprayed painted the base and the arms with two coats of Rust-Oleum Metallic Finish in Gold can of spray paint. There is also a Rust-Oleum metallic gold paint with primer built into it but I don’t think it’s metallic at all. You could skip it like I did and use clear coat if you feel you’ll need it. The clear coat spray can be testy so I prefer a brush on when using. Just make sure it’s oil-based if you used spray paint. I also spray painted the furniture thumb tacks with the metallic gold spray. I did this all outside successfully because it wasn’t too humid, nor was it too windy for spraying.
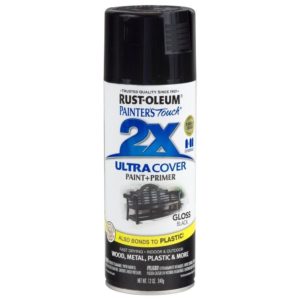
For the actual chair back and seat, I painted black using Rust-Oleum American Accents Ultra Cover 2X Black Gloss Primer Spray Paint. I did two coats so surprisingly I needed two cans, but didn’t use all of the second can.
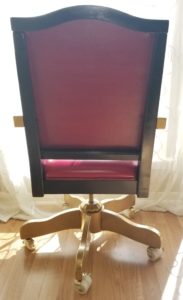
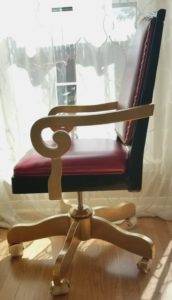
I allowed all the wood pieces to dry over night as well. The next day, I replaced all the thumb tacks, popped the wheels back on the base and assembled the rest of the chair. I LOVE this chair and it goes so well with my office.
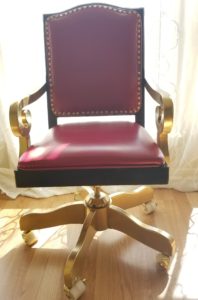
My DIY Painted Leather Office Chair is Complete!
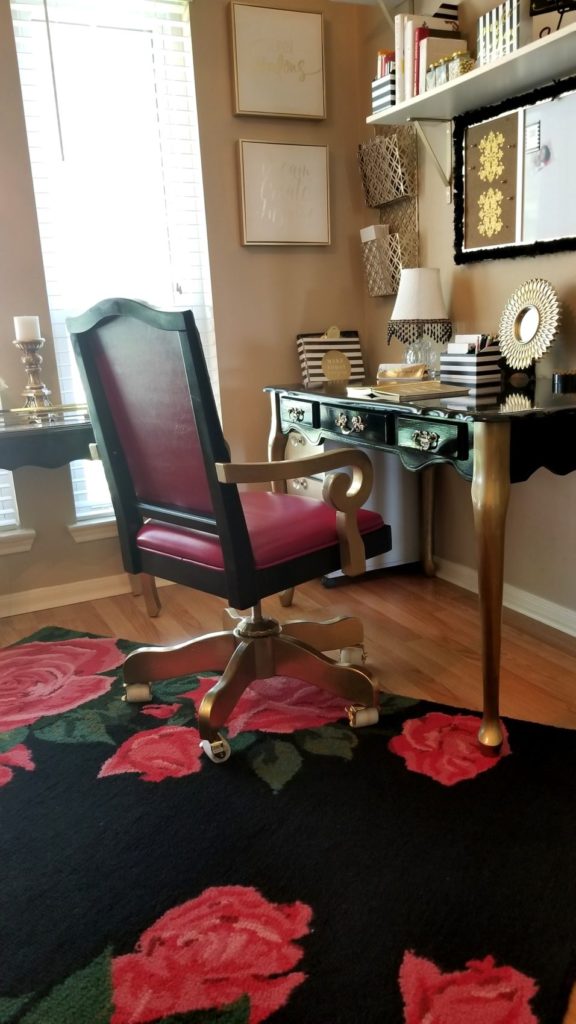
Painting my leather office chair chair turned out exactly how I envisioned it and very easy for anyone to do. I’d love to see your DIY dyed or painted leather furniture pieces. I also painted the desk in the photo below. You can read about it here.
Products Used
- 1 Bottle Angelus Leather Dye – Rose
- 2 Bottles Angelus Acrylic Paint in color Magenta
- 2 Cans Rust-Oleum American Accents Ultra Cover 2X Black Primer Spray Paint
- 2 Cans Rust-Oleum Metallic Finish in Gold
- Sponge Brush
- Optional Leather Preparer & Deglazer
All Angelus Leather Paint Colors. There is a Rose Gold I can’t wait to try next!
I hope you’ve been Inspired! Share Feedback, Ask Questions or give a High Five?
If you’ve tried painting or dying furniture I’d love to see it! Tag me at @lanidoesit on IG o
Find all projects under #lanidoesit
![]()